| Home | IAF vs. USAF | Skins | Models | Animations | More | Contact |

|
Contents: - Making Animations with Jane's IAF and USAF - Path to Screenshots in IAF/USAF
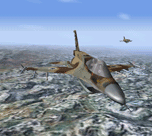
Making Animations with Jane's IAF and USAF: You can use Jane’s IAF or USAF to make animations. It is a lot easier to make an animation with USAF, because of the mission recorder. The mission recorder allows you to fly first and take screenshots later. You can share your recorded missions (.rec) with other users of USAF. However, they are not exportable. If you want to make an animation for the Internet or one that can be viewed on a computer without USAF, extra steps are needed. Since there is no mission recorder in IAF, you have to fly with one hand while you take screenshots with the other. Control response starts to lag. This makes it very challenging to fly. On the other hand, the action in IAF is smoother, because of the simpler flight model. Also, the computer controlled wingmen are more predictable. In IAF, you can land in formation with your computer controlled wingmen. To illustrate the basic principle, all you need to do is take five screenshots in a row. Once you have them, you can view them one after the other. If you switch from frame to frame quickly, the result will be animated motion. |
 |
|
Now, all you need is an animation program to join the screenshots into an unbroken sequence that can be played over and over again. The program I use is Abobe ImageReady. It comes with Adobe Photoshop 6.0. Create a new folder for the screenshots. Open ImageReady or another animation program. With ImageReady, Import Folder as Frames, under File. This will show your screenshots as frames on a reel of animation.
ImageReady allows you to edit all the frames at once. You can rearrange the frames and set the delay for each frame. Here is a way to make animations with USAF in five steps: 1) Think of a flight plan for your animation. 2) Fly the flight plan as perfectly as you can, with the mission recorder on. 3) Using the mission recorder, replay your flight. Try different views, starting the action over again as often as you want. Chose the view(s) you prefer. 4) Replay your mission, taking screenshots at regular intervals. (Note: to make this easier, do one view at a time. Let the mission play out for each view. Do not switch views on the fly.) If you want, you can slow down the play back speed on the mission recorder to make taking regularly spaced screenshots easier. 5) Create a new folder for each view. Using an animation program like Adobe ImageReady, put together your animation. Varying the views gives a more interesting animation. I recommend a maximum of three views per animation, if you are just getting started. Making animations is a lot easier than it sounds. You do not need to be very precise on timing. Just work intuitively. One the animation is in motion, the eye believes. |
| back to Animations contents |
|
For a smooth animation, you might try to take your screenshots at about one to two every second (1 screenshot / sec - 1 screenshot / ½ sec). If you want a light animation (with fewer megabytes), try one every one and a half to two seconds (1 screenshot / 1½ sec - 1 screenshot / 2 sec.). In other words, decrease the amount of screenshots you take per second. The action will be choppier. Of course, you can thin out an animation by deleting every second or third frame. Before you take your screenshots, move the mission recorder control pad to an out of sight location on your screen (i.e. bottom left). It is easier to keep it hidden than to edit it out later. Close up views are great for detail. However they may show some jumpiness. To dampen this, zoom out a little. Or, you can delete the highs and lows of the up and down motion. Making full size animations in 800 x 600 pixels requires a lot of memory. |
| back to Animations contents |
|
An avatar is a simple project to get started on. Here is an example: |
|
|
|
Engage Description: made with Jane's IAF, 38 frames, 152 x 136 pixels, 486Kb total Leader has a radar lock on a starboard bogie and uses the engage command |
| back to Animations contents |
| Animations Menu: |
 |
 |
| Jane's IAF Animations | Jane's USAF Animations |
| Formation Landing Demo | Cinematography Demo |
| Two is RTB | Straggler |
| DASH Helmet Demo | Farewell Flyby - Part One |
| Test Drone Kill | Farewell Flyby - Part Two |
| back to Animations contents | |
| Path to Screenshots in IAF/USAF: |
| Screenshots are in the IAF/USAF\ folder. |
| back to Animations contents |