Fun
with Pixels
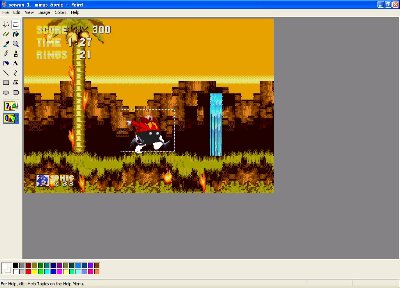
Our next task is a little more advanced. We have our Screen 1, but
how do we get Sonic out of the picture? One way is to erase Sonic and
then fill in the space with colors that match the background. Another
way is to actually copy and paste pixels, which is more advanced.
Let’s start off by erasing Sonic from the picture. Be careful as you
erase so that you don’t erase too much of the background. In order to
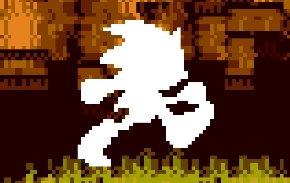
make things easier, let’s paint Sonic entirely white to get him out of the
picture. Be sure to watch out for the black on the bottoms of Sonic’s
shoes. You can find out which ones are the ones to erase by temporarily
painting the background white, undoing the action, and then remembering where
the pixels were.

|
|
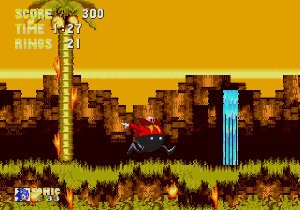
Before
|
After
|
Now let’s see how Eggman fits into the picture. Get your Eggman picture
and paste him into Screen 1. Let’s try to get Eggman into a position
around Sonic. If you’re using Paint and notice that the background
around Eggman is white, click on the button that shows transparency (or just
look at the screenshot below).
Now let’s take care of the area under Robotnik’s legs and above his left
leg (i.e. the leg on our right). Use the “Pick Color” tool, which looks
like an eye dropper, to select the black background color. Try to select
the area right below where the white lies. Then use the Fill with Color
tool to fill in the areas. Your picture should now look like this:
For the spot above Eggman’s leg,
I’m going to use the basic black background color. Use the Pick Color
tool to select the background color. Next, use the Fill with Color
tool to fill in the area. Now the picture looks like this:
Now this is hard to see, but there
are some brown pixels above Eggman’s leg. By studying other pixels
I’ve determined that I need to make another square consisting of four pixels.
Again I use the Pick Color tool to find the correct color, but this time
I’m going to use the Pencil to draw in four separate pixels.
Moving upwards, there is a lighter shade of brown that is closer to Eggman’s
waist. By looking at other pixels in the background, I’m going to assume
that the color continues and fill in the pixels appropriately.
As for the final part, it is all
background color. Select the background color and fill in the color.
Now the area around Eggman is finished.
The entire picture looks something like this:
What’s wrong with this picture?
Study it for a few seconds and then let’s continue.
Next -- Letters and More
Back -- Basic Techniques - Editing a screenshot
Back to the Hoax 101 page
Back to the Hoaxes page
Home (Sonic's Hideaway)
E-mail