

-add horizantal supports to the wheel gurads
-attach wedge
-do the inards
| KraftWerk... | |||||||||||||||||||||||||||||||||||||||||||||||||||
| This is a build report. | |||||||||||||||||||||||||||||||||||||||||||||||||||
|
|||||||||||||||||||||||||||||||||||||||||||||||||||
| This is it, the very first drawing I made for a new 12 pounder The design had been In my head for a short period of time, but being the quick thinker I am, I agreed with myself and decided to build it.You can see the full concept I had thought up here. | |||||||||||||||||||||||||||||||||||||||||||||||||||
|
|||||||||||||||||||||||||||||||||||||||||||||||||||
| Another pencil drawing, as you can see it has moved to 4 drive motors per side as opposed to 3. You can also see what I had in mind for the weapon. | |||||||||||||||||||||||||||||||||||||||||||||||||||
|
|||||||||||||||||||||||||||||||||||||||||||||||||||
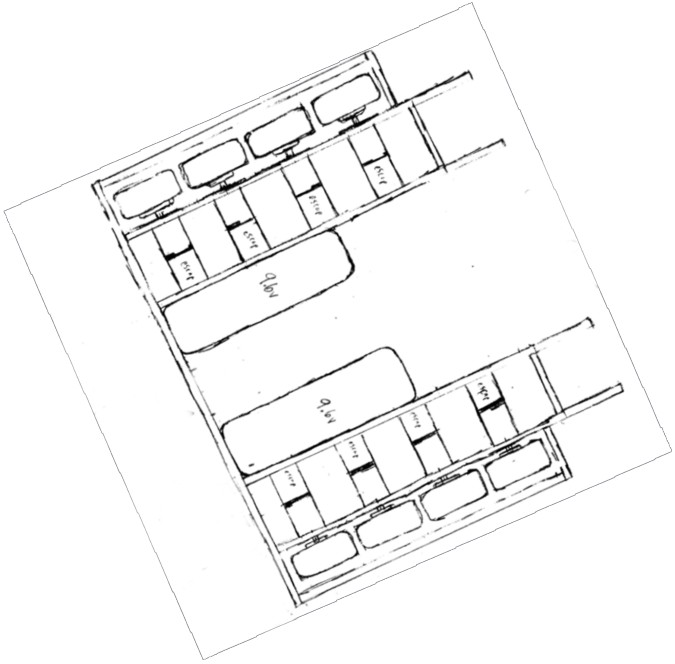
| Here Is The final pencil drawing I did of Kraftwerk from the top. The batteries are included as is the new 8 wheel drive. | |||||||||||||||||||||||||||||||||||||||||||||||||||
| I thought the frame design looked a little boring and I wanted to do something to jazz it up So I started redesigning the frame piece that supported the spinning blade. Here is its progression: | |||||||||||||||||||||||||||||||||||||||||||||||||||
|
|||||||||||||||||||||||||||||||||||||||||||||||||||
| I wanted some sort of spike things to make it look cool, but this first design I drew was to blocky and seemed stiff. | |||||||||||||||||||||||||||||||||||||||||||||||||||
|
|||||||||||||||||||||||||||||||||||||||||||||||||||
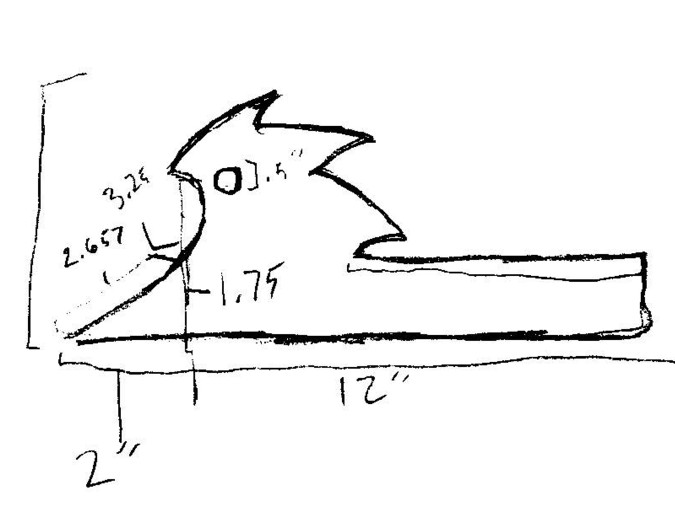
| To make it flow better and be less blocky, I added curves. I really liked how it looked and decided this was the one to use. I came up with dimensions that would fit my frame and gave them to the CAD wizard Kevin Meissner, here is what he came up with: | |||||||||||||||||||||||||||||||||||||||||||||||||||
|
|||||||||||||||||||||||||||||||||||||||||||||||||||
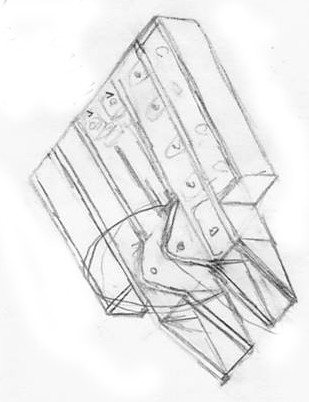
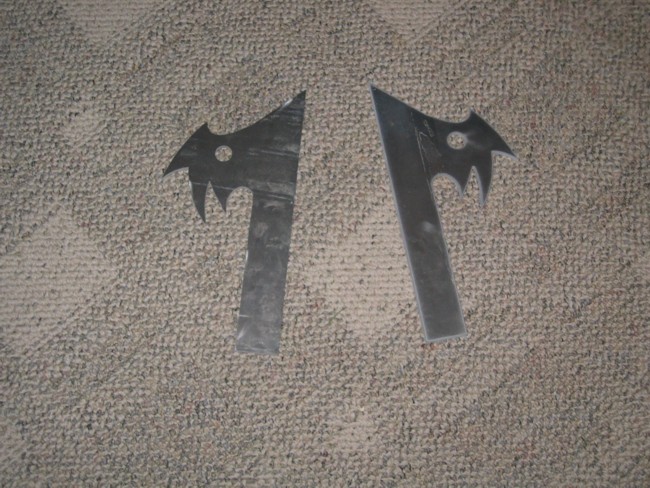
| Pretty good huh? I sent it off to DC water jet and they cut a pair of them for me and here is what they look like: | |||||||||||||||||||||||||||||||||||||||||||||||||||
|
|||||||||||||||||||||||||||||||||||||||||||||||||||
| Nice. With those and the Aluminum and Titanium I have I was ready to make the frame. You can see a list of the materials I used for certain parts of the fame here. | |||||||||||||||||||||||||||||||||||||||||||||||||||
|
|||||||||||||||||||||||||||||||||||||||||||||||||||
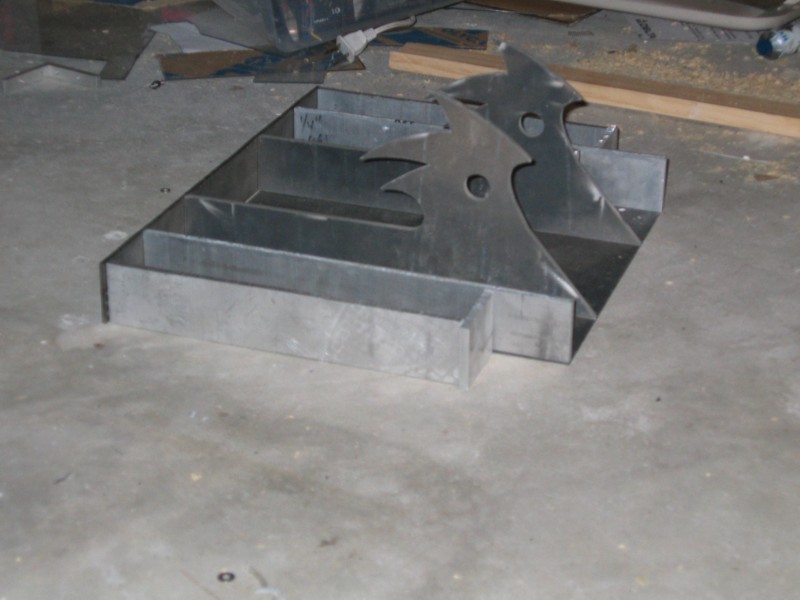
| I laid out all the pieces that I cut and put in their frame shape and here is what it looks like, I still need to cut two of the pieces at an angle for the front wedge, but it still looks pretty cool. Onto to the bolting... | |||||||||||||||||||||||||||||||||||||||||||||||||||
|
|||||||||||||||||||||||||||||||||||||||||||||||||||
|
|||||||||||||||||||||||||||||||||||||||||||||||||||
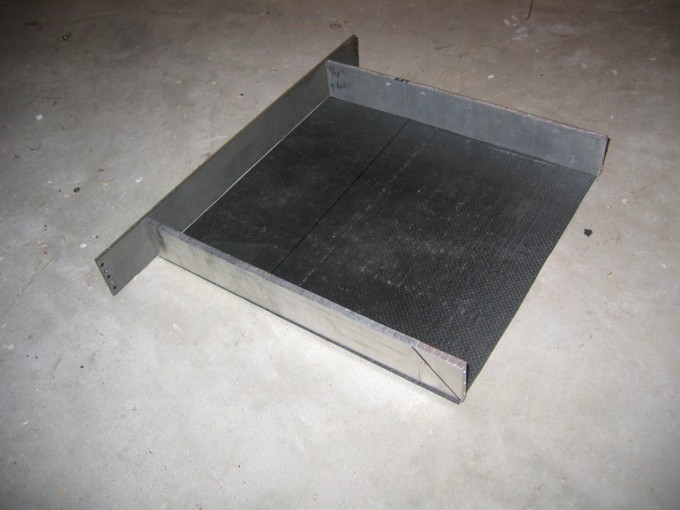
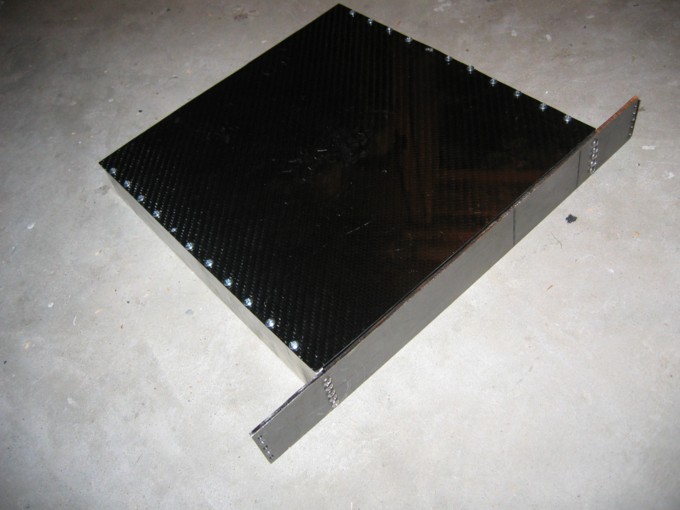
| The first build session shows that I Bolted the two long aluminum pieces (that still haven't had the angle in them cut) to the back plate, I also bolted the carbon fiber baseplate to the aluminum | |||||||||||||||||||||||||||||||||||||||||||||||||||
|
|||||||||||||||||||||||||||||||||||||||||||||||||||
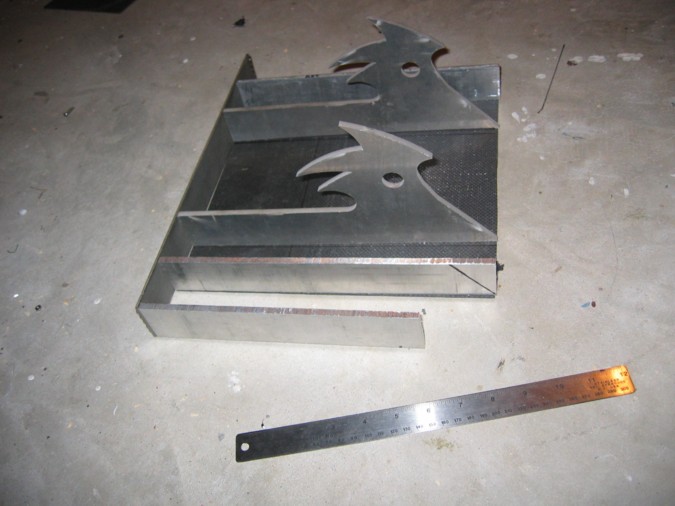
| Second build session: I attached one of the wheel guards but without the horizantal support I also attached the weapon supports to the backplate.To finish the frame I still need to: | |||||||||||||||||||||||||||||||||||||||||||||||||||
|
|||||||||||||||||||||||||||||||||||||||||||||||||||
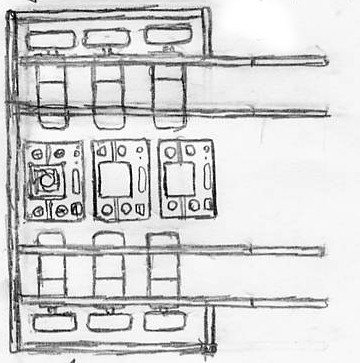
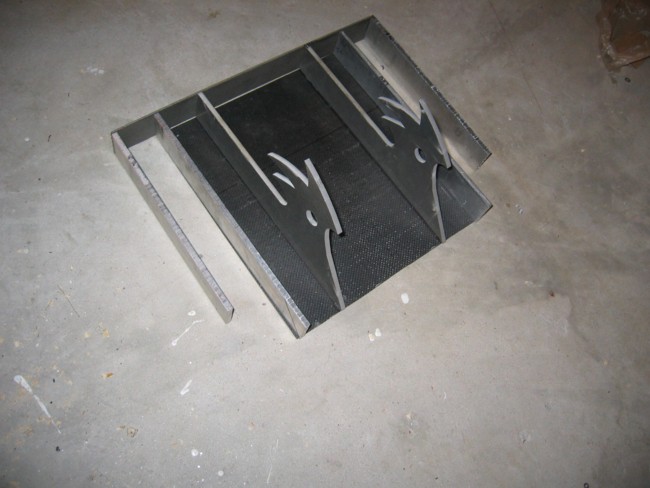
| In this pic you can see I added the second wheel guard, what you cant see is thta I bolted the cool weapon supports to the baseplate. Now to... | |||||||||||||||||||||||||||||||||||||||||||||||||||
| -cut and mount top armor -add horizantal supports to the wheel gurads -attach wedge -do the inards |
|||||||||||||||||||||||||||||||||||||||||||||||||||
| Page 2! | |||||||||||||||||||||||||||||||||||||||||||||||||||