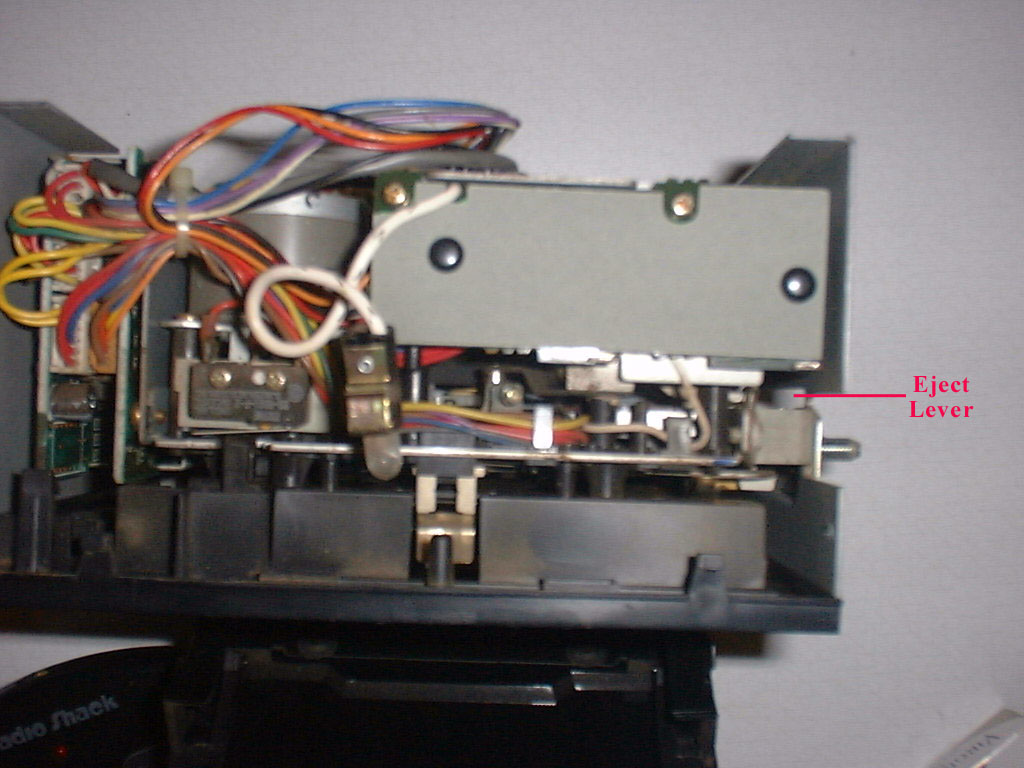
 Looking straight down onto the top of the unit, you will
find a small lever with a spring attached to it located directly behind the top
screw that you are about to remove (right side). See Photo
Looking straight down onto the top of the unit, you will
find a small lever with a spring attached to it located directly behind the top
screw that you are about to remove (right side). See PhotoLooking straight down onto the top of the unit, you will
find a small lever with a spring attached to it located directly behind the top
screw that you are about to remove (right side). See Photo
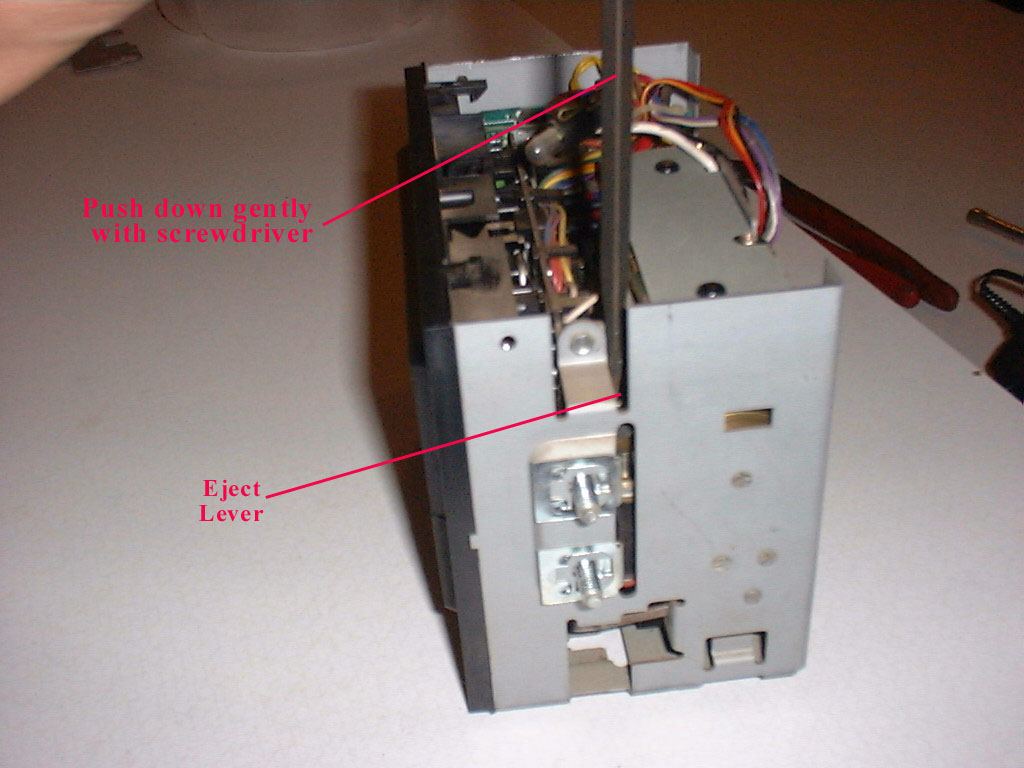
Take a small screwdriver and gently push downward on this lever. This will release the Cassette Door.
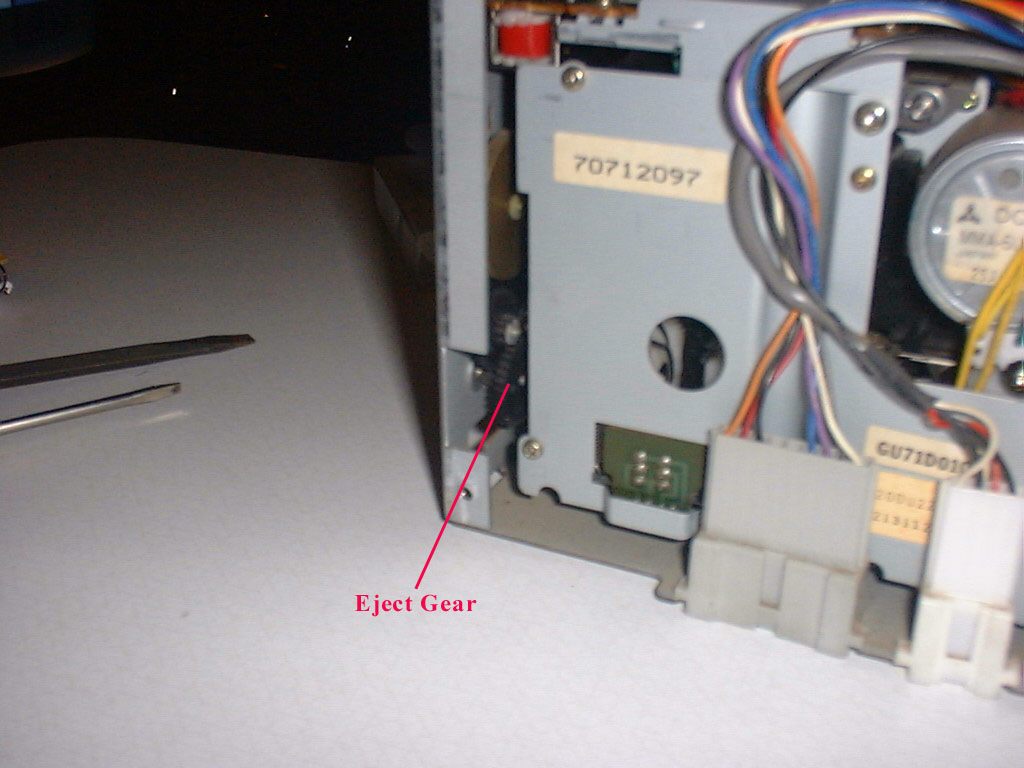 Next, you will need to detach the eject rod from the gear
assembly. Look into the unit from
the rear, on the left side and you will see a set of black plastic gears.
The outermost gear has the eject rod attached to it.
On that gear, you will see a very small plastic retainer, holding the
gear onto the shaft. Take a small
screwdriver and gently push outward on the retainer.
Be very careful here, the retainer is very small and it is clear plastic.
It’s very easy to lose. I
think this is one of the trickiest parts of this project.
Once you have the retainer off, you can slide the gear forward and detach
the rod. If you rock the cassette
door almost closed, this will turn the gear and bring the attached rod closer to
you, making it easier to detach it. The
gear will not come all the way off just yet, it is blocked by the unit.
It will come all the way out when you remove the unit from the housing.
Next, you will need to detach the eject rod from the gear
assembly. Look into the unit from
the rear, on the left side and you will see a set of black plastic gears.
The outermost gear has the eject rod attached to it.
On that gear, you will see a very small plastic retainer, holding the
gear onto the shaft. Take a small
screwdriver and gently push outward on the retainer.
Be very careful here, the retainer is very small and it is clear plastic.
It’s very easy to lose. I
think this is one of the trickiest parts of this project.
Once you have the retainer off, you can slide the gear forward and detach
the rod. If you rock the cassette
door almost closed, this will turn the gear and bring the attached rod closer to
you, making it easier to detach it. The
gear will not come all the way off just yet, it is blocked by the unit.
It will come all the way out when you remove the unit from the housing.

 Now your ready to remove the door assembly and faceplate.
The other end of the eject rod is, of course, attached to the cassette
door. Lay the unit on it’s back and look inside the tape door.
You will see two black hex head screws at the top.
Remove these screws and the door assembly will lift right out.
Now your ready to remove the door assembly and faceplate.
The other end of the eject rod is, of course, attached to the cassette
door. Lay the unit on it’s back and look inside the tape door.
You will see two black hex head screws at the top.
Remove these screws and the door assembly will lift right out.
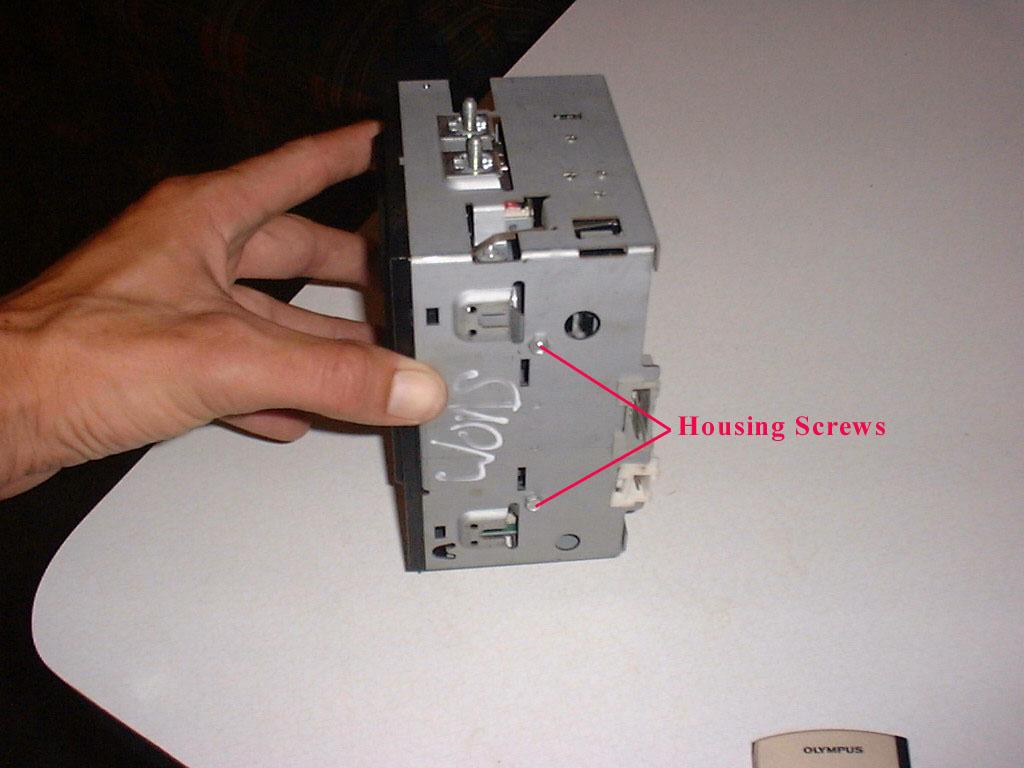
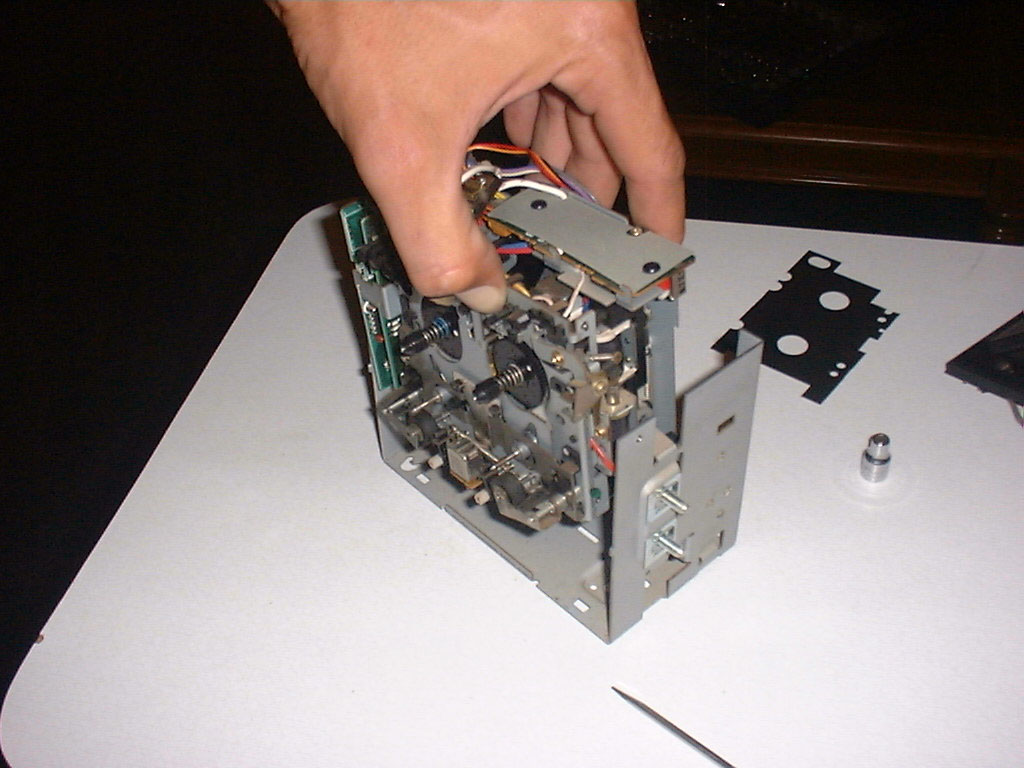
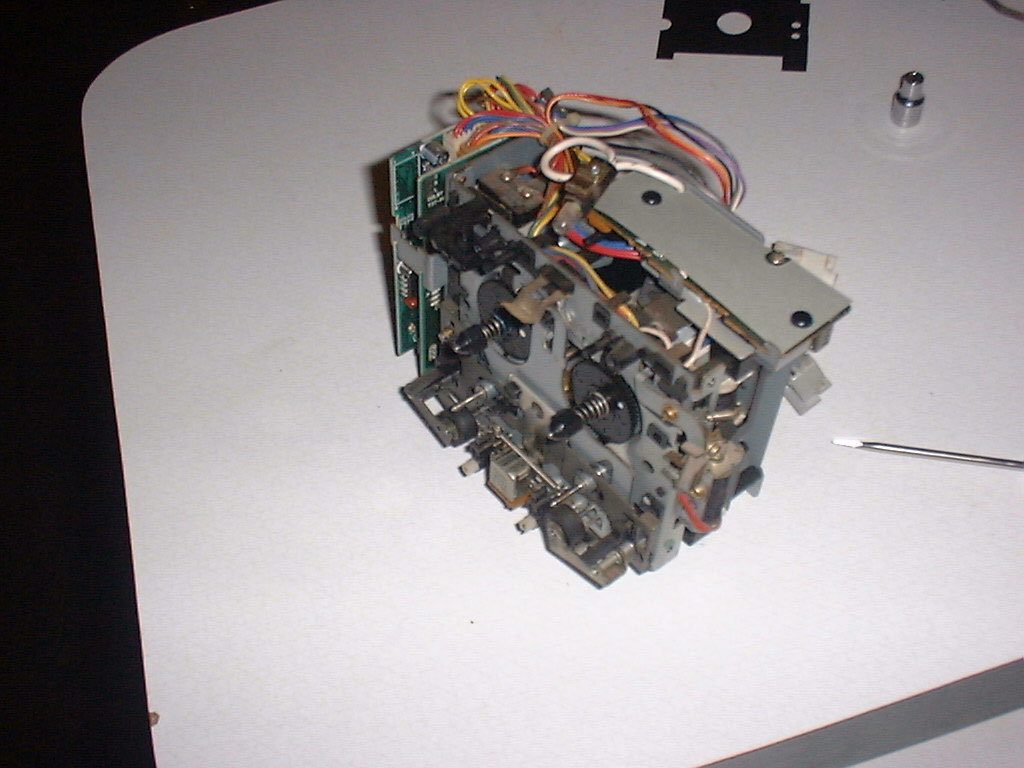
 Now you can remove the two Phillips head screws on
the side and the two hex head screws on the bottom. Carefully remove the unit
from the housing. When you lift the
unit out, don’t forget to watch for the plastic gear, because it’s going to
fall out.
Now you can remove the two Phillips head screws on
the side and the two hex head screws on the bottom. Carefully remove the unit
from the housing. When you lift the
unit out, don’t forget to watch for the plastic gear, because it’s going to
fall out.
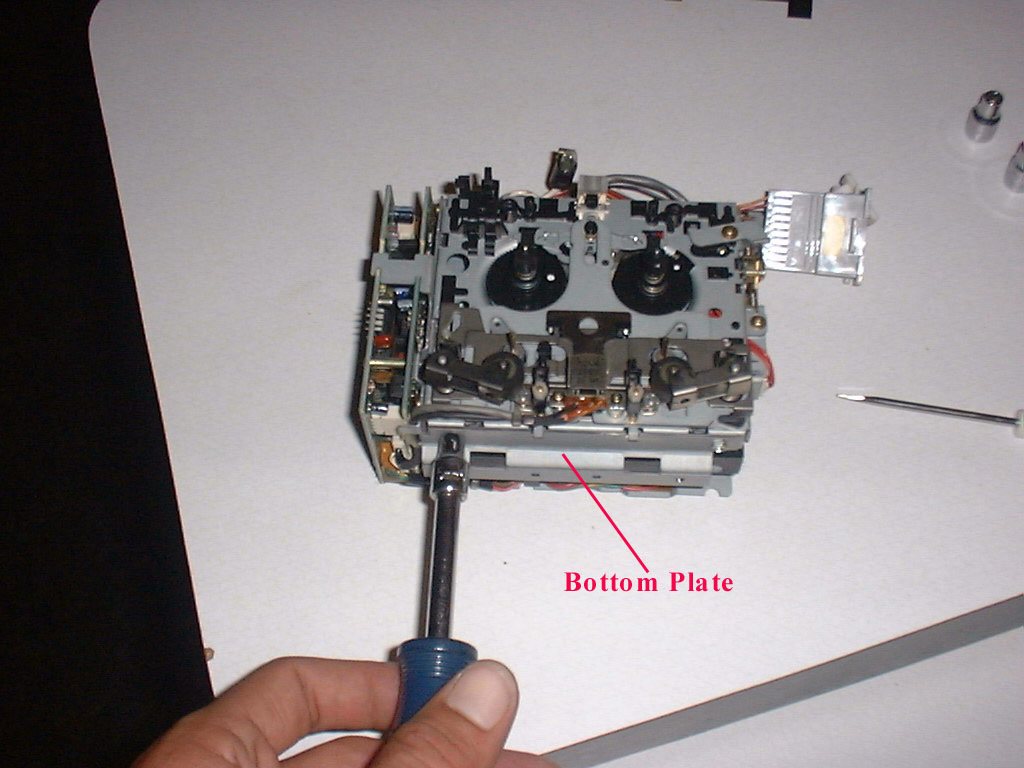
Remove the small plate on the bottom of the unit. It’s attached with two hex head screws.
![]()
![]()
![]()