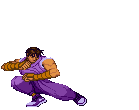
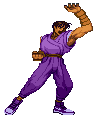
Ok! Here I'm trying to archive various information on the specifics of each move in each version of the game. Ergh, you'll notice that some of the sprites are a different shade of purple than others. The dark purple ones are the ones that I ripped from the Playstation version using the Bleem emulator. The lighter ones were given to me by V.K. of the now deleted Aerith Innovations. He'd actually took existing sprites from his own archives and manually altered the colours on them for me. This was a tremendous help at the time, as it was way back when I'd first started this site and knew next to nothing about creating one. If you see a little finger icon next to a picture, that means you can point at the picture to make it move. Note that you must have a JAVA-Enabled browser to do this.
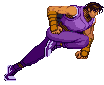
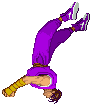
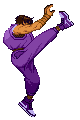
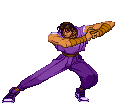
Gale Kick: + K
Point at the picture to see this move in action!
SFZ1
SFZ2
SFZ3
Short
Forward
Roundhouse
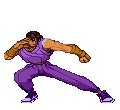
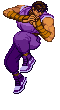
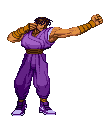
Turn Punch: + P
Point at the picture to see this move in action!
SFZ1
N/A
SFZ2
SFZ3
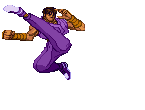
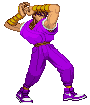
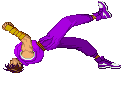
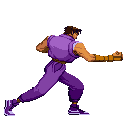
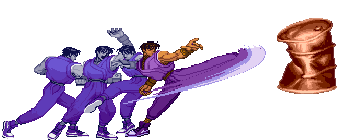
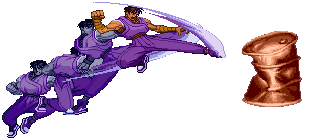
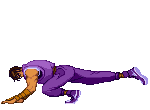
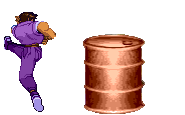
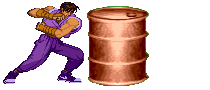
Wind Dash: + K
This move is not as fast as it was in SFA1, but it can still be slightly useful, like if your opponent gets knocked away from you, dizzy, you can run over & combo them. Other than that, there really isn't much else use for it. The strength of the kick used to perform it determines which of the following 3 attacks comes out if you press kick again:
Sudden Stop
( + Short then K)
When doing a Wind Dash with Short Kick, pressing any kick button again will have Guy slide to a quick stop. If you run into your opponent without pressing anything, this move automatically comes out.
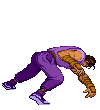
Slide Kick
( + Forward then K)
Doing a Wind Dash with Forward Kick will result in a moderately quick slide kick. If your opponent doesn't have great reflexes, this move can be ok sometimes, but there's usually better things you could be doing, like charging your Super Meter, instead.
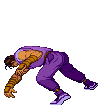
Crescent Kick
( + Roundhouse then K)
This move looks very cool, but is very slow. It must be blocked high, so it can be somewhat useful against turtles. If you are too far away for a big combo to connect, cancel into this move. Often, your opponent will begin to block low, and get hit by the Crescent. For variety, try putting a few of these into a Custom!
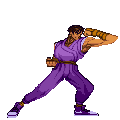
Lightning Jump: + P
This should be a big part of your offense, but try not to do it too often, or else you'll get uppercutted or something. The Fierce Bushin Leap is great from a distance against fireballers; it's a low, quick jump that puts you in their face in the blink of an eye. There are 2 ways to finish up:
Lightning Power Bomb
(Opponent standing)
This move grabs your opponent while in mid-air and flips them around into a ground slam. Your opponent must be standing to grab them, like when they're stuck in a fireball stance, for example. When you are above them, press any Punch button again to grab. Or when a turtler starts catching on to your top-down attacks, when they see you in the air and expect an airborne attack that must be blocked high, grab 'em. If this move drops them in the corner, do a Forward Gale Kick to try for a single juggle hit, or, if they're a big character, do a Roundhouse Gale Kick and go for 2. You can also connect a Bushin Hassou Ken (Punch Super) in this instance.
Lightning Elbow Drop
(Opponent crouching)
If you do a Bushin Leap at your opponent and they duck/block low to avoid being thrown, press a Punch button anyway, and you'll get the Lightning Elbow Drop, which will connect because it must be blocked high! However, it's hard to connect a combo after this move, so you're usually better off to simply block once you land and retaliate after they try to pull something.
Command Attacks:
Overhead Elbow
( + Strong)
Like all of the Overhead moves, this move is a little slow coming out, but it's one of the faster ones in the game. Useful against turtles or when an opponent blocks a combo, throw one of these in. Against turtles, start a Custom and lead with the Overhead Elbow.
Flip Kick
( + Roundhouse)
This move can be used to fake out your opponent, but is really not very useful. A low Forward into Gale Kick would be much better.
Aerial Elbow
( + Strong in air)
When in the air, pressing down plus Strong will get you an alternate version of the Elbow Drop. This version is a lot better, as it is much easier to land into a combo from. Both versions can be used to fake out Dragon Punch scrubs due to the fact that they alter your forward momentum. Jump in from far away, then do the Elbow Drop to avoid their Dragon Punch and retaliate with a Strong cancel into Roundhouse Gale Kick juggle or a Forward into Punch Super.
Final Fight Chain Combo:
Final Fight Chain Combo
(JP, SP, FP, RK)
The Final Fight Chain Combo is the same combo that Guy had in the old side-scroller Final Fight. Notice the FP, it's different than the normal FP. The Chain FP and the RK are not cancellable into other moves. This combo isn't particularly useful in Zero/Alpha 1&2, but it is now VERY useful in Zero/Alpha 3.
Cancellable Mini-Chain:
Cancellable Mini-Chain
(SP, FP)
The SP and FP, when done without the JP to start the Final Fight Chain Combo, will still chain, and the FP you get is the normal one which IS cancellable into Specials/Supers. This is very useful in combos in ANY version of the game. Also, in SFZ/A3, with the return of close/far standing attacks, Guy is capable of chaining either close/far Strong into close/far Fierce.
Super Combos:
Bushin Strong Thunder Kick
( + K)
In SFZ/A 1&2, the Kick Super Combo, or Bushin Gou Rai Kyaku, is generally not recommended. Sometimes the second half of the combo will whiff, and even if it doesn't, the damage you get really isn't all that great. In SFZ/A3 though, this has been fixed, and this move sets up massive corner combos!
Bushin Eight-Double Fist
( + P)
The Punch Super Combo, Bushin Hassou Ken, is a weird move. It looks like anti-air, but if used as such in Zero/Alpha 1 & 2, your opponent usually bounces too high for it all to connect (fixed in SFZ/A3!). However, it isn't very good at hitting grounded opponents either. The higher level version you use, the lower the hit detection box reaches, increasing the hit range of the initial punch.
Bushin Musourenge
( + P)
(Level 3 Only)
The Lv.3 Grab Super is great for ticking into when an opponent blocks a jump-in or even a standing Jab! It even out-prioritizes the other grab supers, such as Zangief's Final Atomic Buster. It does about 65% damage. During the move, the screen flashes black a lot. At first I thought this was stupid, but then I figured that's probably supposed to be how it looks to Guy's opponent, and when you think of it that way, it's pretty cool. This move is not available in SFZ2, It made its first appearance in SFZ2A. In SFZ3 X-Ism mode, where you only get one full meter Super Move, this is the one you get.
Alpha Counters:
Punch Alpha Counter
( + P while blocking)
The Punch Alpha Counter is good against fireballers and jumping attackers. But if their jump-in attack is really deep, they can block it when they land. Still, it's a good way to prevent them from landing into a low Roundhouse Custom. It knocks them far away.
Kick Alpha Counter
( + K while blocking)
This is a good Alpha Counter to do when your opponent is on the ground harrassing you with a lot of poking attacks. It comes out pretty quickly, and leaves them close to you.
Throws:
Shoulder Throw
( or + P)
This throw sends your opponent flying across the screen.
Knee Bash
( or + K)
This grab knees them repeatedly in the face. If done in the corner, you can quickly follow with a Gale Kick or Punch Super.
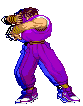
Ok! Here I'm trying to archive various information on the specifics of each move in each version of the game. Ergh, you'll notice that some of the sprites are a different shade of purple than others. The dark purple ones are the ones that I ripped from the Playstation version using the Bleem emulator. The lighter ones were given to me by V.K. of the now deleted Aerith Innovations. He'd actually took existing sprites from his own archives and manually altered the colours on them for me. This was a tremendous help at the time, as it was way back when I'd first started this site and knew next to nothing about creating one. If you see a little finger icon next to a picture, that means you can point at the picture to make it move. Note that you must have a JAVA-Enabled browser to do this.
 Point at the picture to see this move in action!


 + K
+ K

 + K
+ K