| HOME | Back to Morph Page 4 |
| Step 19. Close Carrara. There is no need in saving the file to Carrara format (unless you really want to for some reason) |
| Step 20. Open Poser. |
| Step 21. Open the POSER File you saved earlier in step 8. (MorphHeadDude) |
| Step 22. Select the HEAD within the scene. |
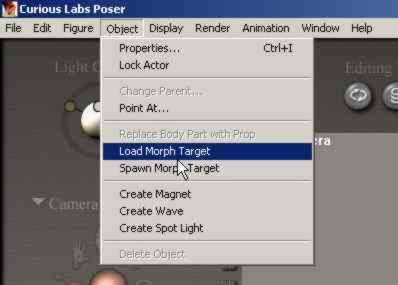
| Step 23. With the HEAD selected in the scene Select Object / Load Morph Target. | |
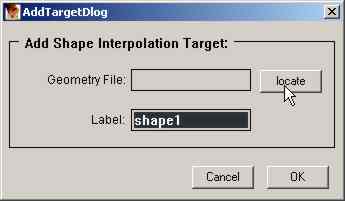
| Step 24. Click on LOCATE. | |
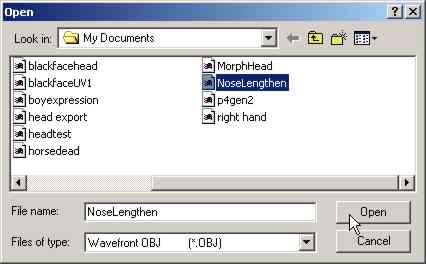
| Step 25.
Navigate to the (obj) file which you created and saved in Carrara earlier.
Click OPEN. |
 |
| Step 26. Create a name for the DIAL which POSER will build for you. | 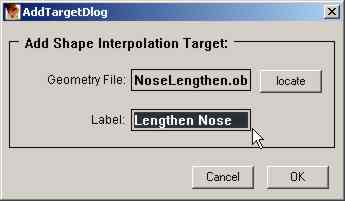 |
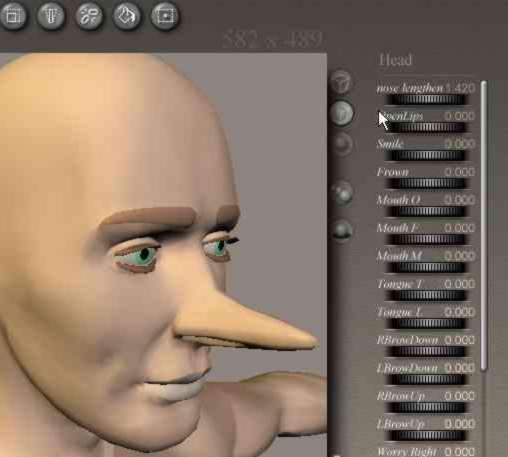
| Step 27.
You now have a new morph DIAL on the right called nose lengthen.
|
 |
| Now if you want to
have the ears on this figure elongated you would have to build a new morph
target.
You don't have to go through all the steps again (but still most of them) You can Now reopen Carrara and re-use the MorphHead.obj file which you originally exported from Carrara in Step 6. With this done you would then follow the same steps from there and alter the ears and name a unique (obj) file for the morph target for Poser to use.
Once you get the hang of it you will find that though somewhat tedious your characters will now be much more flexible in their aspects.
My method for stills: Make all my morph targets in Carrara. Bring them all into Poser. Adjust the morphing dials to create the expression or figure changes I desire. Export the entire character from Poser as an OBJ file. Open the OBJ file with Steve Cox' UV MAPPER and then Re-create the UV mapping (read the instructions at his site). Save the new OBJ file within UV MAPPER as well as the new UV map(s). Open the UV map in Corel/Adobe and paint away. Save the new painted UV map. Import the 'new' OBJ file that UV MAPPER created into Carrara or max. Apply the painted UV map(s) to the OBJ. Render. Simple ! (Yeah ! right !!) |
|