My Modifications
This is a very old page but it has some info on my experiences with Nitrous oxide. I had to learn the does and do nots when using nitrous. I don't want to see others make the same mistakes I did. Keep in mind these nitrous mistakes are from when I first got my neon and didn't know much about neons.
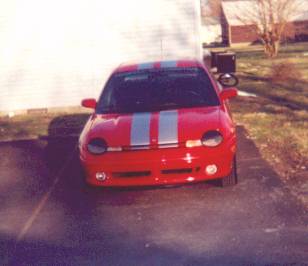
This is my beloved 98 R/T. It is a 4-door with the DOHC engine. Bought it in Oct. of 1998.
|
Click on a link, or just scroll down. |
|
[ Modifications | [Non-Performance Mods | [How Mods affected Performance | [ Weigh Reduction |[Alternator Shut-Off Switch ] [ Homemade Intake ][ Lowering Springs | [Bored TB][Painted Parts] |
Modifications:
These are modifications that I have already made.
2.4L DOHC Motor.....(out of a Stratus).............................................$400
Pacesetter Headers.................................................................$129 Pacesetter Monza Cat-back Exhaust..................................................$149 Nitrous Works Kit 50- 70 hp(I no longer have this kit I sold it ...................$439 Crane Fire Wires...................................................................$31 Rex Motor Mount Inserts............................................................$30 Weight Reduction (more info. below)................................................FREE Straight Pipes out the side........................................................$15 Wider tires 195's instead of 185 factory...........................................$120 Took out power steering and A/C (more info. below under weight reduction) .........FREE Alternator shut off switch...(more info below).....................................$5 Homemade Intake....................................................................$20 Jamex Lowering Springs.............................................................$150 Bored Throttle Body...........( It cost me about 1 hours of time)..................FREE Went back to stock DOHC muffler....................................................$25 Took off rubber seal around the hood...............................................FREE Disabled counter balancing shafts..................................................FREE Made an UPD out of the 2.4L's pulley (cut out the outside with a Lath).............FREE Raise Compression Ratio to 10:1 ...................................................$40Total..............................(about)...................................$1180
Non-performance Enhancements:
   New Shifter Knob....................................................................$20
   Short Shifter ..(cut 2 in from stock shifter).......................................FREE
   Fog Lamps can be on anytime.........................................................FREE
   Radar Detector that gets it's power from rear view mirror lights power..............FREE
   Cool strobe Lights..................................................................$40
   Some cool stickers..................................................................$5
   Dark Windows Tint...................................................................$15
   Moved Battery to Trunk..............................................................$10
   Painted Some of My Interior parts(vents,instrument panel ring,cruise panels,ect)....$6
   Painted My Side Mirrors.............................................................$3
   Painted Brakes...(used high temp paint) ............................................$3.50
   Strapped my bass tube to top of trunk (not the lip but in the trunk)................FREE
   Howell Automotive Windshield Sticker................................................FREE
   12volt to 120volt power converter with outlet in the trunk (looks factory)..........$40
   Headlight Covers....................................................................$34
   TailLight Covers...(painted Flame Red to match car).................................$80
   Removed Fog Lights..................................................................FREE
   Black Light inside .................................................................$20
   Battery in the Trunk................................................................$30

Future Modifications Planned:
Tires: 205's in front and the 195's in back
...........................................................................$150
*HeadWork.............................................................................................................................$300
*Iceman
Cool Air
Intake.......................................................................................................$200
*Mopar
Computer.................................................................................................................$200
A
body kit with Viper Hood, stipes acourse, painted side mirrors, and painted
interior..... $$$
Ground Effects..........(Jerry Riggin
it)..................................................................................
$100
* = This I want badly
I guess I really don't need the underdrive pulley anymore. With no a/c or power steering and an alternator shut off switch it wouldn't do me any good. A normal neon it would do alot of good but not mine. Ground effects would be cool but I hate to spend all that time taking weight off and just start adding it back on.
I think I am going to scrap my nitrous oxide system this summer and
goto turbo. Why I am doing this is because nitrous is expensive and
takes about 3 hours to go there and back, to get tank filled. Some times like
right now I can't find it anywhere! This suck when you have a need for serious
speed 24hr a day. It will be nice to jump in my turbo powered Neon and kick ass
on almost any mid-size car on the road with 100+ quarters, without having to
worry about my nitrous running out in the middle of a race. Nitrous in my opion
is by far the best way to go if you don't have a need for speed all the time and
only want it for drag racing. A nitrous kit costs about a 6th of a turbo kit
($3000) that can produce the same amount of power as a nitrous system. But if
you aren't interested in flying all the time go for the nitrous. You can buy
alot of nitrous(65 10lbs. fills at $40) with $2600, which is the difference
between a turbo and nitrous. Nitrous doesn't last that long but if you don't
make full runs(quarter mile) it will last alot longer. At 70hp I can make about
7 full runs on a 10lbs. nitrous tank which goes very fast. Setting the system
down to 25 or 50hp doesn't do alot of good becuase it takes longer to get to the
speed you wish for, so the nitrous doesn't last much longer.
Update:
Now that I have had so many problems with nitrous oxide I am straping the
nitrous completely. Most of the problems I have had are from pushing the motor
beyond it's limits. I always ran the nitrous on the lean side and didn't retard
timing any. Nitrous was alot of fun while it lasted but if I could go back to
Oct. 98 I wouldn't have bought it and would be about $2500 less in debt.
Update:(Sept. 27,99) I am done with nitrous and turbo idea altogether.
I will go the safest route which is weight reduction and basic engine mods. I
would be nicer to kick butt on other cars naturally without forced induction or
nitrous anyways.
Update:(Dec. 2,99) I finally got rid of my nitrous
kit. Now I don't have to worry about getting brave on weekend and slapping that
sucker back in and totally blowing my motor. I got my springs installed last
week too. There nice but not as good as I thought. They make the car look great
but the ride is pretty rough.
Update:(Jan. 5,99) I removed my pace setter header today. The flange on it broke. I put my stock manifold on(good thing I kept that old thing). Then I go the header out I was looking at it and everywhere that there was a weld it had craked. I had noticed for some time that my car was getting louder by I just asumed it was just the muffler getting alittle age on it. The stock manifold was easy to re-install (I have a wire welder, makes it easy). Now it doesn't make a sound, I love it! Sound like I have a new motor. I tested it to see how much performance difference it made, it's an unnoticable difference in performance. Now I must admit that I'm not bashing the header's quiality. It is kinda amazing that it held up as long as it did. My motor shakes badly compared to a normal motor and that makes for alot of stress on the header. I will re-pair the header and put it back on when I get my motor fixed.
Update: (March 10, 2000) I am now trying to find me a good motor I have the money to get on just trying to find on with the least miles for the best price. Grrr... I want to find one fast I'm sick of haveing a slow ass car!
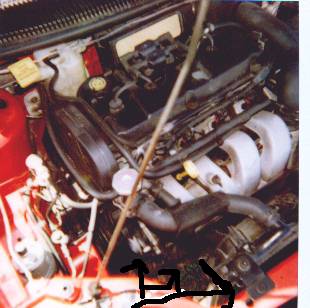
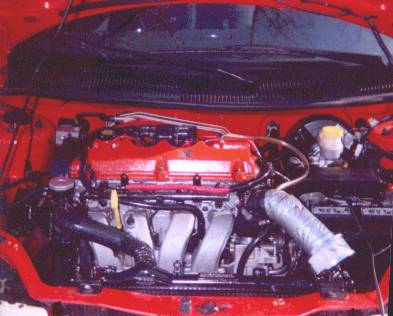
Here is a picture of what the engine
looked like after taking out the power steering and A/C
stuff.
 Lowering Springs:I got the cheap Jamex
Lowering springs but I am still happy withthe results. The ride is still half
way desent and it's alot lower, I wouldn't want to go any lower. There is really
no body sway on tight turns and was pretty easy to install(use a air impact
rachet to remove the center strut bolt, it will make installation fast!!!
).
Lowering Springs:I got the cheap Jamex
Lowering springs but I am still happy withthe results. The ride is still half
way desent and it's alot lower, I wouldn't want to go any lower. There is really
no body sway on tight turns and was pretty easy to install(use a air impact
rachet to remove the center strut bolt, it will make installation fast!!!
).
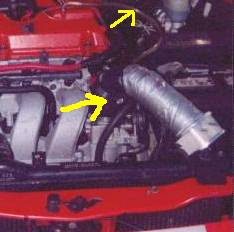
Bored Throttle Body:This was easy to do. I
just filed the sides until it was even with the diameter at the buterfly. (You
have to be carefull not to file to close to the butterfly or it will affect
idle.) It made for better throttle response and probably added a few hp. I have
a mill and lath machinery availably to me but I don't know how to use them and
my brother that does was gone at the time.
Update: I later bored the TB out with the Lath. It took off much more metal and created a smooth finish. It is now a straight bore all the way down.
Will have a picture soon! Painted Mirrors and Interior:It is really easy to paint your interior parts and mirros. I'd neverpainted anything before and mine looks professionally done. If you start painting your interior just be careful not to go over-board it will look like crap if you paint too many things. i would suggest just painting you air vents(including small ones on upper dash), cruise control on steering wheel if you don't have cruise and just have the blank plugs like me, the fog light and de-frost buttons, and the ring around the intrument panel. I think it looks good if you don't color the interior the same color as the car's color. I had silver stripes so I painted my interior silver, if you have a white car paint it blue or what ever you want. Make sure you take the parts out of the car before you try to paint them. To paint shake can well first, then paint in thin, fast coats(this is the key to making it look good) and do it from about 8-10 in away from part at a max of 45 degree angle(this angle will prevent the can from spiting out spots). When you start to paint, paint the back side of part first. That way if you mess up it don't show and when painting you will get alittle paint blow over. If you paint back first you will notice alittle gets on the front side and leaves little spots. If you paint the back side first then the front it will cover over those spots better.
Painted Barkes and Valve Cover
I used high
temp paint on both. It is really easy and is very cool looking! 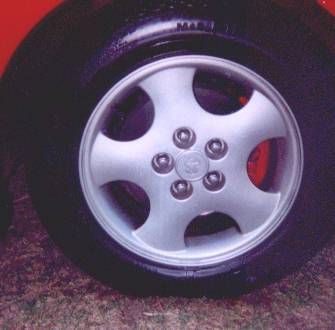
Two 8" Kenwood Self Amplified Basstubes.(including installation).............$400