Home Gallery Tutorials Downloads Other Stuff Links About Me Email
TUTORIALS
More Boolean Operations
I've gotten e-mails from people commenting on the turntables in the gallery over the past few months and have decided to create a tutorial on the steps to creating the DJ's weapon of choice.
1. Find reference pictures of the turntable you wish to model. You'll find plenty at specialist DJ stores web pages like Hard To Find Records. Also try to find the actual dimensions of the turntable either from the manufacturer's web site or from the specialist DJ store web pages. Although the dimensions aren't vital, the reference pictures are, even if just to give you an idea of the task ahead. If you own a turntable, use that by all means!
2. For this tutorial, I'll be using Vue d'Esprit 2, but any 3D program that has Boolean capabilities will be fine. Open up the program and create a cube. Resize it to the dimensions you found earlier. The height of the cube is the height of the deck plate (the part on top). This doesn't include the base. If you don't have any dimensions, reposition the camera in the scene so it is like the camera in the reference pictures. Resize the cube to what you think looks right, then do a quick render and see if it matches the dimensions of the turntable in the reference shot. This point is crucial in the turntable modeling. If it is wrong, almost everything on the turntable (the platter etc.) will look out of proportion. Don't worry if you don't get this first time, I spent many an hour sizing and resizing the deck. My deck measures 155x119x6.
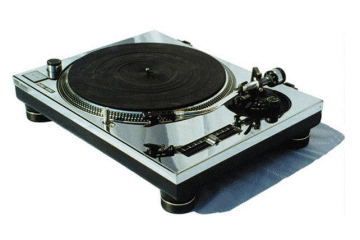

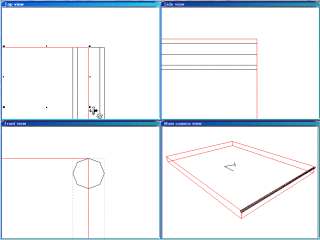
3. As you can see in the above pictures, both decks have rounded edges. These are easily created if your program can create the sorts of primitive cubes with rounded edges. I didn't have this option, but I still wanted rounded edges so I did it the long way. To do this, create a cylinder the length of the deck (in my case 155 units). Make the thickness of the cylinder 1x1. Align it so the very top of the cylinder is level with the very top of the deck. When looking down on the scene, the cylinder's centre should be on the edge of the deck. It sounds complicated so below is a wireframe of what it should look like (the deck is in red).
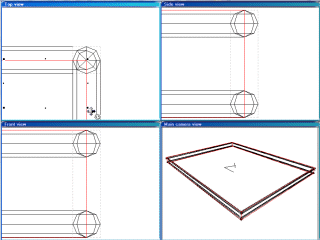
4. Repeat this process for each side, both top and bottom, but don't do the vertical edges yet (the corners). Now create a sphere 1x1x1. Place one on each of the corners so it is aligned with the cylinders on each side (see below, the cube is in red). Now make four more cylinders the length of the height of the cube and position them so they are aligned with the spheres of each corner of the deck. This all sounds confusing, but hopefully the pictures are helping (the corner cylinder is in red).
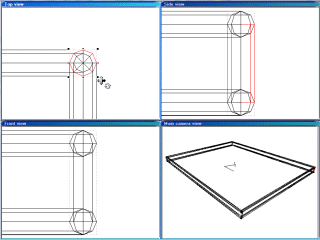
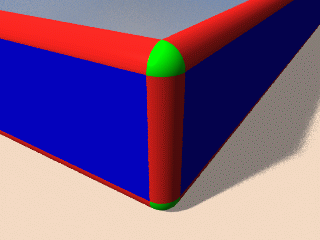
5. Now create a cube that will fit into each of the four 'holes' still remaining on each side of the deck (there shouldn't be any on the top or bottom sides of the deck or you've done something wrong!). Make them so the curve of the cylinder joins seamlessly with each face of the deck. Below is a render of one corner of the deck. The cube is silver, the cylinders are red, the spheres are green and the cubes which fill the holes are blue. Hopefully this clarifies the last few steps. When you have completed the above steps, group each side and corner into different groups (ie. the left side would comprise of the top and bottom cylinders and the cube filling the hole. The corners would consist of the top and bottom spheres and the vertical cylinder). Keep the cube which is the main deck seperate from these groups.
Next:
Creating the base of the deck
Best viewed in 1024x768 using Netscape Navigator
Copyright Michael Balzer 2000/2001
[email protected]