 |
| Blitzball |
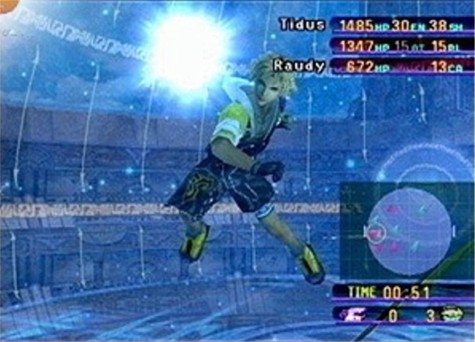
| A sport known throughout all of Spira, blitzball lets the people forget about Sin, if only for a moment. Blitzball is played in a sphere of water, surrounded by stands of spectators. The Luca Stadium is where all the top teams come to compete against each other. In FFX, you can control the Besaid Aurochs. Here is a detailed section about the mini-game. |
| The Basics Attributes A player's attributes determine how well he can play: shoot, pass, tackle, etc. The more you play, the higher your stats go. Make sure that all your players participate in the games. Hit Points, or just HP, stand for stamina. The more HP a payer has, the more actions he can perform. Every action, including shooting, passing, and moving, consumes HP. Only players holding the ball loose their HP, but slowly regenerate them after getting rid of the ball. The higher Speed (SP) you have, the faster you can move around the sphere. This means that you can possibly evade opposing players. Unfortunately, you have to pay players to be on your team, even if you don't use them in a game. This will consume your Gil. A player's Salary tells you how much they want. After every half of a match, you can be awarded with experience points, or EXP. These let your players level up and raise their attributes. Endurance (EN) tells you how much damage you can take from other players. After you are tackled, your EN is lowered according to the other player's Attack. The more EN you have, the more defending players you can withstand, and ultimately get closer to the opposing goal. If your EN is lowered to zero, then you lose control of the ball. This also works the other way around, meaning that you can take the ball from opposing players. Attack (AT) tells you how much of an opposing player's EN you can take away. It determines how strong the defending player's tackles will be. Please note that the numbers are not exact. For example, when you tackle a Ronso with an Attack of 7, you may end up doing only 5. The Pass attribute, or just PA, determines how accurately you can pass the ball. The longer the ball travels, the lower the PA gets. If it reaches the intended player after it reaches zero, then that player can't catch it and will fumble the ball, allowing anyone to catch it. The higher PA you have, the further you can throw the ball. PA is measured against a defending player's Blocking attribute. Block (BL) tells you how well your defending players can block passes and shots. This way, the ball can be intercepted. Shooting (SH) measures how far and accurately you can shoot the ball. It must be higher than any defending players nearby, or the'll catch it. Then there is also the goalie, who attempts to Catch the ball. Catch (CA) determines how well a goalie can stop an incoming shot. Only goalies use this attribute. It is measured against the attacking player's SH. The Playing Field Each blitzball team has six players. There is a position for each of them: Left Forward (LF), Right Forward (RF), Midfielder (MF, Left Defense (FD), Right Defense (RD), and Goalie (GL). On the circular mini-map, your players appea as green triangles, while the opposing team is red. The player with the ball has a circle around his triangle. His or her attributes will be displayed on the upper-right side of the screen. Sometimes it is better to use the mini-map when moving around because of the limited field of vision. Action Commands When one of your players has control of the ball, you can open the Action Command menu by pressing Square. Then you can choose one of the follwing: Pass, Shoot, and Dribble. Pass - When Pass is selected, a new window containing the names of your other players will appear. Choose one to pass. The ball will move towards this player until he or she either catches it or fumbles the ball. The ball is fumbled when the PA reaches zero before reaching the intended target. Shoot - Shooting allows you to score points. The closer the ball comes to the goalie, the more th SH reduces. If the goalie's CA is higher than the SH of the ball when it arrives at the goal, then the ball will be caught or blocked. Since SH is just like PA, it's best to get as close as possible to the goal. Dribble - Selecting Dribble allows you to keep moving around as normal. Movement During your first game, you'll notice that when one of your players has the ball, you can't control him. This is because the Movement is set on Auto. If you press Triangle, you will see the Movement menu. There are three choices to select: Auto, Manual A, and Manual B. Auto - In this setting, the computer controls the movement of your players. You do not have any say at all about the direction they are moving. Manual A - The Manual A mode allows free movement around the sphere. Your direction in movement is corresponding with the mini-map. Therefor if you go left, you'll head towards the opposing goalie. Manaul B - In this mode, the direction of movement corresponds with the current camera angle. For example, if the enemy goal is straight ahead, pressing up will take you to it. Formations After you select one of the Manual modes, the Formation menu appears. The higher your team level, the more formations become available to you. You start off with four formations: Normal, Mark Mode, Right Side, Left Side. Normal - When this formation is selected, your players go after the ball carrier once he or she gets close enough and try to keep up with him or her for as long as they can. Mark Mode - Your players will cover the opponent that they were assigned to in the pre-match setup screen, even if that opponent doesn't have the ball. Right Side or Left Side - Your entire team basically plays in only the chosen side, leaving the other side rather undefended. Experience Only players that participate in the games gain EXP. Thererfore, they have to pass, tackle, shoot, etc. in order to level up. Each increase in levels raises the player's HP and perhaps his attributes aswell. Since defenders do the least amount of work, they are very likely to be left behind while leveling up. Goalies receive EXP by catching incoming shots, so allow weak offensive players shoot at your goal. Strategies Certain teams are better at blitzball than others. Here is a list of all the teams, what makes the good, and strategies on how to beat them. Luca Goers - This team is relatively well rounded. Some of them enjoy using Nap Tackles, especially Doram and Balgerda. They usually have some good techniques to copy. Just play however you like against them, although I prefer scoring a few points first so that they can't catch up, then pass the ball to everyone to let them earn some EXP. Kilika Beasts - They aren't really that tough. If you hire a Ronso, like Zev Ronso on Luca Harbor-No. 5 Dock, then you can just plow right through them. Remember, let some of their weak shooters get a shot at your goalie to give him EXP. Al Bhed Psyches - These guys are usually quite tough. They have good formations and a very good goalie, Nimrook. These Al Bheds also love to use status attacks on your players, like Nap Tackle, Venom Shot, etc. Basically, use the same strategy listed above for the Luca Goers. Ronso Fangs - The players on this team usually have high EN and AT. After all, they're Ronsos. Their goalie isn't really that good at the beginning, but he quickly gets better. They are extremely slow, so you could probably outswim them. If Tidus has the Jecht Shot, use that when they have him cornered near the opposing goal. Guado Glories - The Glories are basically like the Kilika Beasts, except faster and better at passing. Again, you could probably plow right through them with a Ronso. My own blitzball team is nearly unstoppable. In case you want to know, here's a list of all the players on my team. LF: Tidus RF: Wedge MF: Zev Ronso LD: Jassu RD: Botta GL: Keepa |
 |