| Pz Jag Panther (sdkfz173) Jagdpanther (Late) |
| Manufacturer : MIAG, MNH, 392 produced January 1944 to March 1945 Crew : 5 Weight : 46 tons Engine : Maybach HL230P30 Length : 9.9 mtrs Gearbox : 7 forward, 1 reverse Width : 3.42 mtrs Speed : 46 kmph Height : 2.72 mtrs Range : 160 km Armament : One 8.8cm PaK43/3 L/71 cannon, 1 x 7.92mm MG34 |
 |
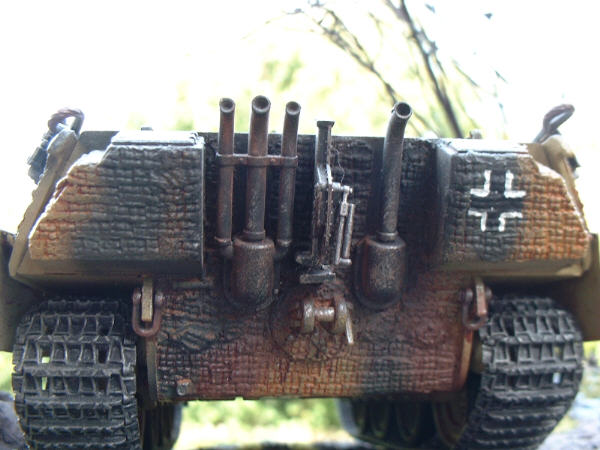
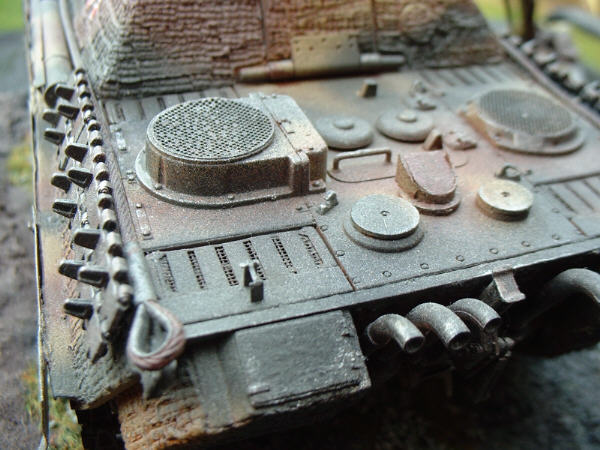
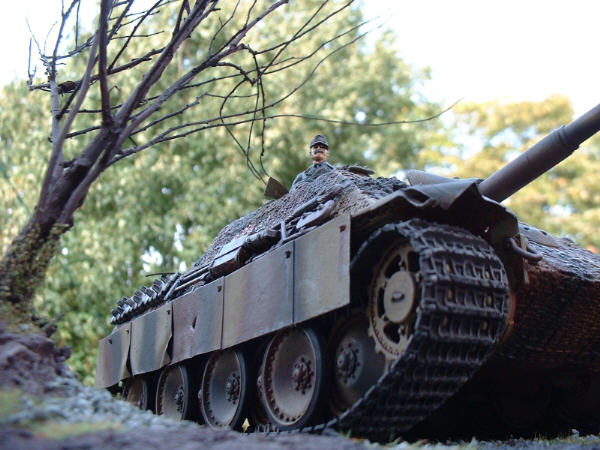
| This is the second kit I built, again a win on ebay. This is a Tamiya kit, the late production model, this being distinguished from the former version by the prominant bolted gun mount plate in the super- structure and the two piece gun barrel. Having made my early Tiger and being well pleased with my first effort, I decided to expand my technique by trying some super detailing, adding a metal barrel and trying my hand at zimmerit. To this end I purchased the Eduard etched brass set for this kit, A Jordi Rubio turned aluminium barrel and some super fine miliput 2 part putty and a set of zimmerit punches. I found super detailing tricky at first, because in order to use these parts, you have to saw, file and remove unwanted parts of the kit, which is nerve wracking the first time you do it. The size of some of the brass pieces were tiny too and im sure I speak for many modellers who have done this when I say a lot of times was spent in the hands and knees position on the floor, desperately searching the carpet for escaped components! I heartily recommend removing these pieces in the white lower carton of the models box, this way they stand out should they decide to wander! The joy of using etched brass is the ease of which you can deform pieces to simulate battle damage. This I did with the schurtzen included with the Eduard set, using photos for reference. One thing you will find is that if you want a good authentic look, a reference library is essential. I heartily recommend the Encyclopedia of German tanks of world war two, by Peter Chamberlain, Hilary Doyle and Thomas L.Jentz. This superb book is a great place to start and is published by Arms and Armor press ( isbn 1-85409-214-6). As for zimmeriting, I first used a hobby drill to scuff all of the surfaces that were to recieve the putty, being careful not to gouge it ! I then added the putty one section at a time, leaving a day for the putty to set before moving on to the next section. once the putty was in place on the tank, I then pressed my chosen zimmerit punch into the soft putty in rows to simulate the real thing. One thing to make sure of is that you keep the putty on the tank damp and the punch damp too or the putty will stick and come away as you pattern it. The other thing I learned with this kit was that my zimmerit was too thick, a lesson taken to my next kits, where I rolled the putty into thin sheets and used a scalpel to cut it to the required shape before placing it. I recommend the purchase of a putty carving set to help with forming the putty on the tank chassis, these can be bought from most good modelling stores. Anyhow, although a massive learning experience, I was happy with the end result! All in all I rate this kit A+ its beatifully machined and fits like a dream, well worth the money. Historically, the Jagdpanther was never built in great numbers, entering the war very late. However its purposeful sleek lines, with well sloped armor and the same gun as fitted to the King Tiger made it a potent weapon system.The largest number of these tanks deployed operationally was during Hitlers Ardennes offensive, the Battle of the Bulge. Jagdpanthers were also used operationally against the allies in France after operation Overlord. Its one weakness, which was inherent in the Panther tanks from which it was derived, was its drive system which was prone to mechanical failure and encumbered the crew with the need for frequent overhauling of the engines and drive train. |
 |
 |
 |
| Home |