 |
| 19 AE | Civil War 03 |
| Location: Above the Death Star Versus: Rebel Alliance v Galactic Empire Victor: Rebel Alliance |
| BATTLE OF YAVIN |
| [Attacking that battle station ain't my idea of courage. It's more like suicide] |
| For a preview of Star Wars, George Lucas used footage of dogfights from World War 2 in place of the dogfights over the Death Star, which were unfinished at the time |
| Events Main | The Galactic Civil War - Timeline | Battle of Yavin - Attack and Defence | Battle of Hoth - Imperial Victory | Battle of Endor - The Final Battle |
| < Previous | Next > |
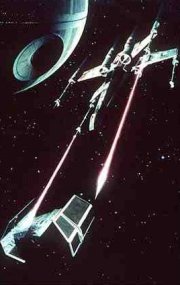
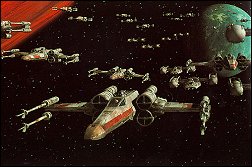
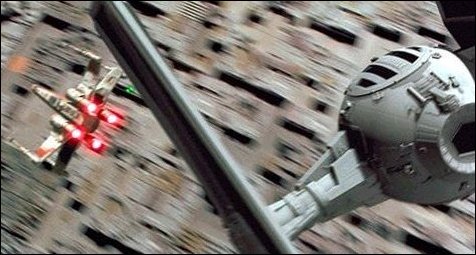
| After securing the technical readouts of the Empire's new battle station, the Rebel Alliance quickly began to analyse the data for a weakness. Rebel tacticians and technicians worked tirelessly to find a way to destroy the Death Star, but their plight seemed hopeless. The Death Star was already tracking them to Yavin IV, and the Rebel fleet was far too weak to attack it. Finally, General Dodonna found a weakness. There was a small, unprotected thermal exhaust port located right below the main port. It led straight to the Death Star's reactor, so if a proton torpedo was fired into it, the station would be destroyed. The Rebel pilots were duly briefed on the plan, and though some voiced concerns, all were ready to try out Dodonna's strategy. The Rebel hangar was a hive of activity as the pilots manned their ships, and the war room was similarly busy. Emotions ran high during the preperations of the battle, though soon there was no time for it; the Death Star emerged from hyperspace in the Yavin system. Luckily for the Rebellion, the battle station had to navigate the gas giant Yavin before it could fire upon Yavin IV. As the Imperials didn't consider a small starfighter to be a threat to the Death Star, pin-point defense was lacking, so the Rebel attack force was comprised solely of starfighters. Red and Gold Squadrons were present in the attack, with new recruit Luke Skywalker flying as Red 5. The thirty-strong Rebel fleet flew through the Death Star's magnetic field, and the attack was on. The Rebels began scoring victories quickly, taking out turbolaser batteries before they could target the nimble starfighters, but their luck did not last. TIE fighters were deployed to engage the Rebels ship-to-ship, turning the tide against the attackers. Dogfights errupted over the surface of the Death Star as Gold Squadron sent its first wave to attack the exhaust port. Three Y-wing starfighters maneuvered down the trench circling the Death Star's equator, closing in on the target. However, Darth Vader had other plans for the Rebels, and flew in his TIE Advanced to intercept them. Vader and his wingmen destroyed the three Y-wings before they had a shot at the exhaust port, though when Red Leader attempted the trench run, he managed to fire a torpedo at the exhaust port. It looked as if the Rebels had won, but Red Leader himself reported the torpedo impacted on the surface, rather than heading into the core. Just before his ship was destroyed by Vader, he told Luke to head into the trench. With Biggs Darklighter and Wedge Antilles as his wingmen, Luke flew at full speed down the trench. Vader pursued, and managed to damage Wedge's X-wing, forcing him out of the fight. Next, Biggs was destroyed outright, leaving Luke desperately trying to keep ahead of Vader. Even at the speed he was going, Luke could not get away from the Dark Lord. Vader prepared to fire on Skywalker, and end the Rebellion's attack. But, at that moment, Han Solo arrived in the Millennium Falcon, and blasted one of Vader's wingmen. Surprised, the other careened into Vader, sending him spinning off into space...and leaving Luke clear to make the shot. Guided by the Force, Luke fired, sending his torpedo into the exhaust port. The remaining Rebels shot away from the Death Star before it exploded into a million pieces. |
 |
 |