|
If you're interested in learning about different computer programs, you're now in the right site! Our website includes beginner's instructions to different computer programs.
If you want to create your own webpage, just click onBeginners' guide to creating a Web Page. It teaches the steps on how to create a basic HTML file. Through this, you can learn about the HTML tags you can work with to come up with a creative webpage design.
And if you're fond of Winnie the Pooh and his friends, just click on A guide on how to use Disney's Winnie the Pooh Print Studio It teaches the steps in making computer outputs such as banners, greeting cards, calendar, letterheads, and many more!!!
Promotions:
|
 Winnie the Pooh Print Studio Winnie the Pooh Print Studio
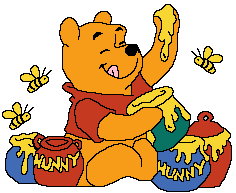 Are you fond of Winnie the Pooh? Here�s a great treat for you! Disney Interactive releases a new program, �Disney�s Pooh Print Studio.� Now the most lovable characters from the 100 Acre Wood can help turn your computer and printer into a home printing studio that's fun for the whole family. Disney's Print Studio is everything you need to be creative for special holidays, birthdays, and all the "just for fun" days in between.
Create your own customized designs, layouts, and text for parties, fun events, and all kinds of other print projects. To do this, first, you must install the program to your computer following the guidelines included in the CD-ROM. Your computer must comply with the following requirements in order to run this program:
After installing the program, run it by clicking the Start-Up menu. Choose Program and find for the Disney Interactive task bar, then click on the Pooh Print Studio. A choice of 18 projects will be seen to choose from.
The projects available are banner, certificate, calendar, coloring page, greeting card, post card, growth chart, calling card, nametag, placemat, bookmark, notepad, invitation, disk label, envelope, place card, diary, letterhead, and fax.
Piglet, which is at the bottom, helps you scroll through projects by dragging his body across the screen. You may also click the arrows beside him to scroll. Just click on the icon of your chosen project.
For example, you want to make a greeting card. Click on the greeting card icon and it will lead you to its menu. A pre-constructed card can be seen at the right side of the screen. Click on New located at the top of the pre-constructed card.
Now you're ready to make your own greeting card! First, choose a layout found at the lower right. To personalize the outside of the card, see to it that the indicator is on the outside mode. Choose from the different images at the left side by dragging Winnie the Pooh up and down or the arrows near him. Click on your chosen image. You may flip the image by clicking the flip button indicated by bees. To insert text, simply click on the box placed at the bottom of the chosen image. A new window will appear where you can write your message. Choose the font style, size and color at the left side of the screen. On the same side, four buttons allow you to choose whether you want your font to be italized, underlined, bold or in a normal style. Below are choices of paragraph alignments. You can choose from align left, center or align right. After writing the text, close the window by clicking the x button at the upper left.
To have a background, click on align right pattern located at the lower left of the screen. Follow the same instruction on choosing an image in choosing the pattern. You can remove the pattern by clicking align right remove.
Do the same for the inner part of the greeting card.
If you want to view the card that you�ve made, just click on the preview button at the lower right side of the screen. If you are satisfied with the output, print it by clicking print. The save menu enables you to store your personalized greeting card for future use. You can open it again by using load menu.
If you want to make another project, click on the main menu, it will lead you to the opening page where you can choose another project. Follow the same step in choosing a project and designing it.
Have fun!!!
|


If you have any questions, you can e-mail us.
