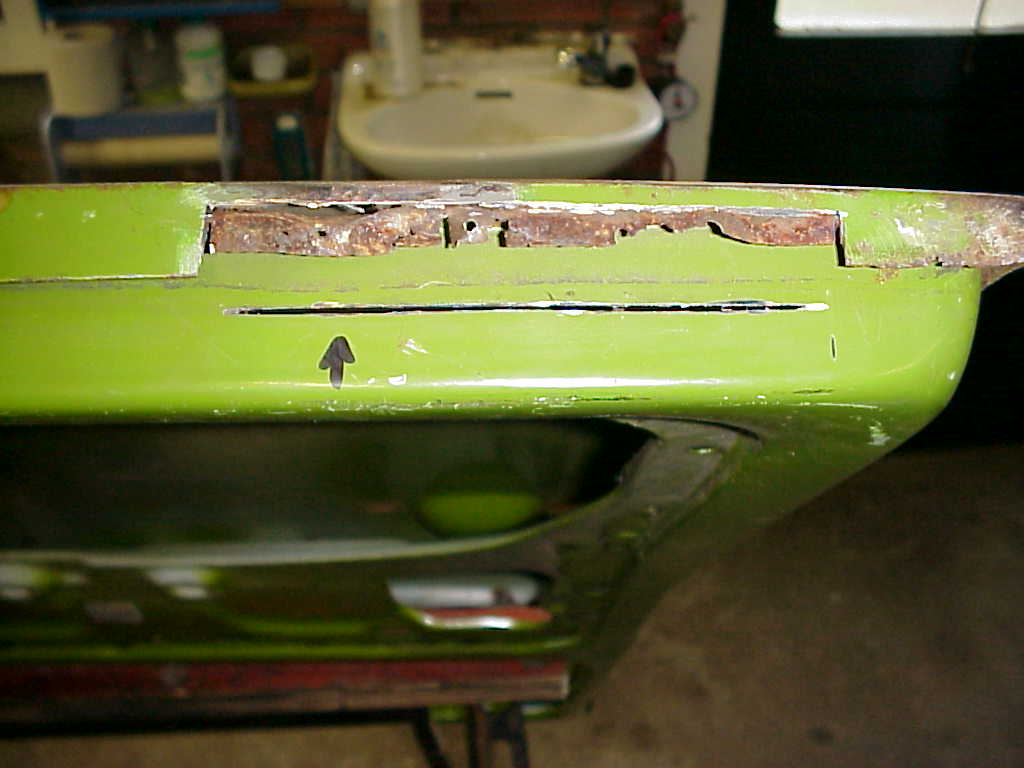
Although new Beetle doors are relatively inexpensive and both used and new doors can be easily obtained, I nevertheless decided to repair and keep the old doors. The reasons why? Well, it seemed to me that these doors had never been replaced and still were the original ones. Moreover they were in a remarkable good condition after more than 25 years of service in the Netherlands where they pour tons of salt on the roads during the winter period. In fact, the condition of the doors was very much like the rest of the car: no major rust. The only spot were I found some serious rust was at the very bottom edge of the door between the overlapping door outer skin plate and the inner U-bended end plate of the door frame, see figure 1, where a strip of the door skin plate was cut away for more clear view.
Here, the two plates are spot welded together, and all rainwater entering the inside of the door is supposed to be drained through two drain "gutters" in the inner U-bended plate. The small black arrow in figure 1 indicates the "remains" of the drain gutter. However, the small seam between the overlapping plates is not sealed at all, and will "attract" (salty) water because of the capillary forces acting on the water. Also the door rubber mounted in the U-bended plate helps to keep this area wetted. Rust really has an easy game to play there!
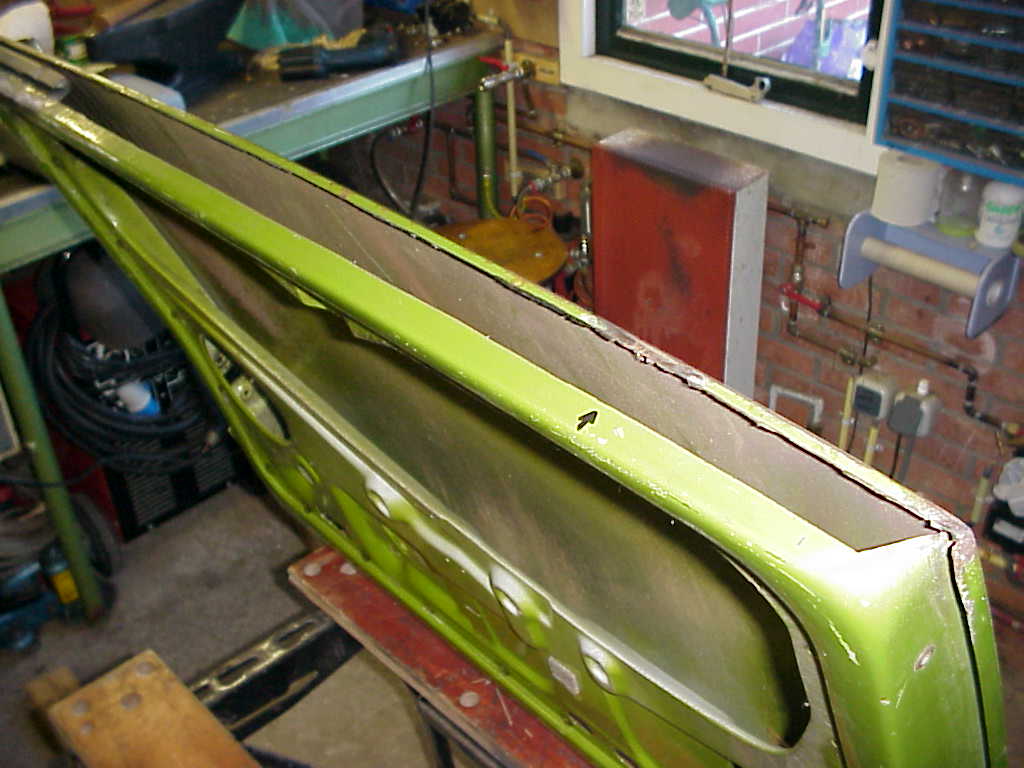
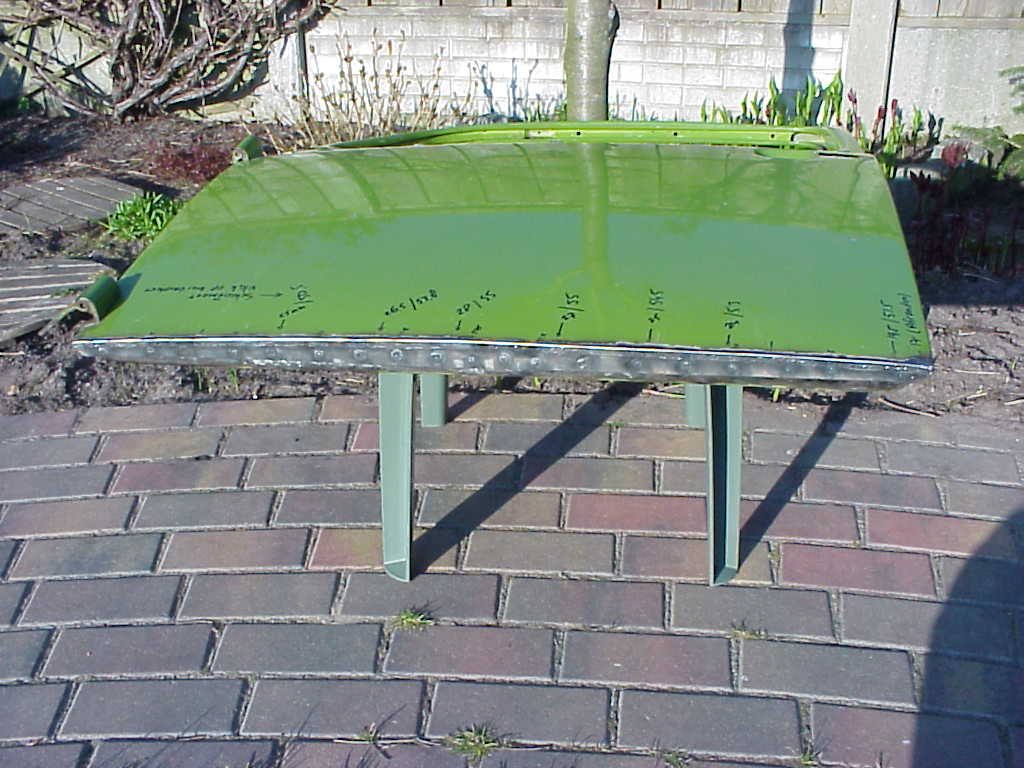
To repair the door, I decided to completely cut away the affected area. Since the door skin is double-curved in two directions, I took the measures of the distance between the outer skin plate and the inside of the door and wrote them down for later reference to reconstruct the door back to its original dimensions. For cutting I used a special thin cutting disk in order to work as precise as possible. You can see the result in figure 2.
A major problem when welding large flat thin sheet metal plates is that you put in (a lot of) heat in the sheet metal. This may cause warping of the panel that needs to be corrected after welding has been completed, but may be difficult when the inside is not accessible for a hammer and dolly. Fortunately, no (or very little) rust was found the 90 degree angled edge at the bottom end of the skin plate, and therefore it was not necessary to cut away this edge. So it will work as a reinforcement to prevent the surface of the outer skin panel from warping during welding.
Now I needed to weld-in two replacement sheet metal pieces: #1 the U-shaped part on the inside to be welded to the door frame first and #2 a piece of flat plate lap joined to the inner U-shaped part and to be welded to the door skin. Because the form of these replacement parts was easy, I decided to make these pieces myself.
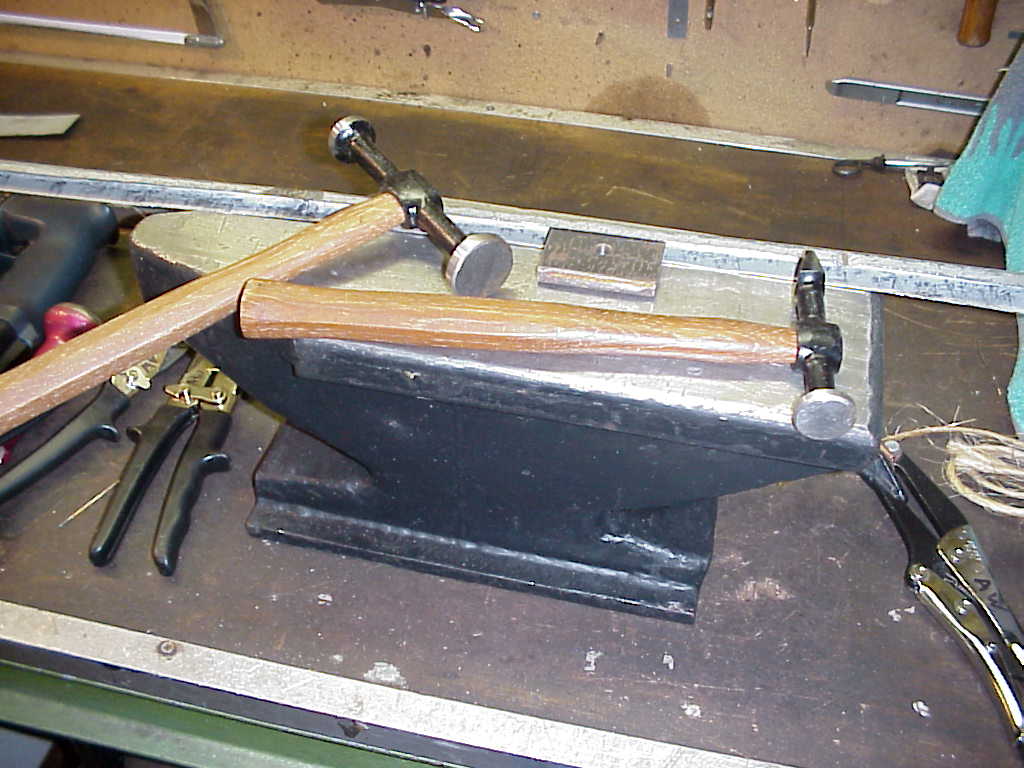
To make part #1, I took a flat sheet of metal and with a hand cutter I cut out a piece with the approximate dimensions. The inner distance of the "U" was 10 mm so I used a standard carbon steel strip of 10mm thickness on an anvil to hammer the desired U-shape in the sheet metal, see figure 3.
After the "U-shape" had been formed and hammered into the piece of metal, it was further cut to fit in exactly "like a hand shoe" in the doorframe at the bottom. This is a very important step in the process and probably also the most time consuming one. The gap between the metal edges of the existing part and the new part should be as small a possible, and it takes a lot of measuring, trying and cutting to obtain the desired "close fit" of the new part. Now the new part is ready to be welded in. The new part was fixed into the desired position using welding clamps and was spot-welded using the MIG/MAG welding technique. You can see the results in figure 4a, 4b and 4c. Especially figure 4c shows you how close the new part fitted in.
After spot-welding, the spot welds were grinded and the new piece was fully seam welded by using the TIG welding technique. With the amperage set to as low as 10-15 Amperes, I used the "flow" method to melt the two metal edges together. This means that I added as less as possible filler material to the welding puddle, and made maximum use of the excess in material of the MIG/MAG spot welds and the metal of the joining edges. That's why it is so important to have a "close fit": otherwise you will only be burning holes instead of creating nice welds! The result of TIG-welding is a beautiful flat weld that needs no or very little grinding. See figure 5 for the result.
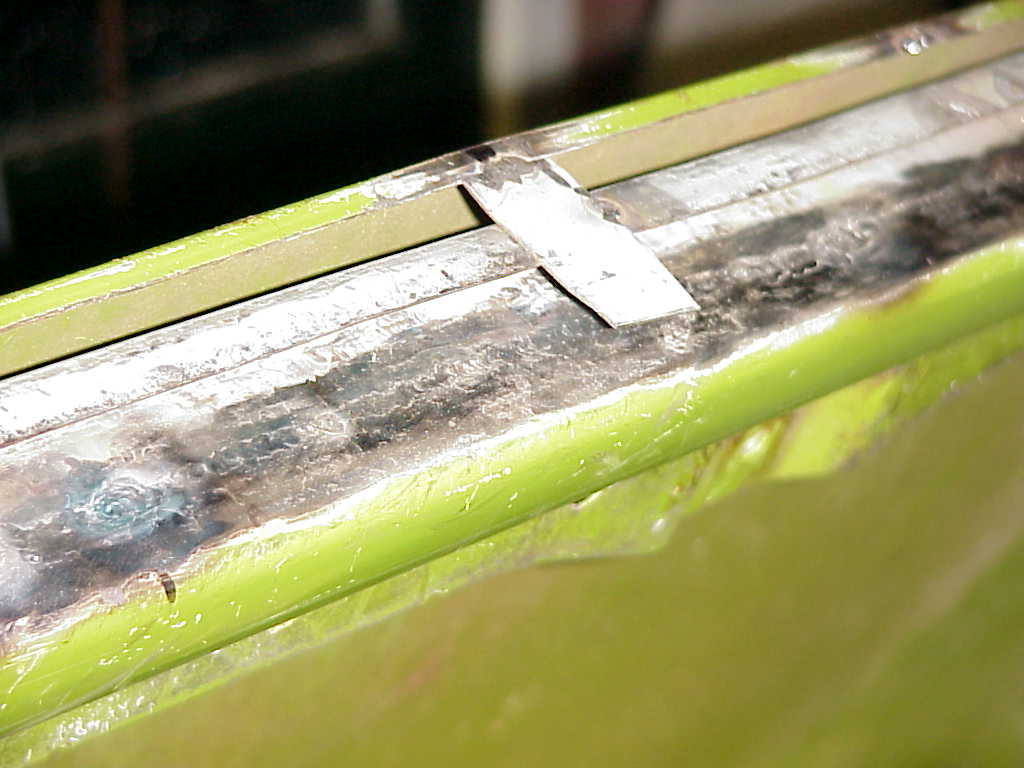
Now it's time to prepare part #2: covering part #1 at the bottom of the door skin, which is a simple flat piece of sheet metal. To get the door skin back in its original position, I welded a small temporary bridge between the door skin and the "U"- doorframe, see figure 6. The covering piece was clamped in position with a few welding clamps, and the cutting line was marked from the inside with a marker. A hand cutter was used to cut along the marked line.
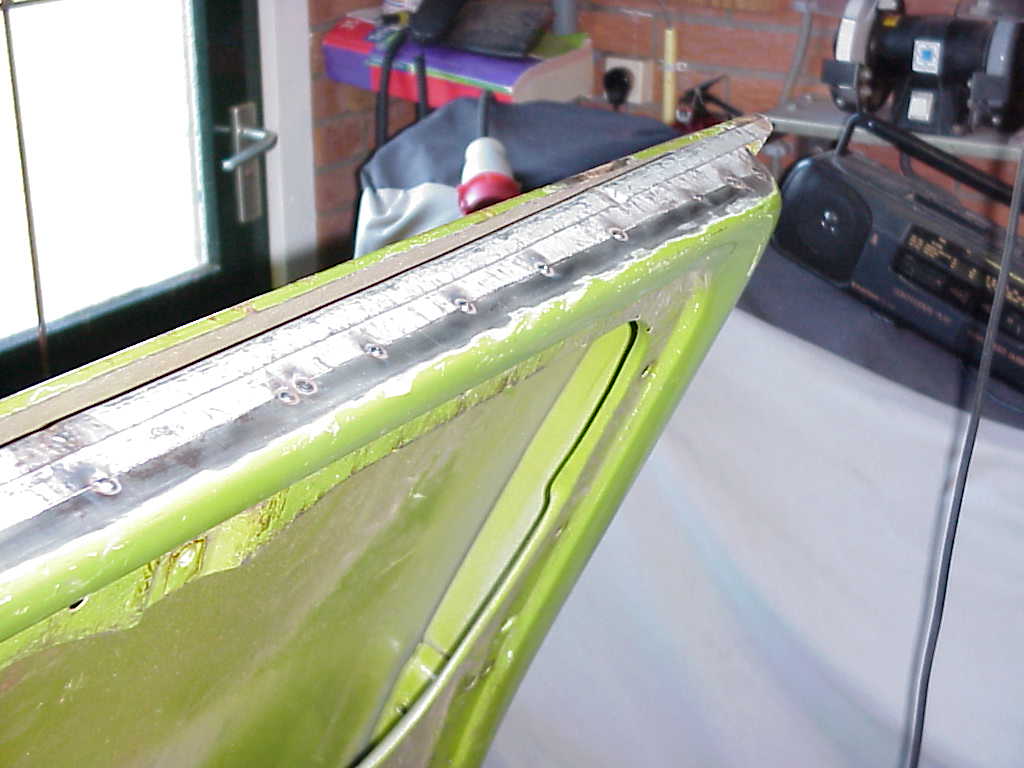
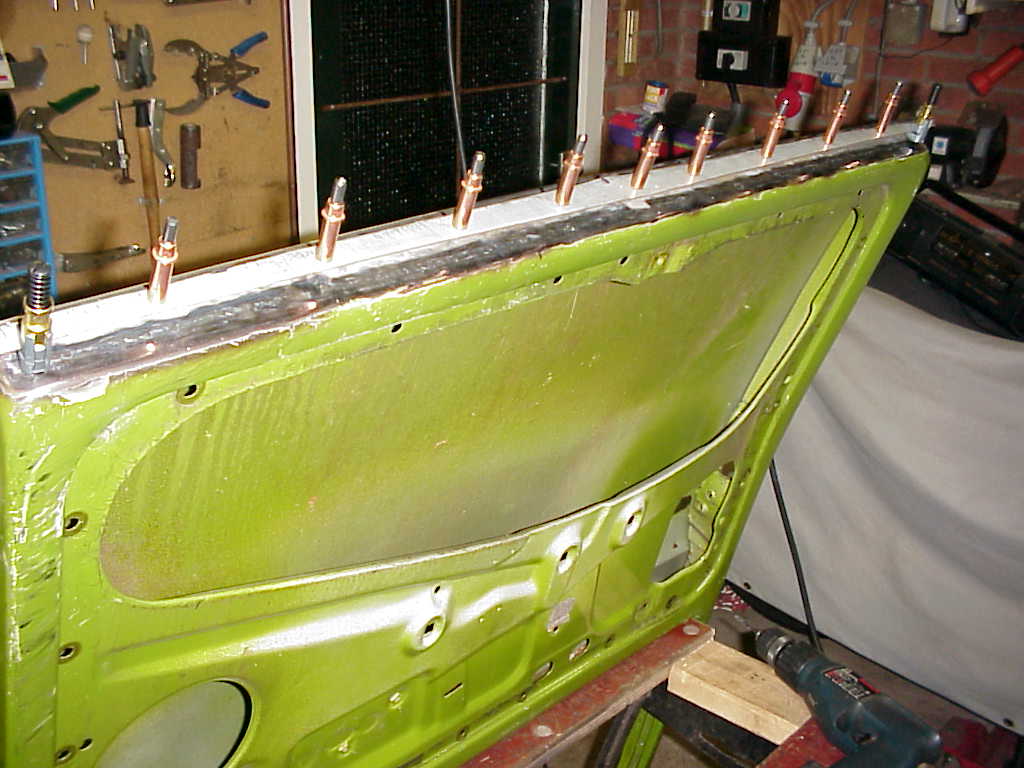
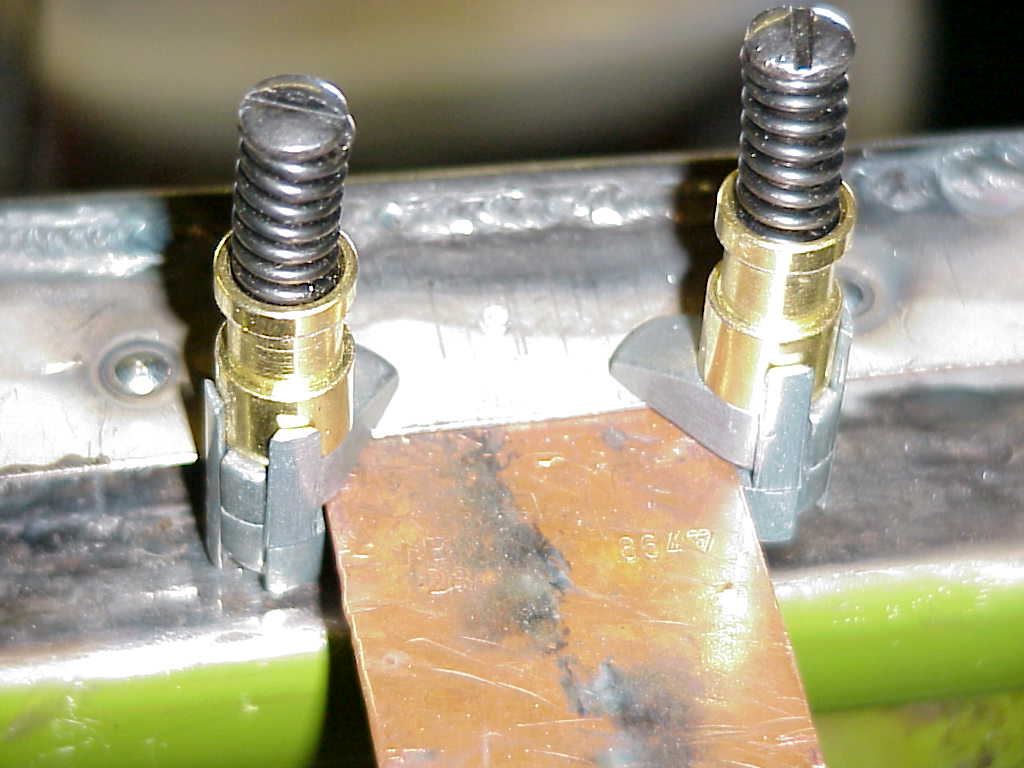
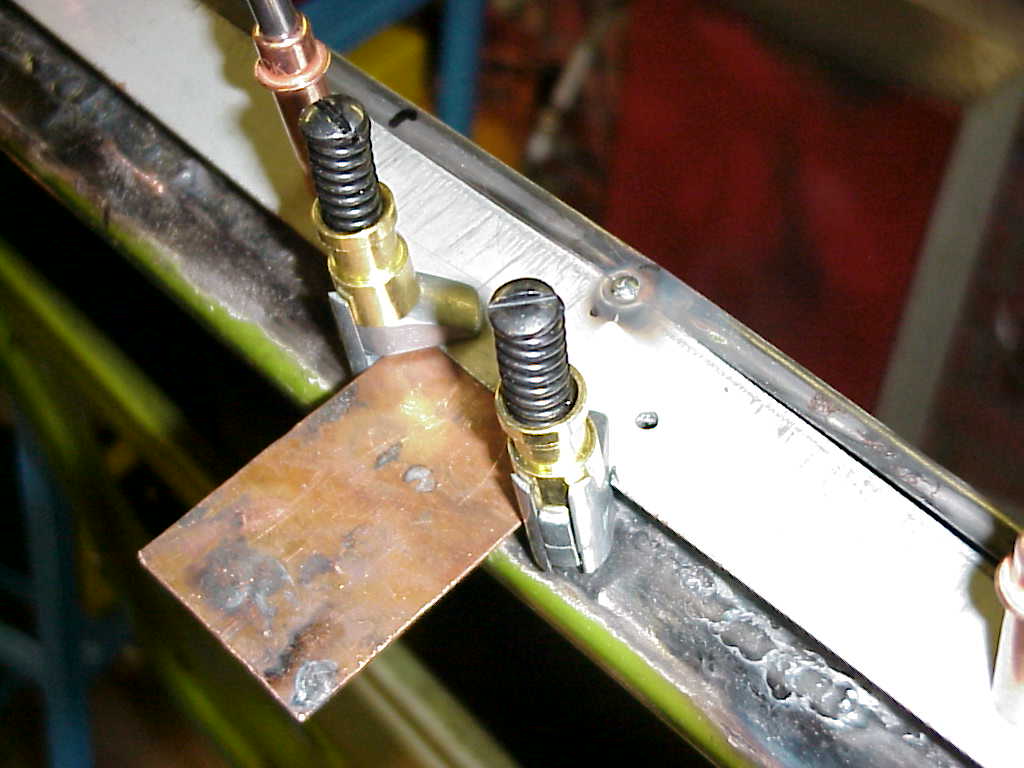
Now the bottom plate was clamped to the "U"- doorframe using special sheet metal holding fasteners. To mount these clamps, a small hole (app. 3,2 mm) is drilled through the lap joined bottom plate and the "U"- doorframe. These blind fasteners have an expanding pin, which was inserted with a pair of installation pliers through the 3,2 mm hole and released, see figure 7a and 7b.
The fastener exerts a large holding pressure that "pulls" the two lapped metal pieces close together. After the seam has been fully welded, the remaining holes will be used for making spot welds.
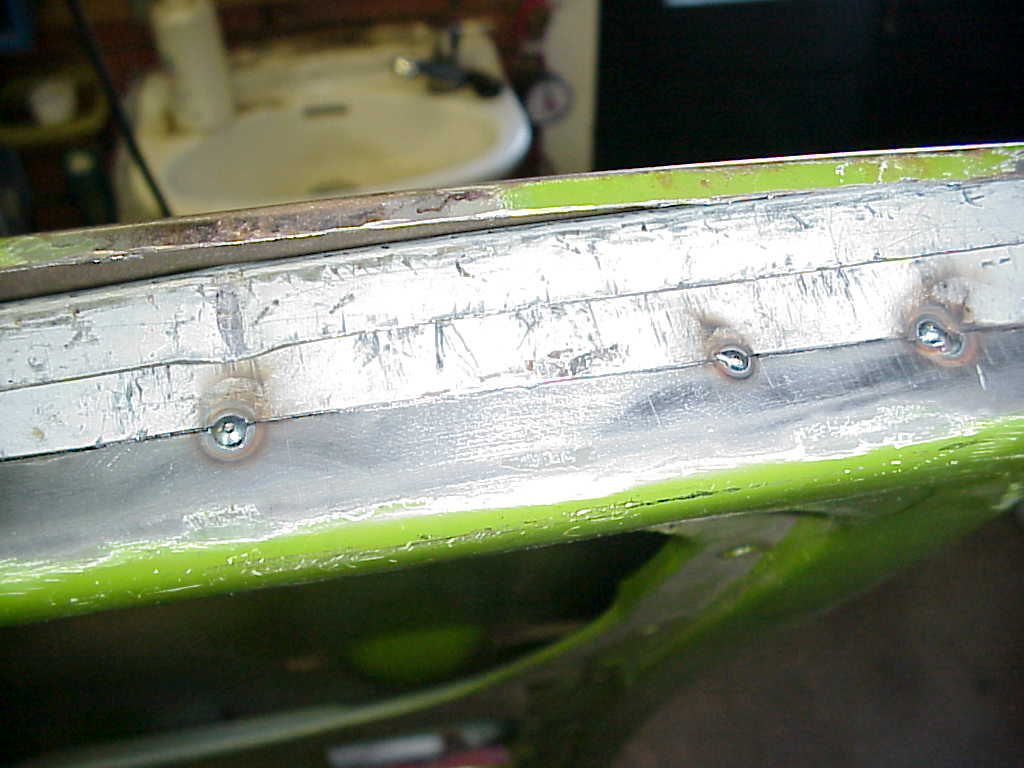
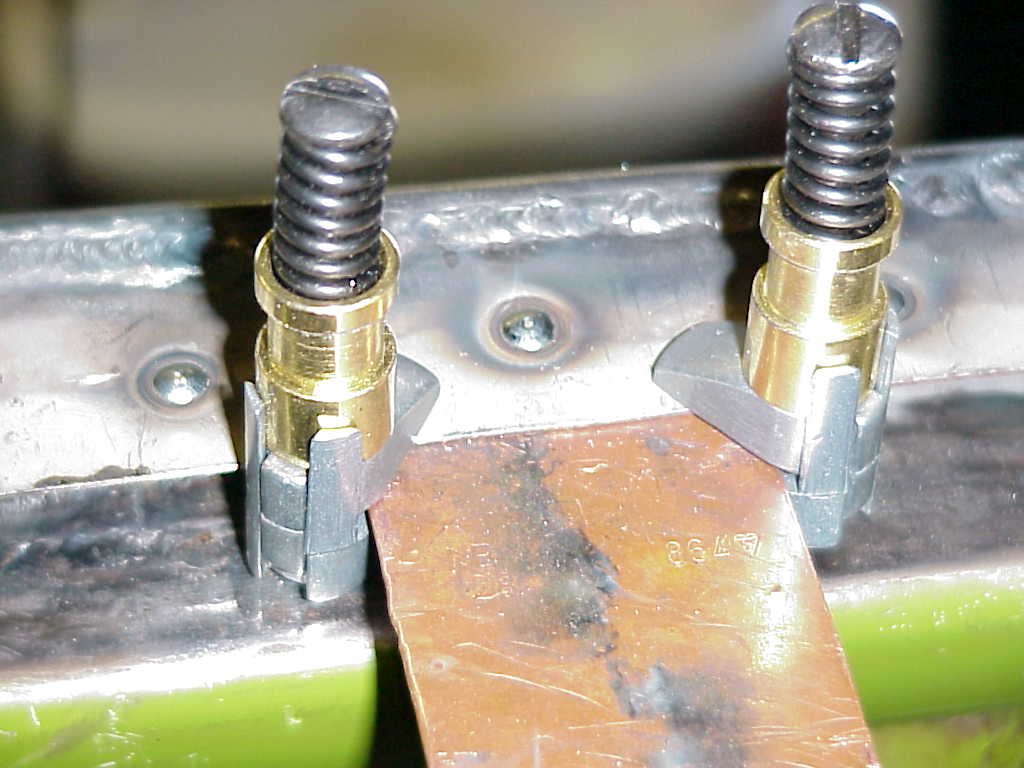
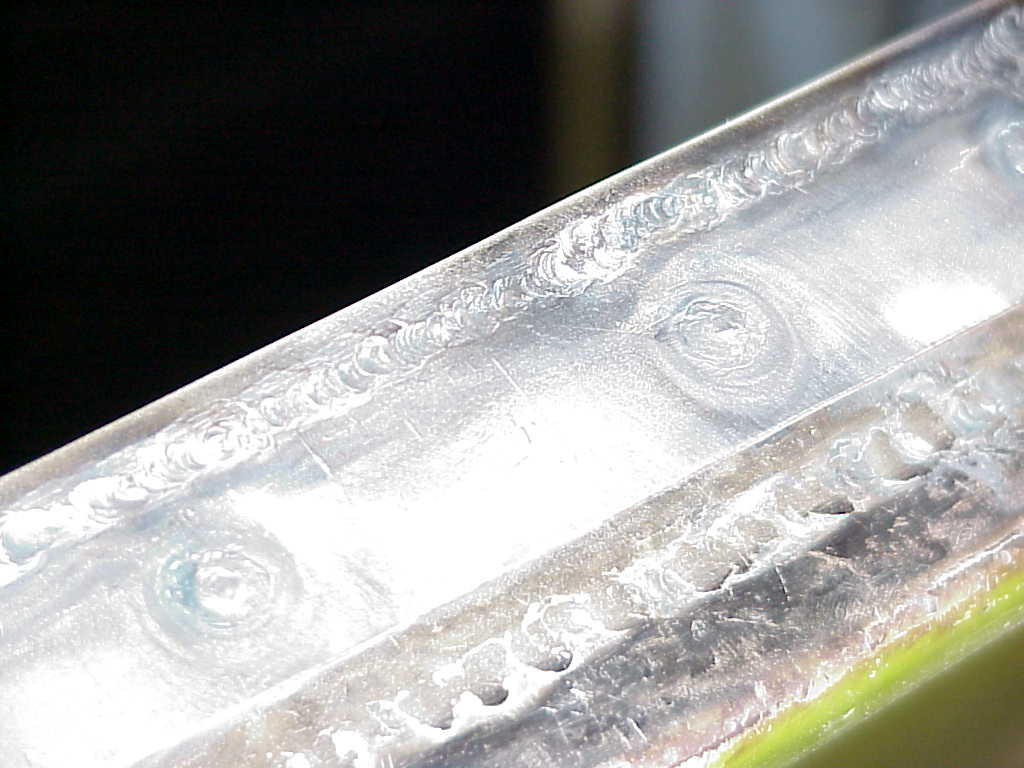
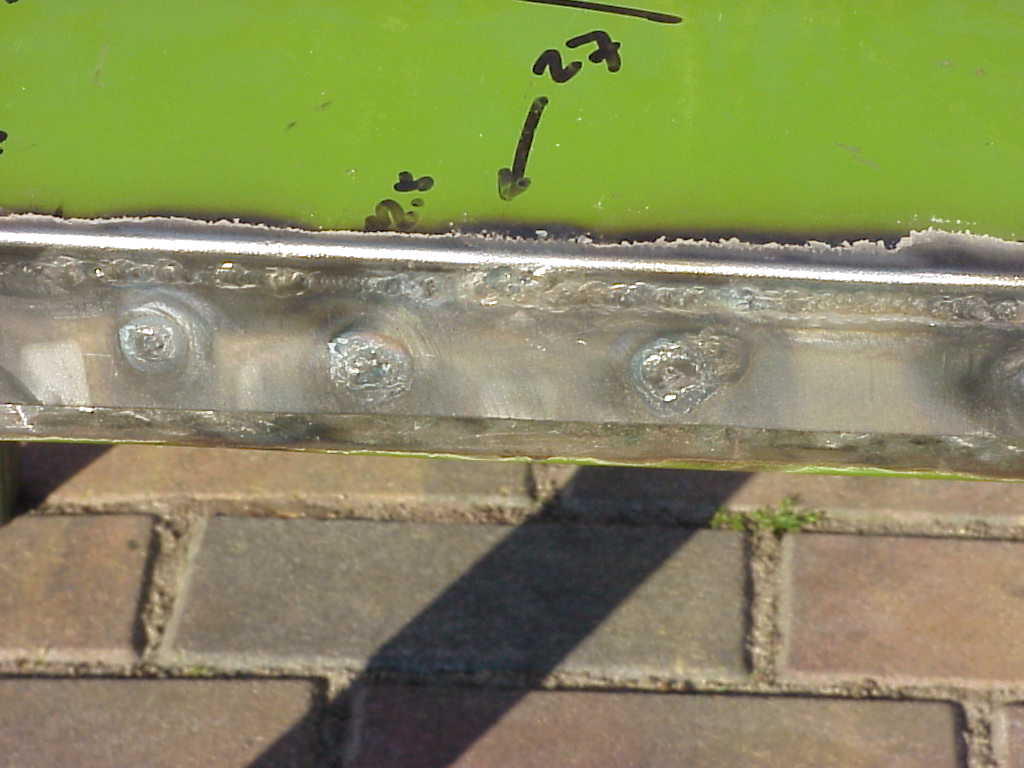
Now the new part is ready to be welded in. Again, I used the MIG/MAG welding technique for making the spot welds. I used a small thin copper plate underneath the spot-weld, see figure 8. The copper plate is put in between the lapping parts and is fixed with a very small G-clamp.
The copper plate prevents burning holes the steel and does not stick to the weld. It allows you to make well-penetrated welds with a flat backside easily, provided the copper plate is in close contact with the backside of the weld. You can see the result of the spot welding in figure 9.
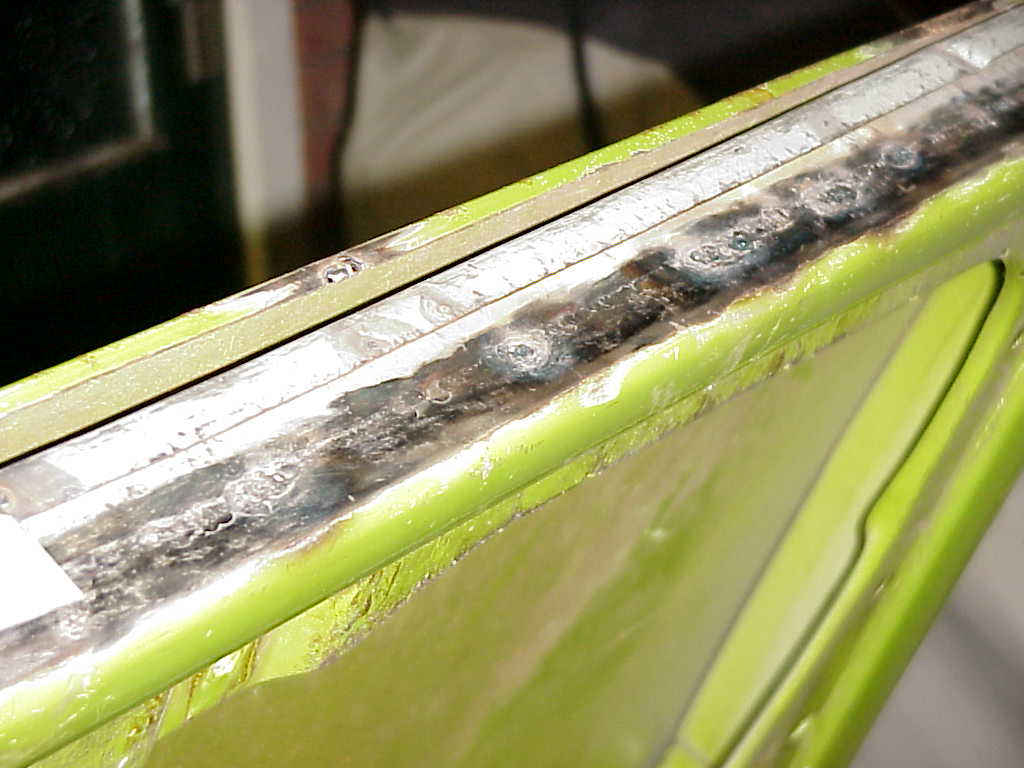
After the spot-welding was finished, the spot welds were grinded and the new piece was fully seam welded by using the TIG welding technique. With the amperage set to as low as 10-15 Amperes, the "flow" method was used again to "melt" the two metal edges together.
The holes that were used by the blind fasteners were closed by MIG/MAG welding. Again a copper plate was used to keep the backside flat so only very little grinding was necessary here. See figure 10a and 10b.
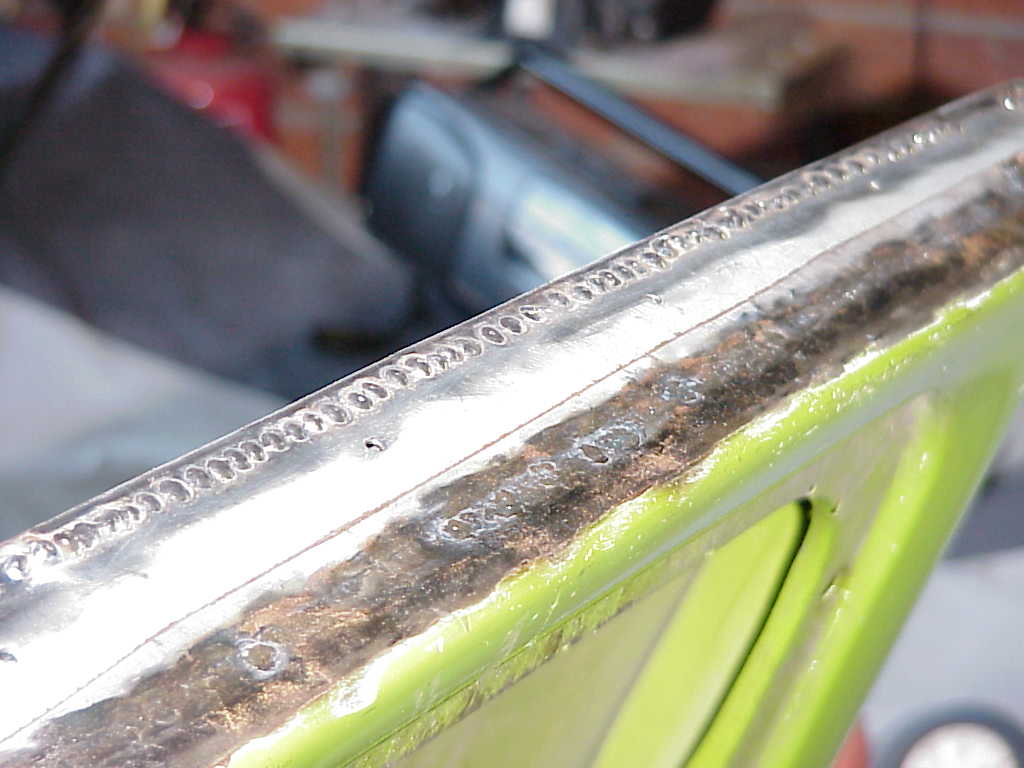
Let's take a closer look at the TIG-welding results, see figure 11a and 11b. Although the TIG-process is much more difficult to learn than the MIG/MAG welding process, it produced beautiful flat welds where very little grinding was necessary.
The final result can be seen in figure 12a and 12b. The bottom of the door is completely renewed, and only needs some decent rust protection to prevent it from rusting in the future.
For more technical information on TIG-welding please refer to a technical article about TIG- welding that can be found here .
(c) Ir. A.S.H. Westenbroek