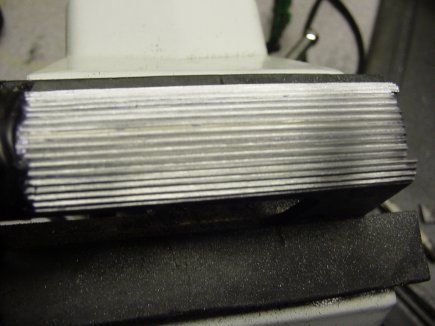
Here I began using slide lapping compound. I started out with 600 grit compound. This stuff looks like gray putty. I mixed a bit of cutting oil into it with a paintbrush and liberally coated the rail surfaces on the frame and slide with it.
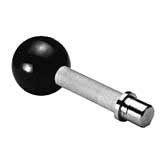
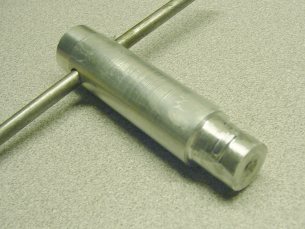
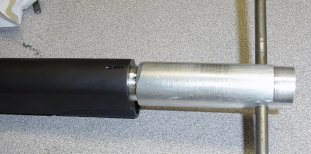
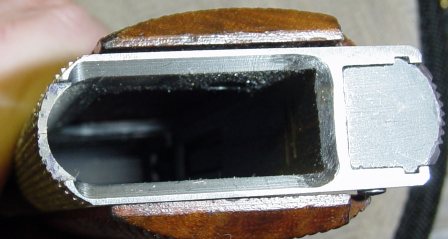
At this point, it was nearly impossible to move the slide with your hands. I needed to make a lapping handle that would allow me to apply some leverage to the slide to get it moving. Brownell's makes one of these, but I wasn't crazy about spending $40.00 for something I could build with my lathe in about 15 minutes. Theirs certainly would have been better made and more comfortable, but the one I came out with did the job. A photo of it is below. To make the "tab" that fits into the bushing slot, I simply turned a high "ring" at this point, and then removed the tool from the lathe. I removed the rest of the "ring" with a belt sander and file, leaving a fraction of it to form the "tab." Now this tool would fit into the bushing slot, and a hole drilled for a crossbar would help give me more leverage. I debated borrowing the ball handle from my Dillon reloading press for a handle, but in the end, quick and dirty won out.
Lapping the slide is a lot harder than it sounds. It took me about three hours, including making the tool, spread over a couple of days before I got the slide to the point I could easily move it. In the last hour I went to 800 grit compound, and finally to 1000 grit for a finishing touch.
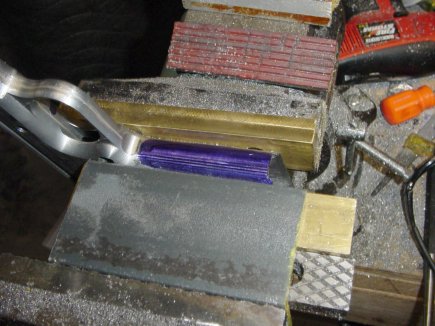
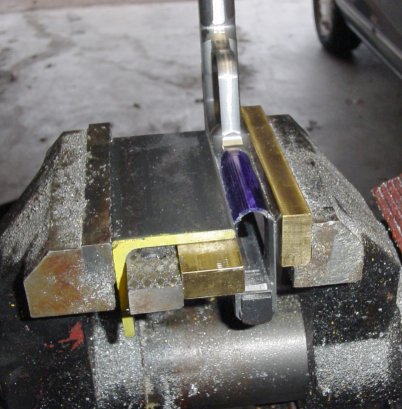
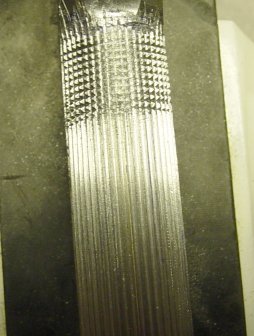
The edge of the angle iron gave me a straight solid surface to rest the edge of my file against as I began to lay out the "verticals." The way you lay out the verticals is, the file cuts a row of grooves with every pass. You take a few strokes to deepen these grooves, then move the file over a bit to use the existing grooves as a guide to cut new grooves. You only need to use the angle iron to cut one good straight set of grooves, then you use these as a basis for the rest of them. This was difficult and took a fair amount of concentration to keep the file from jumping out of the grooves, especially once I began to get near the edges of the frontstrap. Layout dye was used liberally during this process to help measure my progress. When you have the frontstrap covered with a set of parallel grooves, you use a triangular needle file to deepen them. This, by far, was the most time consuming part of the job. I estimate I spent about four or five hours just doing this. I found myself using the tip of the file as a scraper more often than not; this seemed to cut faster than laying the file in the groove and actually "filing." Before I began deepening these grooves, I'd used a round needle file to cut a shallow "trench" across the top of the frontstrap to provide a stopping point for the tops of the grooves. Despite this trench, I still found myself occasionally gouging the area past the top of the grooves. I soon put a few layers of electrical tape over this area to help stop that, as you can see below.
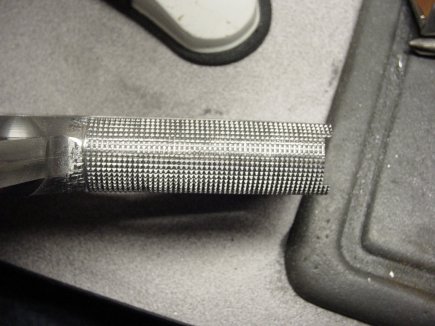
Finally I had brought the vertical grooves to their final depth and was ready to start laying out the horizontal grooves. A similar jig was needed here to make sure the file was cutting straight across the frontstrap. I hunted around in my junk box and came up with an SKS sight pusher. This clamped perfectly across the frontstrap and provided a temporary straight surface to guide the file. Now, I was dreading cutting the horizontal grooves; as long as it'd taken to cut the verticals, I was sure I was looking at another 4 or 5 hours of filing. Fortunately, not so! I found that I could quickly cut the horizontals to full depth with only a half dozen or so strokes of the checkering file. Below you can see my first row of horizontals (and the ugly gouges up near the trigger guard.)
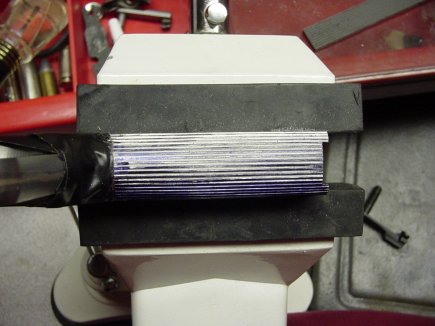
It only took me about an hour to cut all the horizontals, and deepen them fully. I did it all with the checkering file, too. I noticed that you must be careful, though, when moving the file over to a fresh row. It is very easy for the file to jump out of the grooves and cut where you don't want it to. I soon realized I needed to pull the file backwards a few times to create a light series of notches to help the file stay in place. In the first photo below I have finished cutting the checkering. In the second photo I have removed the gouges under the trigger guard with a needle file.
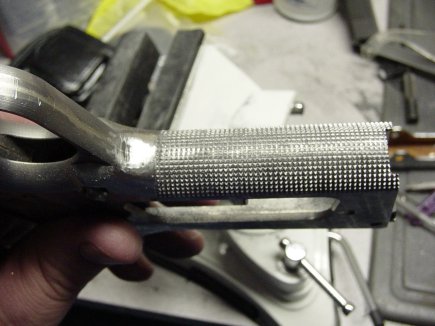
And that's it for checkering. I was pretty proud that I hadn't botched it by this point. I have to give the highest kudos to PvtRyan for his incredibly detailed, well written, and unbelievably informative checkering pages! Blindhogg, also, saved me about $100; he gave me the angle iron idea, and kept me from having to buy a checkering jig. Like most garage smiths, I really hate paying big bucks for a highly specialized tool that will only be used maybe once a year, at most. I try to find a way to get by on the cheap, especially on these occasional jobs. I suppose if you're Ed Brown, having the best jigs makes sense, but for me, I really can't justify it.
Anyway, on to the next job!