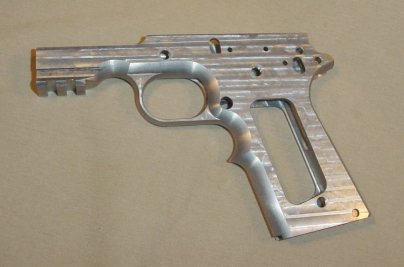
As you probably can see from the photos, the frame was machined in two halves, then brazed together in an industrial furnace. This is obviously a departure from the usual manufacturing methods, but I have been reassured of the strength of the weld. Also, the designer saw fit to include a finger grip and tactical rail extension on the dustcover. At this point I wasn't sure what I would do with these, but I decided to leave them for now.
To do the actual cut I chose to use a 1/16" thick slitting saw, and clamp the frame upright on my angle plate. Below are a couple of photos showing how I set up the frame for the initial cut. The tactical rail came in handy for a clamping spot; this area was much thicker than a standard 1911 dustcover. There are several ways to cut the rails, but I thought the slitting saw would be easiest to use and would minimize the chance for errors. With the saw being 1/16" thick I would have to make two passes to achieve the 3/32" width of the slot.
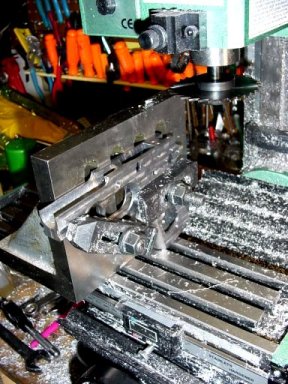
Here you can see me using the dial test indicator to make absolutely certain the frame is parallel with the spindle. A few taps with a light hammer lined it up nicely.
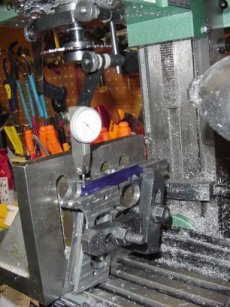
Before making the cut I painted the frame with layout fluid and used a dial indicator to position the slitting saw at the correct height to make the first cut. I checked the travel of the table first to be certain I would have enough room to cut the whole length of the rail. The mini-mill's travel was enough to do the job, but just barely. OK. Now to make the first cut.
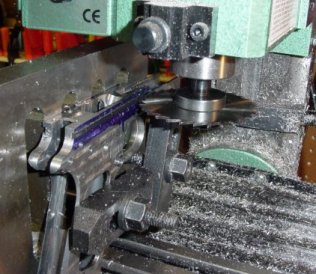
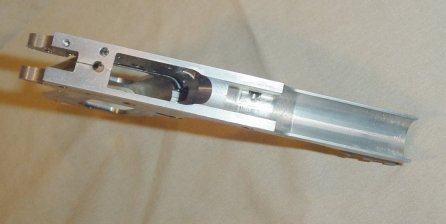
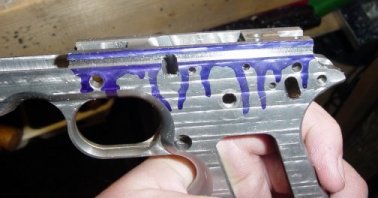
I ran the slitting saw at about 700 RPM, used plenty of cutting fluid, and fed the table slowly. I advanced the saw into the piece about .010 at a time, until I reached the dimension I'd set. The saw did a beautiful job. It didn't have the least problem making the cut. After the first pass, I lowered the quill the rest of the way and made the second cut. Then I flipped the frame over and cut the other side. Here is how it looked after the cuts were complete.
While the frame was clamped upright to the angle plate, I took the opportunity to cut the barrel link relief slot in the locking lug area. This is just a short groove that gives the barrel link room to swing down. I don't have any photos of this process, but it wasn't difficult. This is not a critical cut in any way, you just don't want the barrel link to touch metal. I used a 1/8" endmill and just eyeballed this cut, comparing it to the existing cut on my Sistema frame. I took a couple passes and that was finished.