<== Prev Page Next Page ==>
Fitting the Beavertail
A friend had given me an old stainless steel beavertail (I assume of Kimber or Wilson make), so I didn't have to buy one. Unfortunately I plan to blue this gun when it's finished, so a stainless part was a no-go. Luckily the stainless beavertail would fit nicely on my already-customized Sistema, so I simply stole its Ed Brown hi-rise beavertail for use on the new gun. It's painted a stainless steel color, but it is in fact blued underneath. So let's get started.
Brownells Hates Me
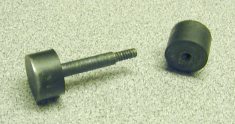
Brownells' sells the Ed Brown beavertail cutting jig that is designed to help you quickly and accurately cut the excess metal off the grip safety tang, without danger of going too deep. This jig is nothing more than a pair of .500" diameter steel buttons that screw together through the grip safety hinge hole, so once again my inner Scotsman manifested. I had some water hardening .500" drill rod lying around, so I simply turned down a 1.5" length of it until most of it would fit the grip safety hole. I left a .5" button on the end of it, and threaded the narrow end. I cut another .5" diameter button, and drilled and tapped it to accept the other piece. The Brown jig is hardened to allow filing right up to it, so I used my propane torch to heat my jig up to bright orange, and quenched it in water. I didn't bother tempering it. Testing it with a file simply removed the black oxide coating that quenching had given it, it didn't cut any metal. Voila! Another 15 minutes on the lathe had saved me $22.00, plus shipping. Don't get me wrong, I absolutely love Brownells', but I'd rather spend my money on parts instead of tools.
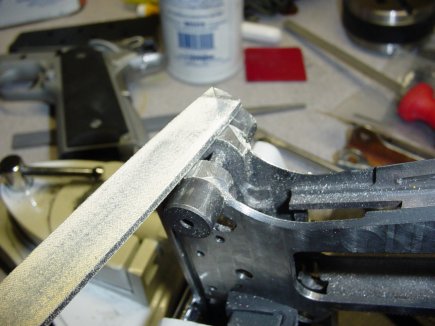
With the jig installed, I headed straight for the belt sander, which did a great job of removing most of the excess metal sticking out beyond the jig. I didn't want to get too close because a belt sander will cut even hardened steel. I switched to a file to take down the rest of it. I stopped when there was no more metal being cut, and the file was just skidding across the hardened jig.
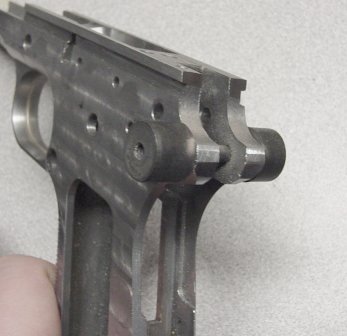
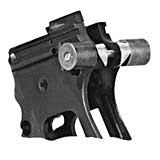
Now the grip safety dropped right in, but there was a problem. It wasn't pivoting down nearly far enough. I had to do some fitting on the surfaces indicated below before the part would pivot all the way in. Funny, it had fit into my Sistema fine.

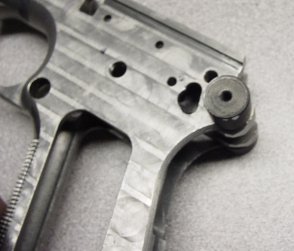
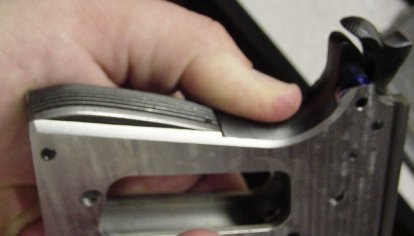
Now there was a new problem. The beavertail went too far in! Something wasn't quite right here. I grabbed my Sistema and compared the backstrap with the KT frame. The KT backstrap was about 1/8" higher than the Sistema, so the beavertail and mainspring housing seemed to be recessed too deep in their respective areas. Dammit! Now I was going to have to take at least 1/8" metal off the backstrap to get things fitted correctly. I could've done it with the mill, but in the end I decided using a file would be quicker. Well, a file, and the Dremel. Below I am removing the metal and blending in the beavertail.
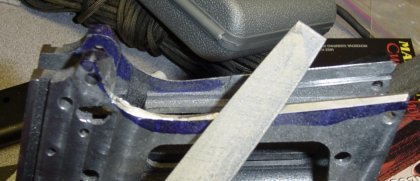
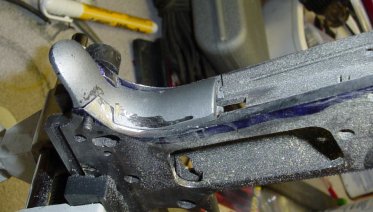
The following photos show the backstrap before and after.

While I'm on the subject, I should mention that the Colt mainspring housing I was using would not fully go into place. It seemed to stop about 1/8" short of where it should have been. It seemed the mainspring housing slots in the frame were not cut quite long enough. Quick solution: file off 1/8" from the top of the mainspring housing rails. Problem solved, but I wonder how many other parts I'll have to modify before this thing is finished.
Fitting the Trigger
The same friend who'd given me the beavertail grip safety had also given me a brand new Burns "hard use" trigger. By now you should not be surprised to learn that quite a bit of filing was required on this as well before it would fit correctly. I had to take about 1/16" of metal off the top of the trigger to get it installed. Then there was so much friction in the trigger stirrup slots in the frame that the trigger would bind, and not move freely back and forth. This was solved by taking metal off the outside of the trigger stirrup, and also using a diamond bit in the Dremel to deburr the inside of the frame, where the trigger stirrup rides. The problem was minor, and easily enough solved, but I admit I am getting a little frustrated struggling with this frame, and having to do extensive fitting to get every part installed. I suppose the consolation is that I should have a very tight gun by the time I'm finished.
<== Prev Page Next Page ==>
Home Page