
 |
Home |
Tutorials |
Exercises |
About Us |
|
|
Lesson 6
Assisting Tools

- Eye Dropper Tool - Takes color samples from colors on the page and displays Tool them in the Color Boxes.
Select the tool, click on the color in the image you wish to sample. The Color Box will display this color.
- Hand Tool - Allows you to move around within the image.
Select the tool, click on the spot on the page, hold the mouse button down, drag to move in the area
.
- Magnifying Tool -Magnifies or reduces the display of any area in your image Glass Tool window.
Select the tool, choose Zoom In or Zoom Out in the Options bar, click on the area of the image you wish to magnify or reduce
.
- Rotate View Tool -Rotates the canvas
Select this tool and click and drag outside of the canvas and the canvas will turn. Hold Shift to make sure that the canvas will snap to certain degree points
.
|
Lesson 7
Layers
- Photoshop lets you organize artwork on separate transparent layers. Think of layers as a stack of acetate sheets one on top of the other. Where there is no image on the sheet, you can see thru the sheets laying below, and behind all the layers is the background.
- The graphic to the right displays the layer palette of the document on the left.
- The layers palette lists all the layers in an image, starting with the topmost layer.
|
Lesson 8
Parts and Function of Layer Pallets
Legend:
- A- Show/Hide
- B & G- Paintbrush icon and highlighted layer: indicates the layer is active
- C- Link/unlink
- D- Add a New layer
- E- Delete layer
- F- Layer Content Thumbnail
- H- Palette Options
|
Lesson 9
Adding and Deleting Layers
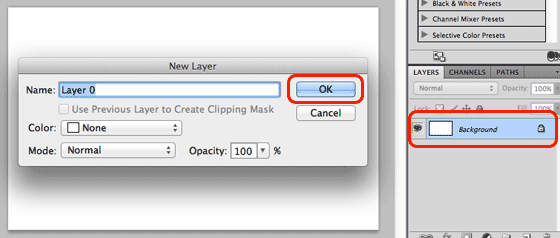
To unlock layer:
- Double click the layer and click "ok".
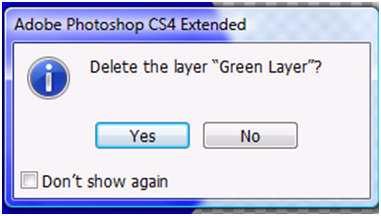
To delete layer:
- Click the layer.
- Right Click.
- Click "delete layer".
- And click "yes"
|
Lesson 10
Saving your files
- Click "File", the Save As".
- Change the name of the file and, click "save".
- If you want to save your work as jpeg file.
- Click "File", the "save as", Change the name of the file.
- Click "Format", and cange to jpeg.
- Click "save as".
|
|
<<<
|