This tutorial intends to help
you learn the basic techniques employed in the creation of the 3D animation: The
Hunter - Iria the Computer Animation, which was created on a bedroom PC.
In
part 1 we discussed Preparation
In
part 2 we covered story boards
In
part 3 we briefly look at Myce Port
In
part 4 we'll make a Japanese castle
Tutorial
Part 4:
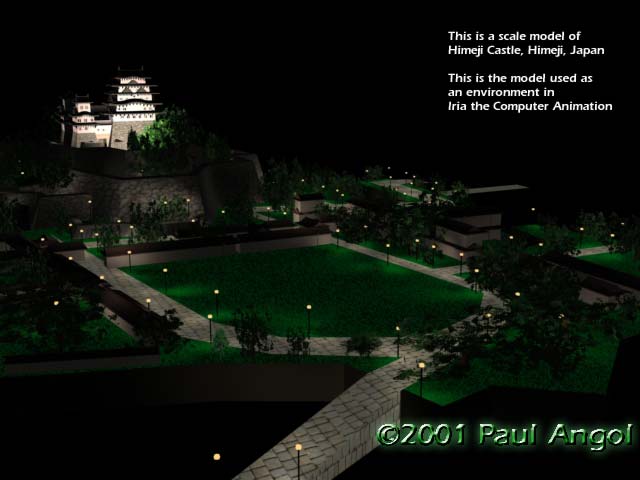
Environments: Hijime Castle
How
to build Hijime Castle
Step One: Get some
photos of the building, as many as possible. If you can, also get some schematics
of the building. This will help when you are setting out the dimensions for your
objects.
Step Two: Create three boxes. Make sure that they are the right size and shape
to fit the three towers on your schematics.
Step
Three: Create the Sanomaru and Honmaru surrounding environments using opacity
map trees and simple primitive shapes and extrusions to create walls. You may
use glow effects for the lamps.
Step Four:
Create a flat box about the same area as each box you have created for the towers.
This will be your generic roof. Extrude faces on this box to create the tiers
and enough additional faces to shape the box into the traditional Japanese gable
design.
Step Five: After spending a good
deal of time shaping your gable roof create the struts that will fit under it
using simple primitives. Attach theses struts to your roof.
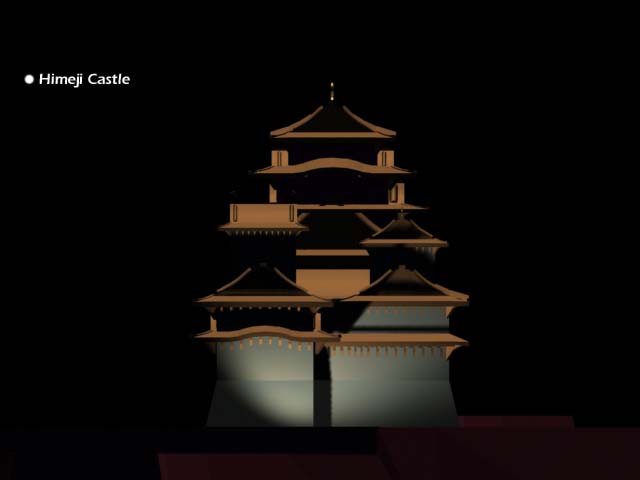
Step Six: Extrude your towers to fit in with schematic design from all angles,
and create authentic material maps. In this case make sure to include moss, and
weather marks on the towers and at the base of the stone masonry. Create bump
maps to give the stone masonry texture.
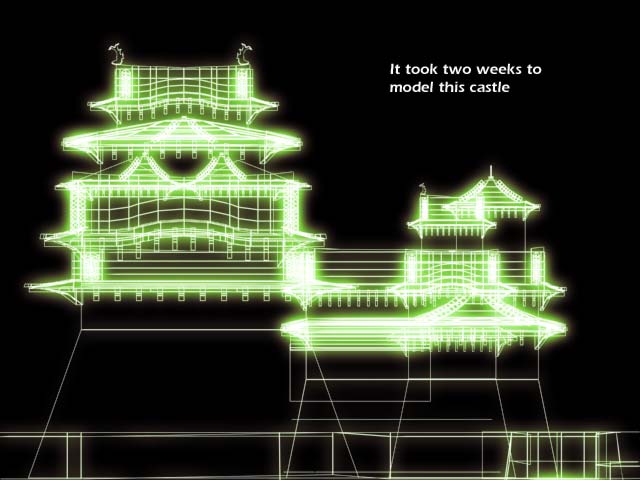
Step
Seven: Duplicate your gable roof enough times to create each required gable and
modify each one to fit in with your photographs and your schematic. Create sachi
ornaments to fit on top of each exposed gable. Et voila: Hijime Castle.
Next:
Tutorial Part V: Interiors
Download
The Hunter (MPEG-4 or MPEG-1) here.
Iria
(c) 2001 BANDAI VISUAL et al
*Miss
Croft is based
on Eidos Interactive's Tomb Raider series