| Reminder: Keep area and all components as clean as possible
1. Remove the three plastic covers under the car. 2. Remove the one bolt holding the windshield fluid bottle. Undo the ABS plug to get more room if you need. This plug has a unique locking mechanism. To unlock, pull straight up on the cover of the black plastic plug. This motion will cause the plug to mostly disengage from the ABS unit. To completely disengage, gently pull the plug towards the front of the vehicle. You can then lift the washer bottle straight up until it is free. Set it off to the side a few inches. You may have to pull up pretty hard to get it loose. Just make sure you don�t rip any of the connections out. See picture below. 3. Remove all of the torx bolts holding the intake to the engine. Size T40 4. Remove and label the two rubber hoses going to the EGR valve . The EGR valve is built into the intake manifold just before the manifold splits from one to 6 ports. 5. There is a corrugated pipe connecting into the intake manifold at the EGR valve. Remove the screw holding the clamp on this corrugated pipe. This is done from the top of the engine. You have to reach under the intake manifold to remove it. 6. Remove the clamp and separate the pipe from the EGR valve or you will not be able to remove the manifold. 7. From under the car remove the bolt holding the EGR valve to the bracket coming off the engine. You will have to jack up the car and lay underneath. It will be easy to see from underneath. You will have to reach up into the engine compartment to remove it. 8. At this point you should be able to remove the manifold but remember there is an o-ring one the EGR so it will take a little effort to separate it. 9. Once the intake manifold is off discard the long flat intake manifold gasket and the o-ring inside the EGR. Also be sure to cover the intake and the ERG so nothing falls in. I used wide blue painters tape to cover it up. You can also use rags or whatever you like. 10. Clean the two flat surfaces that the long intake gasket contacts. If the intake manifold has been removed in the past, it is likely that the mechanic used silicone RTV gasket sealant when re-assembling. It is important that you completely remove this RTV from the mating surfaces of the engine and the intake manifold in order to get a good seal upon re-assembly. Be especially careful to prevent any RTV or dirt from entering the intake ports. 11. If the manifold looks like it is restricting airflow you should soak it in B100 or something else strong to remove the build up inside. 12. Installation is just the opposite. 13. You can use some tape or some silicon to hold the gasket in place when you are reinstalling. It is unnecessary to cover the entire sealing surface with Silicone RTV. Always use a new metallic intake manifold gasket every time the IM is re-installed. The gasket does not have to be perfectly positioned at the start. You will be able to move it once the intake is in place. 14. Before reinstalling any of the bolts make sure the intake seated properly at both ends. It should be pushed all the way down on the EGR and flush at the head. Try getting it on the EGR first. 15. Install the bolts on the head first and torque to 20 NM then continue with the EGR bracket bolt, clamp, tubing and the washer fluid bottle. |
| Intake Manifold Removal |
 |
 |
 |
 |
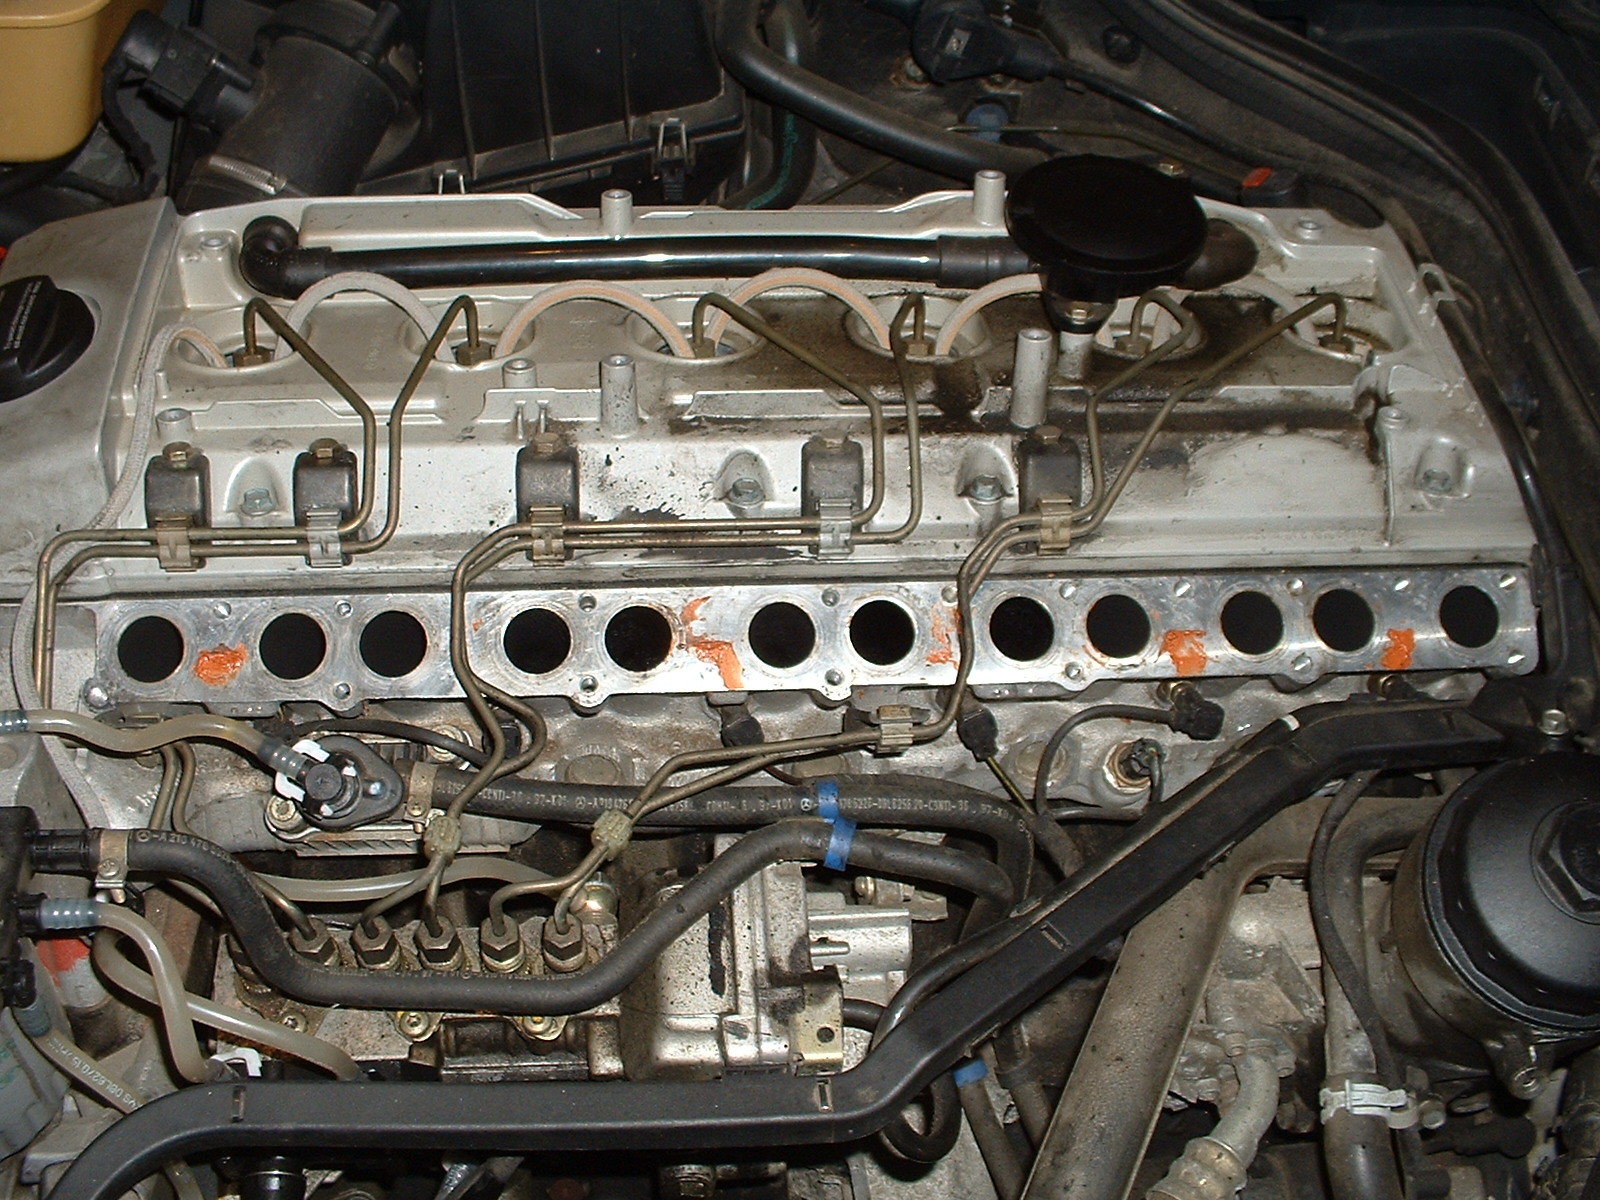
| Intake Removed |
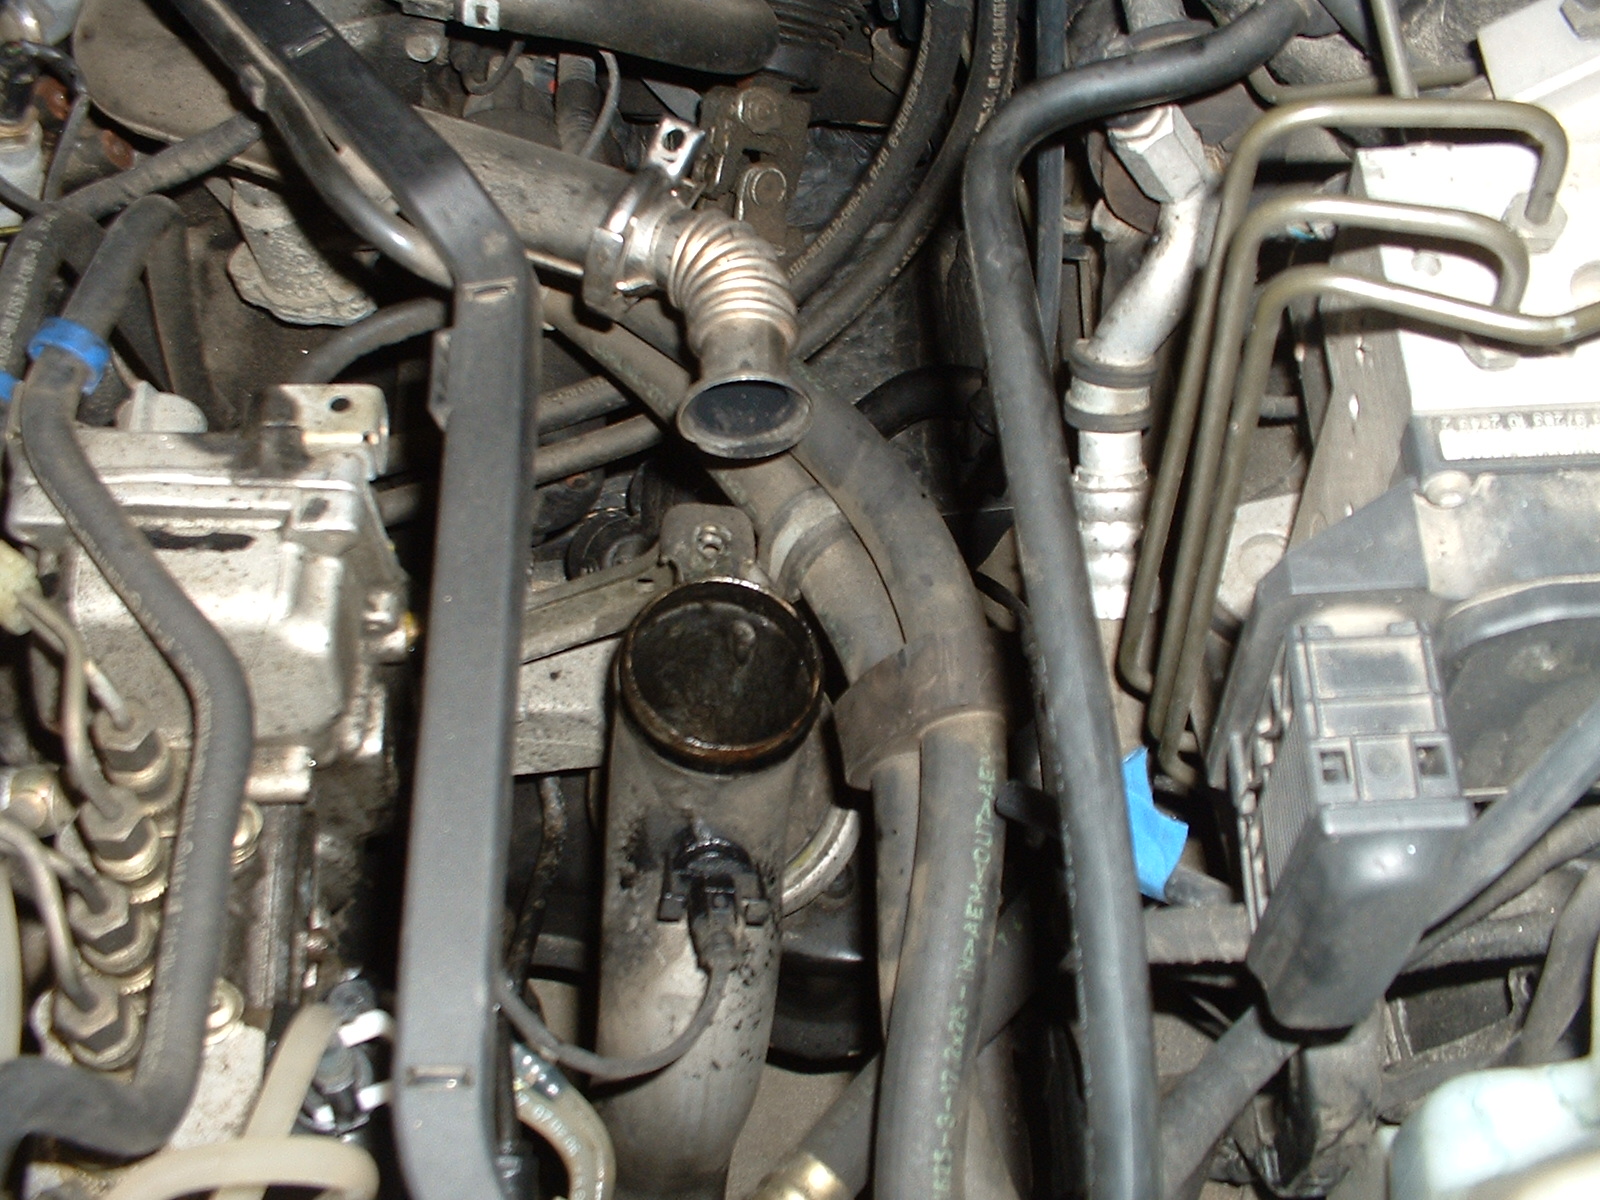
| Front View with Intake Removed Arrow Points to Location of Screw to Be Removed from Underneath |
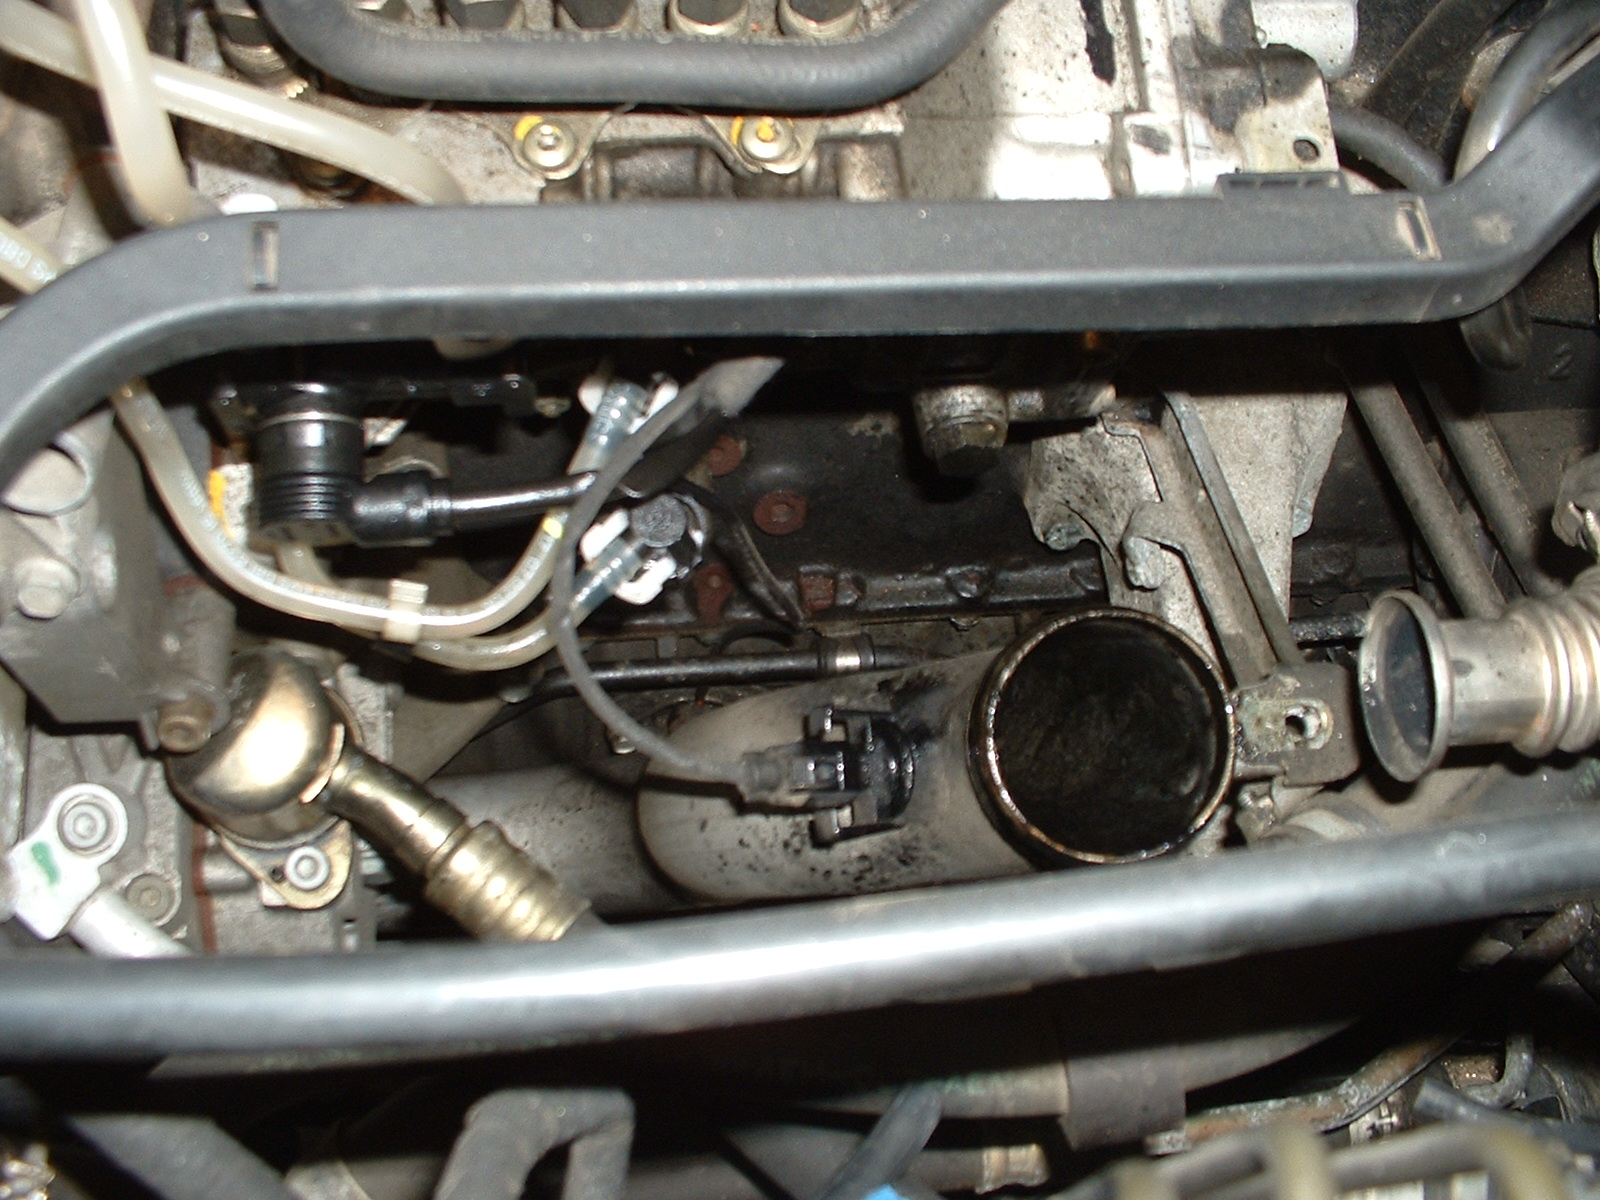
| Top View with Intake Removed |
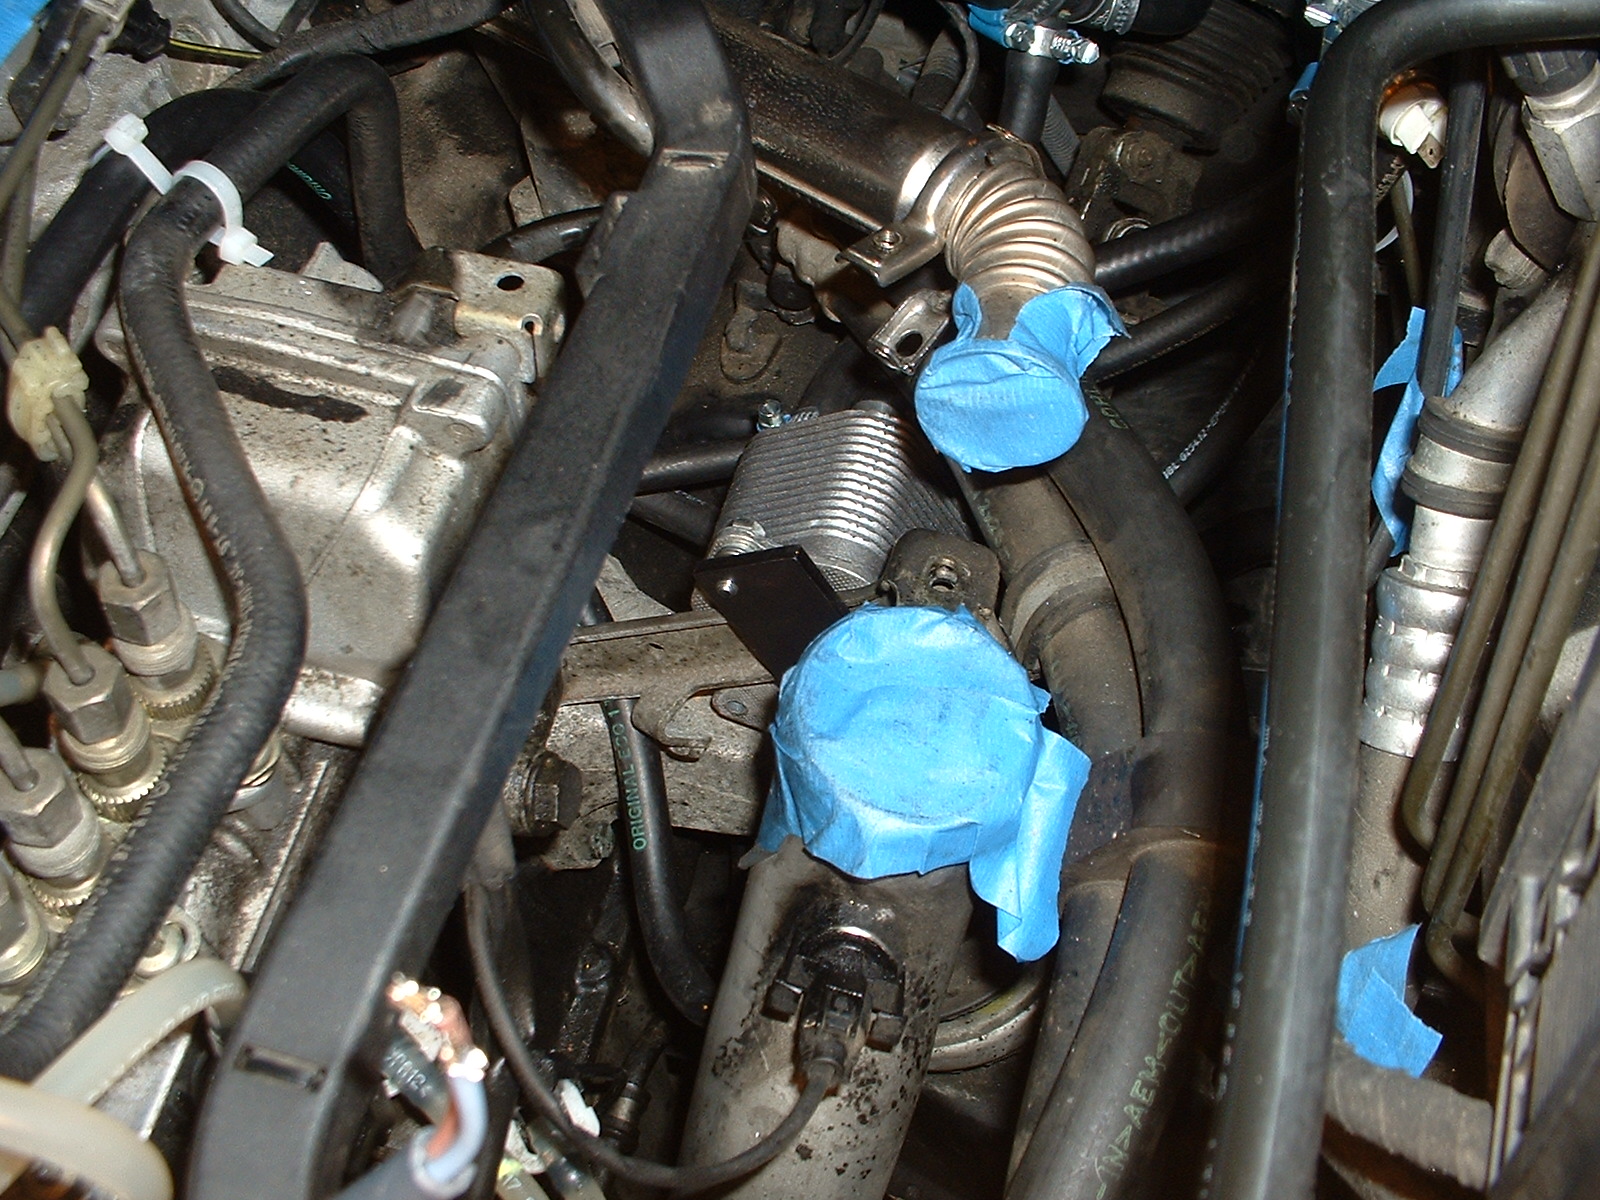
| Intake pipe and EGR pipe Taped |
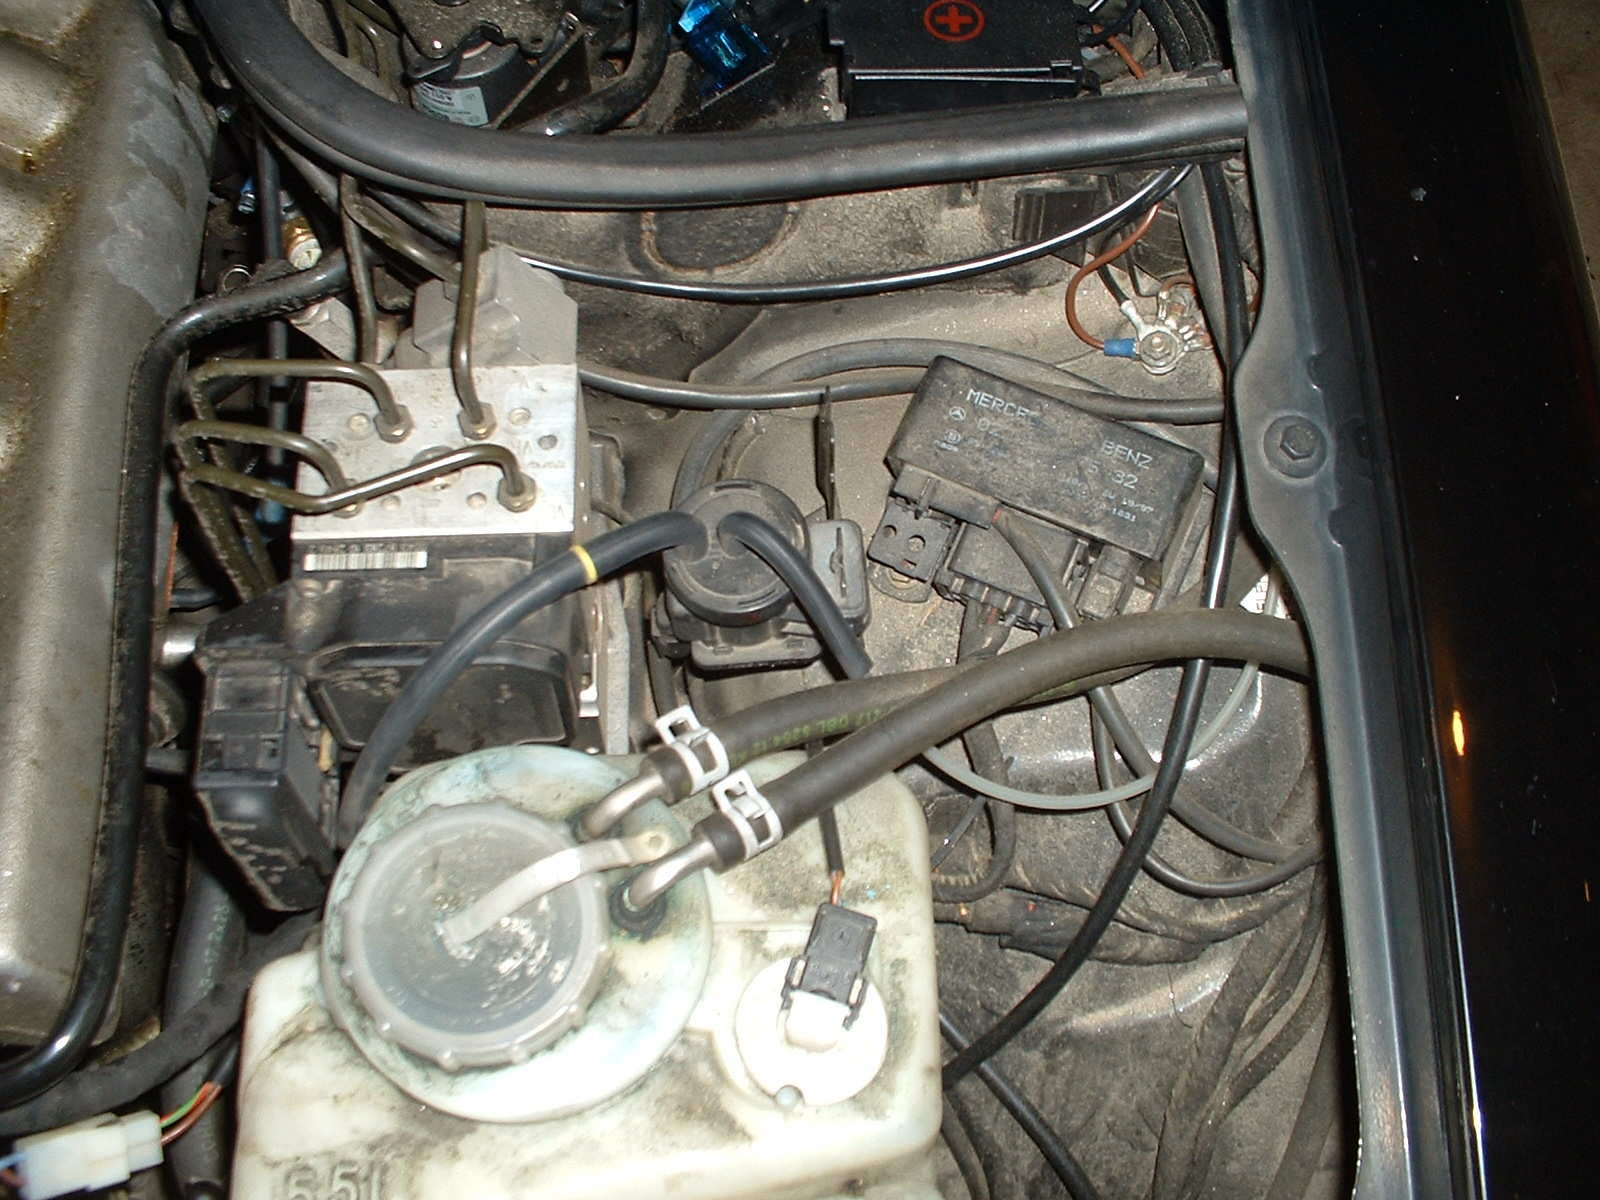 |
| ABS Plug is located at theTop Left Corner of the Wiper Fluid Bottle. Bolt is Located at the Top Center of the Bottle and Can Not be Seen Here. |