bodywork
gearbox swap
differential swap
bodywork
paint
engine
ignition
carburetors
suspension wheels & tires brakes
interior
audio
before & after
parts lists

shows
the shop

home

Both floor pans had to be cut away and replaced. I bought the premium kit from Motorsport Auto, which had the original style stampings. The crossbar for the front seat mount was left in place and rear seat mounts were taken off and rewelded back onto the new pans. A support brace that came with the kit was welded underneath. Cutting away and welding in the pans is not for the half-hearted restorer.
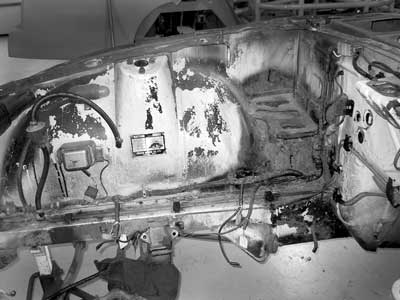
I remember when I bought the car the owner said the car had no rust. I found out just how wrong he was when I dismantled the engine bay. The battery tray area was rusted beyond belief. The tray was taken out and thrown away, and a aluminum tray was fabricated to replace it.

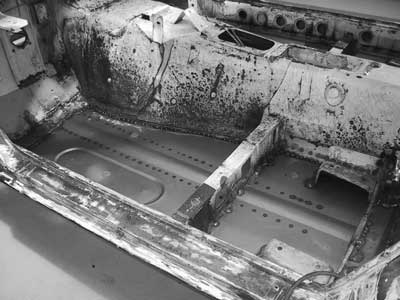
All the metal under the tray was rusted. So all of it was cut away and replaced with heavy gauge steel.

The portion of the framerail from the torsion bar mount back to the firewall was rusted through as well. This section was replaced with thick steel.

All steel replacement pieces were cut, shaped, and welded in by my father.

After spending many hours on my back under the car, I regretted not taking the effort to setup a rotisseri. The underbody was stripped and patched up. It was painted with a undercoat spray. You can see here that the wheel wells are complete. My alternative to a rotisseri was what I call a "hospital cart". Welded square stock with casters, was my own brainstorm. A couple of tack welds to the frame and a strap was all I needed to secure it.
I needed to push the car in and out of the shop many times to use the sand blaster I bought from Eastwood. Here I finished blasting the entire engine bay. I spent the next few months finding blast material in the most peculiar places.
Hosted by www.Geocities.ws

1