This is the menu bar, click here to navigate around the site!
HOME
Modeling Home
My Models
205025 (2H hampshire DEMU)
Page last updated 24/03/04
 Soon after joining Hampton Court Model Railway Society in April 2003 I decided it was about time I tried my hand at a kit, or conversion. In the short time I had been there, and through joining the Souther e-mail Group I developed a passion for all things SR EMU, so this was the obvious choice.
 I did not have the first clue about what to build, or indeed how, so I turned to fellow member Jonathon Hall for some help (you only have to look at his site www.metropolitanrailway.co.uk and click on 'my models' to understand he was the man I needed to talk to!). After much deliberation we decided that the best option would be to build a 4-CIG EMU by cutting up old hornby/tri-ang Mk1 coaches, taking out the window strips, cutting them up and re-ordering them to suit the profile of the CIG. This idea was chosen as it is cheap, and reletavely easy, this was important as I had never ventured away from ready-to-run products before. The parts needed for the conversion were:
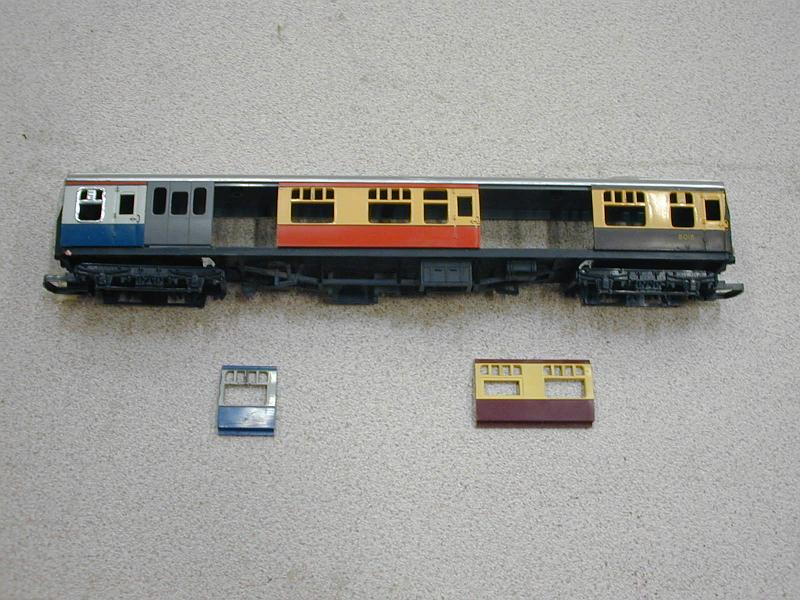 The first step was to dismantle the Mk1's, this is easily done by removing the screws from the underside of the coach, then the roof can be simply pulled off and the sides will fall out. Next the Mk1 bogies need to be removed, depending on the coach these will either require a screw to be undone, or they will need their permenant fixings drilled out. The Mk1 bogies will not be needed again and can be discarded or put away for other projects. You will now need to find some pictures of the prototype before attacking the coach sides. Then next, and most difficult task it so cut up the coach sides to suit the profile of the CIG. For this you will need a razor saw and miter block. Carefully study prototype pictures before cutting anything, and mark on the coach sides with pencil where you intend to cut. Try to waste as little of the side as you can, you will find here that unless you buy a lot more coaches there will have to be some compromise, my model for example has far too many toilets, only 7 Mk1 type windows on the trailor coach rather than 8 as some of the ones used were to 1st class profile rather than 3rd. It is probly best to do this stage one coach at a time, I started with the DTC's (driving trailor composite), make one, then make another coach identicle for the other end of the train. This is where the great thing about old Hornby/Tri-ang Mk1's comes in, as soon as you have cut out a section of the side it can be slotted back inbetween the roof and floor of the coach (you will have to remove the small pieces of plastic at the top of each end of the side strip to do this). This makes it easy to see which bits you have cut out, which bits you have left to do, and how they all fit together. Hopefully you will have enough bits of side to do all the 4 coaches and should cut them all up untill you get to the stage where all the sides have been cut up and placed in the sides of the Mk1 shells.
 To make the driving cab windows you will need a toilet window section, these need to be enlarged sideways with a file on the top half. You should use the DC kits driving cap etched windowframes to measure where you need to enlarge the window, using a prototype picture to help you. The toilet window goes lower than the driving cab windows, so the the bottom part of the window will need to be filled in. Use some .10 or .20 thou plasticard and glue a piece behind the lower part of the window, then use some filler over this to fill the recess of the window. When the filler is dry it can be filed into profile with the coach side and the etched driving cab side window glued above it.
You will now need to make up the sides for the MBS (motor brake standard) and TS (trailor standard) coaches. These are constructed in exactly the same way, with the ommition obviously of work for the front ends. All the internal ends of the unit will need their details removed including buffers, footsteps and piping as this is not present on the CIGs. 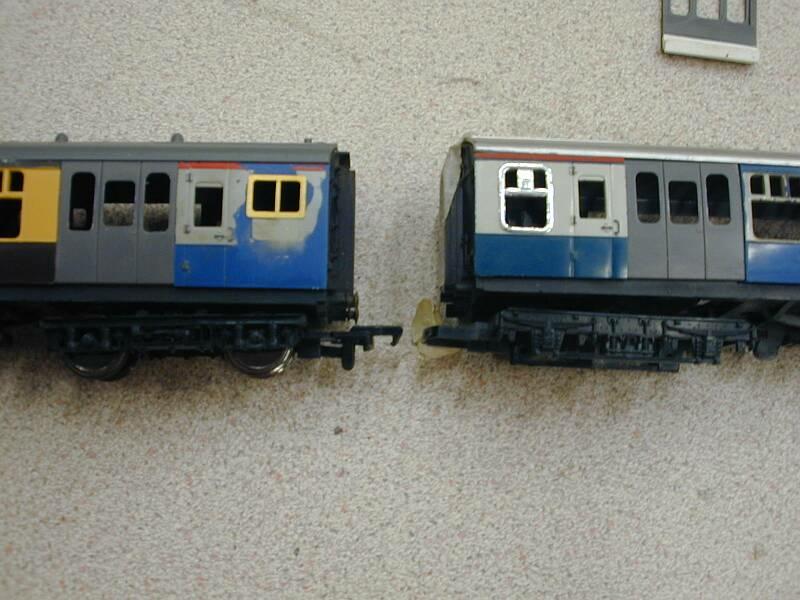 The coaches should now look a little like the sides of the CIG, do not worry if there are some small gaps, for these you should asses the size of the gap and decide wether you need to fill the gap with filler, or wether it is big enough to require a slither of coach side to be cut and fitted into the gap (the later option should be used for any gaps of more than about 1mm.) There will of course be many imprerfections and areas which will need work later, but for now the next job is remove all the sides from the coaches, do it one at a time, also it is a good idea to mark which sides join on to which other parts. Then as you go lightly sand down the ends of each section you have cut. Cut of a piece of plastistrut (about 10x40 thou), which is long enough to cross all the joins in the coach side. Apply some plastic glue to the ends of the pieces of coach sides and apply preassure to stick them together. Then apply some glue to one side of the plastic strip and attatch this along the length of the inside part of the coach side. This must be left to dry, and can then be inserted back into the coach.
 You will need to assemble the front end, if using the MJT casting the corridor connection and buffers will need to be stuck to the end piece with super glue. Next you will need to take one of the DTC coaches and saw off one of the coach ends so that it is flush with the sides. Check that the end will fit correctly by placing the end against it. Once this aligns as well as possible glue it into place with some strong 2 part glue. you will need to apply the glue to the end where it attatches to the floor, and sides of the coach but not the roof as this should be left removable.
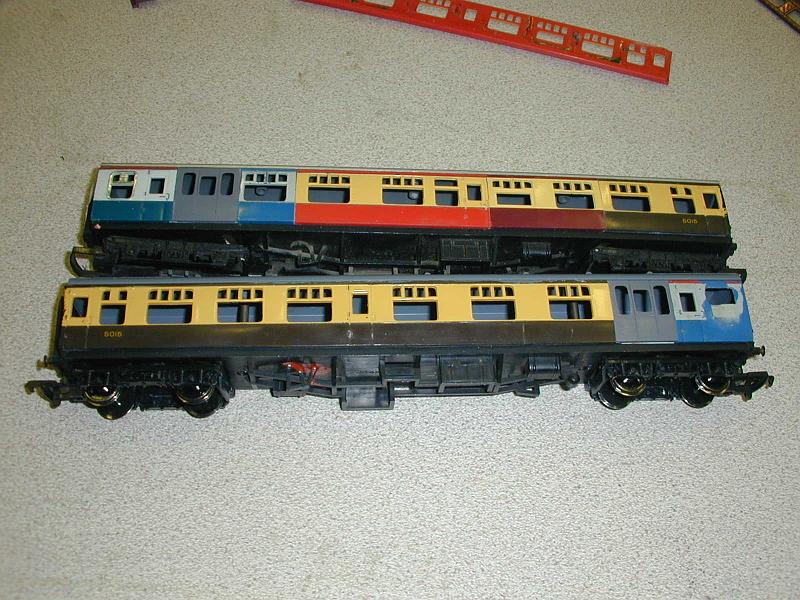
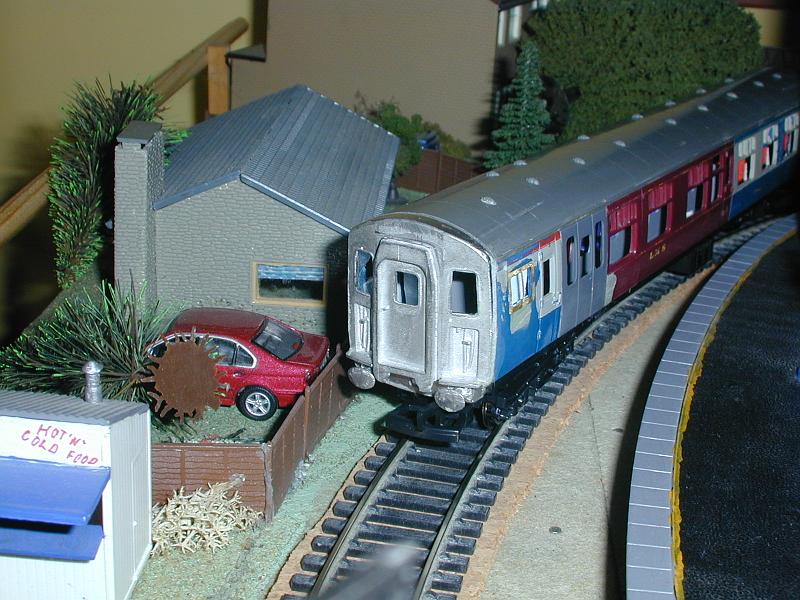
Your train should now be begining to resemble a 4-Cig, the cabs will be attatched, and the sides more or less as they should look. If the train has been made from several different liveried Mk1's it will look very interesting with a mixture or many liveries on each coach, a little like mine! Using some prototype photos you can now work on the roof. First you will need to remove all the moulded roof vents with files and sandpaper. You can then measure out approximate possitions for the new cast scalloped dome coach ventilators which can be perchassed from MJT. Next you can drill small holes for the ventilators and then after removing the vents from the sprue they can be pushed through the roof and secured with a dab of super glue. The air horns and box which is on the front of the roof can then be attatched by drilling small holes for the air horns and supergluing them and the box in place. Note there are two different sizes of air hornes, which should be placed on the correct side of the roof. The box at the front is also not central on the roof, you should consult a photo before placing these items. 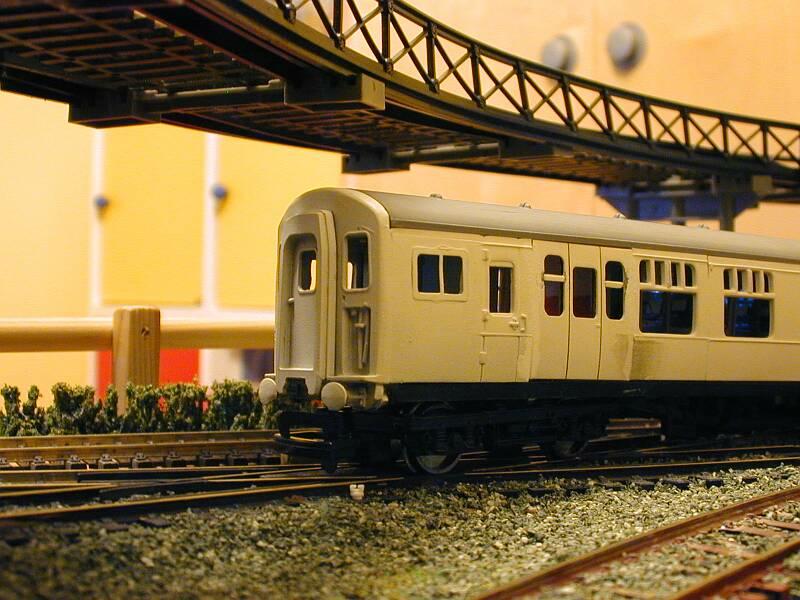 Interiors for the coaches can also be made up using the old interiors out of the Mk1 coaches. The interiors of an EMU are quite different to those on the Mk1 coaches. Depending on which CIG you are modeling you may or may not need 1st class compartments (some south central cig's have had their first class compartments removed, others have had them downgraded to 3rd class). Most CIG's have 4 compartments for the first 4 windows of the DTC and the rest of the train exept the guards compartment it all standard open seating. This will require 2 sets of 1st class compartments to be cut from the Mk1 coach interiors, the rest of the interior will need the compartment doors removing and also the partions above the seats. I find it best to do this with a razor saw and an unnessisarily large stanly knife. You will then need to cut a floor section out of plasticard, this will need to have some holes cut into it to allow the parts of the floor to fit around the Mk1 floor. The seating can then be glued to this in a suitable position. Prototype photos will be needed to determin the seat colours used on particulare units. Remember that the first compartment is 3rd class on all units. depending how much you care about your interior you may (as I have) want to fit antimasacars and mirrors made of paper and allumilium foil to the first class compartments. The seating pieces should fit into the coaches easily and remain removable. Toilets can be made up from plasticard or from attacking the toilets from the original Mk1's.
If the B4 bogies need to be made up (I used replica ones which do need assembling, others such as those by Bachmann are pre-built). It would now be worth fixing the bogies temporarily to the trailing coaches (DTC's and TS). These should not be permanently fixed as they will need removing for painting. The Bogies and interiors will need to be removed from the coach in preperation for painting. To prepare the surface for undercoat they should be washed in warm water to remove any grease. The 4 coaches can now be undercoated with an aerosol white undercoat Only the sides and roof will need to be sprayed. Once the first coat of undercoat has been applied it is time to remove and clean up imperfections. Small amounts of filler can be used to smooth the joints between the pieces of coach side. Tip-ex can also be used for this job, as Jonathon told me 'it's just like liquid plastic'. Once the filler has been applied and dried any exess and imperfections can be sanded off. The ridges on the coaches can be ignored if you will be painting the CIG in Corporate Blue/Grey, Network South East or South West Trains liveries as the paint will hide them, if you are painting the unit in Connex, South Central, Overall Blue or BR Green it would be wiser to remove the ridges. Once the unit has been fully prepared it can be undercoated again untill the livery of the existing Mk1's has dissapeared. One of the most important tasks of the project was to fit the motor and motor bogies. I enlisted the help of Jonathon Hall from my model railway society to fit the motor. He removed a large section of the floor to fit the motor removed from the Lima class 73. Pieces of plasticard were used to hold the motor in place. The motor bogies were placed around the motor and the sand boxes and conductor rail shoes. The other motor bogie was fitted through a hole in the motor coach floor. The motor was then connected up and tested. The motor did work quite nicely, and when weight is added to the coach the performance is improved further. The train is now ready for painting. 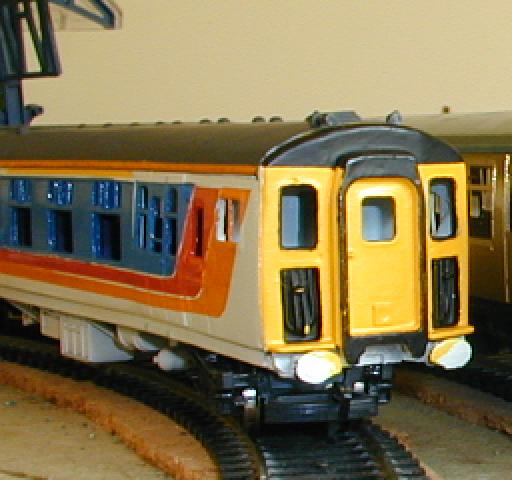
Painting a unit is very dependant on the livery in which you are choosing to paint. My unit will be in South West Trains colours, one of the most difficult! I first gave the entire side of each coach 2 coats of Silver White paint, after this had dried I masked off the middle section of the unit using Tamiya Masking tape which was applied to the coach sides and at the unit ends I cut a off a small piece and cut a curve into the tape with a craft knive while stuck to a cutting mat, I then removed the tape from the mat and applied it to the model to make the curved upsweap. Once the area has been masked I used Prescision Paints 'Stagecoach Blue' to paint the area, applying 2 coats. Once the paint has dried the tape can be removed. The same method was used to paint both the red and orange colour. I have painted the fronts in Railmatch 'Warning Panel Yellow (post 1984)' the whole area was painted with masking tape at the ends of the yellow area. Following this I maked the top of the unit to paint the black area, I unfortunatly painted it too low, and have since worked to correct this. I have fitted a Kaydee coupling to one end of the unit, and also to one end of my Lima 73109 (the south west trains thunderbird) so that I can drag the unit around my layout. All of the electrical equipment for these units is located beneeth the floor, mainly in the MBS coach, and the focus now turned to completing these areas. Accurate plastic moulings of underframe equipment are available from Southern Pride Models I purchesed a pack of their underframe components for a 4-CIG. The parts all need to be cut from the sprue, and some assembled. The components are somewhat pricey, but the work they save in creating your own components makes the investment worthwhile. Diagrams are supplied with the pack, but I found it nessisary to consult my own photos to find the locationsof all the components. These were secured with some MEK solvent adhesive. The underframes also needed some attention themselves, I had retained the original Hornby underframe trussing, removing just the parts that had integral mouldings I did not require. This left gaps in the trussing which I have had to in-fill with platistrut. This has not been a particularly easy task, and if future I shall remove the underframe trussing and replace it completely. Transfers are the next focus of work for the unit now that touching up the paintwork is complete. Some of the transfers I have brough from Fox Transfers who specialise in transfers for model railways. I used numbering sheets from Fox, which are of an exellent quiality although are rarther pricey. Also Overhead line warning flashes were used from the Fox range. For other transfers- the South West Trains branding and 'First' signs I made my own waterslide transfers using specail inkjet computer transfer paper. For intercoach couplings I shall use Kadee couplings. I think these couplings are exellent and allow for a lot of flexibility and ease of use. As the EMU coaches do not have buffers it means the coupling can be mounted (at the correct height using a Kadee height guage) underneath the corridore connection, allowing fairly tight coupling between coaches without the risk of buffer locking. Some more photos of the train to follow! (watch this space!) Model Built by James Stearn if you have any queiries or comments on this page please feel free to e-mail me at: [email protected] I hope you found this article informative. |
Thankyou for visiting Trains Today
|
