Paint Shop Pro Advanced
Week Four Part 2
Making Selections to
Minimize Color Spill
Often when you make a selection to be put on a new layer that is then placed over a different background, the color of the old background seems to cling to the edges of your selection. This is called a color spill. It can be one of the most frustrating problems you encounter while trying to create composites. I will show several ways to deal with color spill using this Magnolia image.
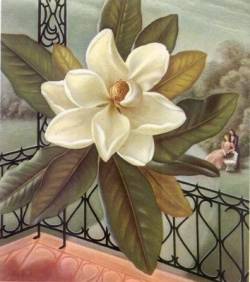
Sometimes when you see part of an image that you want to select, the background does not lend well to using the magic wand. What do you do? Most images have the selections waiting for you in the various color channels! I usually start with a color channel that has the most contrast at the outline edge of what I want to select. (In Photoshop we can also use the Select Color Range, but I don't see anything like that in PSP)
Create a Basic Mask
1. Open the image that includes the object that you want to select. We will look at the various color channels and choose one from which to start our mask.
2. Go to Colors - Channel Splitting. Check out the CMYK, RGB, and HSL channels. None of the CMYK channels looked like good candidates. When I chose HSL, the Lightness channel looked possible. When I chose RGB, both the Red and Green channels looked possible. I chose the Green channel to create my mask in although the Red and Lightness channels would have worked equally as well.
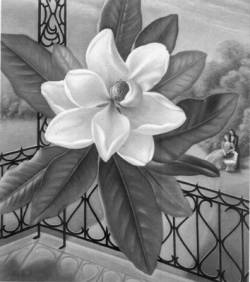
Green Channel
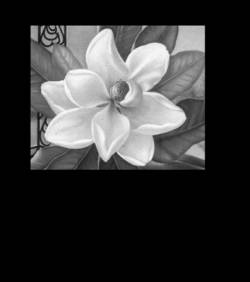
3. Get the selection Tool and select an area that just includes the flower. Go to Selections - Invert to invert the selection. Make the foreground color black and fill the selection with black. This saves you from having to later paint a lot with black to clean up the mask.
4. Press CTRL - D to deselect.
The results are shown on the right.
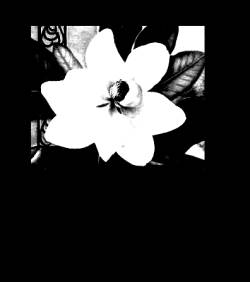
5. Go to Colors - Adjust - Brightness/Contrast. Brightness set to -20, Contrast set to +80. Click OK.
This gives me a good start to my mask. Notice how there is a well defined edge to my flower. Now it is a matter of painting inside the flower with white paint and painting outside the flower with black paint.