Paint Shop Pro Advanced
Week One - Part 1
Objective #1 Draw Tools Point to Point Line Tool
Objective #2 - Custom Brushes


I used the point to point line tool because it is closest to the Bezier tool that I am used to from Adobe programs. I placed the heart on one layer and the arrow on a layer above. I then erased part of the arrow to look as if it is behind the heart.
I used some custom brushes that came with PSP. I was able to change the size of the brush by using my graphics tablet set to determine the size by the pressure of the stylus.
Objective #3 Picture Tubes
Objective #4 Create a Brush

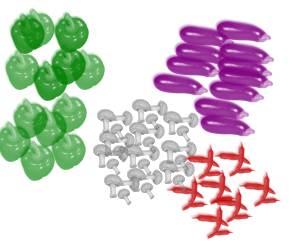
I created these brushes from the tube called vegetables.
This was done using the tubes that come with PSP. I used the graphics tablet to get varied sizes of the objects.
Objective #5 Eraser Tool

I opened the butterfly and filled the background with brown. I created another layer filled with white and put that layer beneath the butterfly layer. I erased all of the butterfly layer. Then I right clicked and un-erased the butterfly layer back using a woodgrain texture. Then using no texture I continued un-erasing the actual butterfly.