| HOW-TO PICTURE GUIDE ON HANDWEAVING |
| Handweaving Guide & Showcase |
| Links: |
| Email: |
 |

|
  |
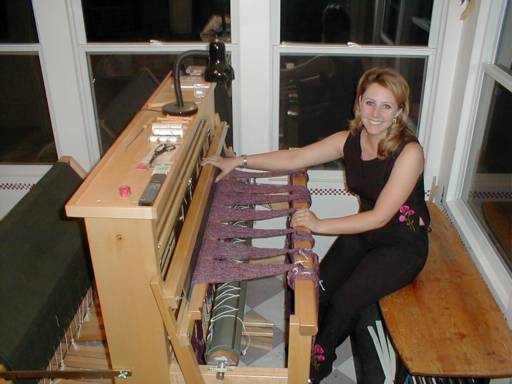
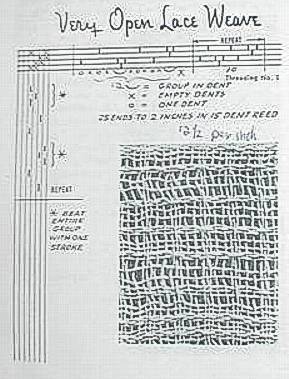
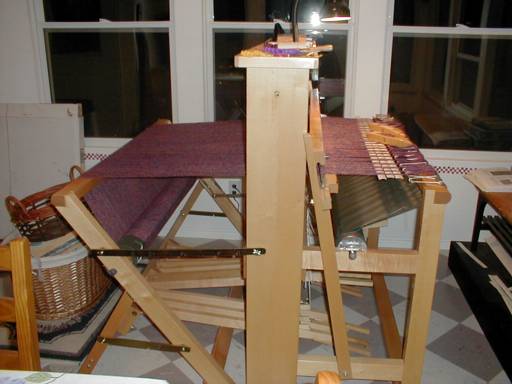
| This page will show you how I go through the weaving process. When I first began researching weaving on the internet I could not find a page like this so I hope it will benefit some of you out there. This page might show things done a little differently than some weavers, but this is my process of dressing and weaving on a floor loom. I use the front to back method of warping. I will walking you through a lace project 41"x 88". I will be weaving this cloth to be used for a curtain. Whenever I begin a project I first like to make sure I have enough yarn to complete the project. Most yarns are measured in YYP (Yards Per Pound) or give skein yardage on the wrapper. Click HERE to see a yardage calculation sheet I have made. Feel free to save and use the sheet as a guide to help you figure yardage needed for a project. After finding the EPI (Ends Per Inch) and knowing if I have enough yarn I choose a pattern. For this project I will be using a pattern out of Marguerite Davison's Pattern Book, 'Very Open Lace'. Below is a draft of the pattern that I will walk you through. Keep in mind that Davison's book has tie-up for counter balance looms so I will need to modify the tie up of the draft when I get to that point because I use a Jack Loom. I will show you that in a later step. |
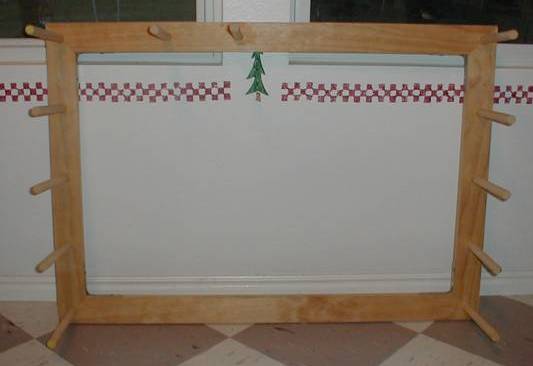
| The first step is to prepare the warp, ie. count off width by EPI (Ends Per Inch). There are several ways to acheive this by using a warping board, pegs, mills or sectional warp beam. I use a 1-yard warp board pictured below. |
 |
 |
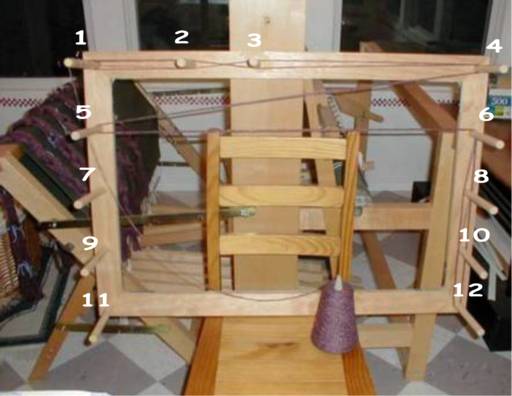 |
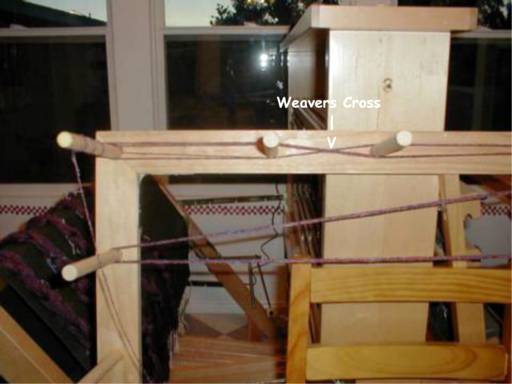
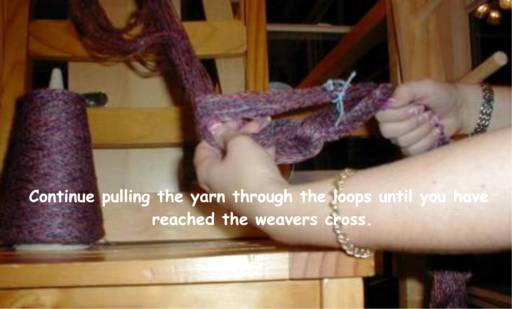
| For this project I will need a warp lenght of 3.5 yards. (88 inches+8 take-up+8 shrinkage+18 loom waste=122")(See Calc Sheet) I will need to wind 41"(width) at 10 E.P.I. To start tie the yarn to the number 1 peg.(see below) Now go OVER peg 2, UNDER peg 3 and around peg 4, 5 & 6 and down to peg 12. This gives me 3.5 yards. Now work back up to peg 1 but this time going OVER peg 3 and UNDER peg 2. This will form a Weaver's Cross. The Weaver's Cross is essential for sleying the read in the next step. Once you reach peg 1 I have wound 2 E.P.I. of 3.5 yards. I will continue winding until I have 10 E.P.I. on my board. |
| Once I have 1-inch wound (10 E.P.I.) I will secure my yarns with contrasting color ties. The ties go through the Weaver's Cross and each of the four arms of the cross. Also put a tie on each yard, this will help keep the yarns tidy and in order. Once I have secured the first inch, I will continue winding and securig until I have 5 inches on the warpboard. Now it is time time to remove the yarns from the board. |
 |
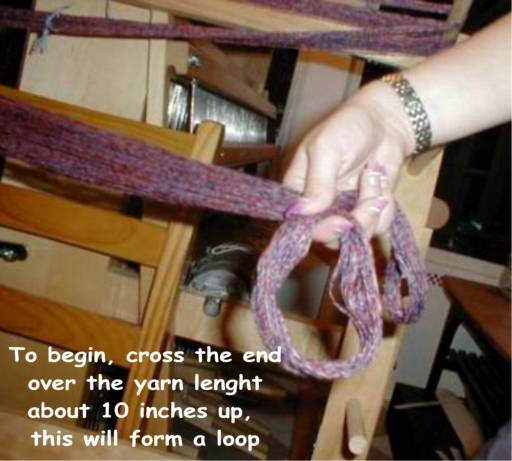
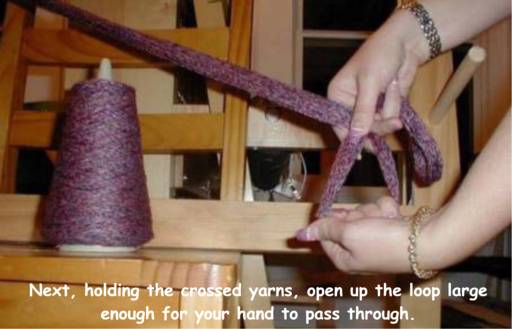
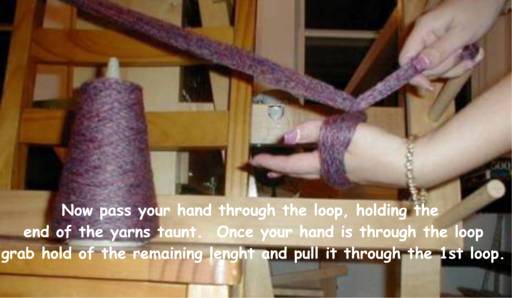
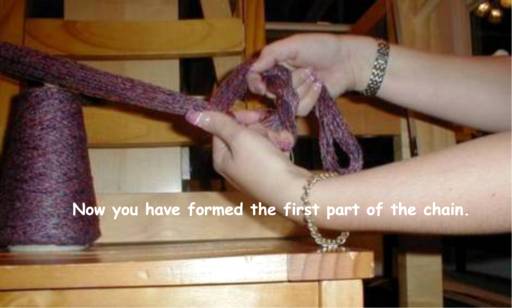
| When pulling off the inches, I chain the long piece of warp much like crocheting. This helps to eliminate twists and tangeling of the warp yarns. Once the inches have been removed, continue winding and chaining until you have 41" of warp. The pictures below will explain the chaining process. |
 |
 |
 |
 |
 |
| Step 1 |
| Step 2 |
| Step 3 |
| Step 4 |
| Step 5 |
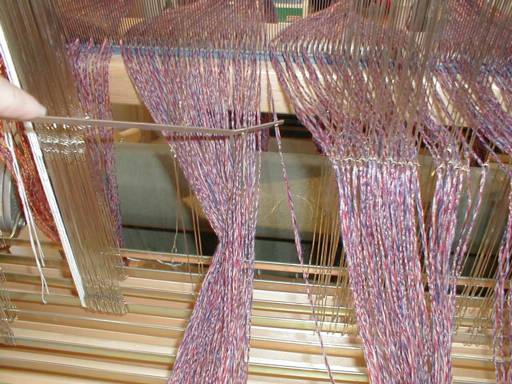
| Now that I have all of my warp yarns counted off, it time to begin sleying the reed. For this project I will use a 12 dent reed. Find the center of the reed, then divide the project lenght in 1/2, equaling 20 1/2 inches. Slip something (reed hook) through your center dent and measure out 20 1/2 inches. This is where you will begin sleying the reed. |
 |
 |
 |
 |
 |
 |
 |
 |
 |
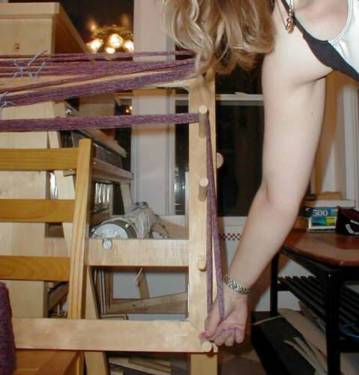
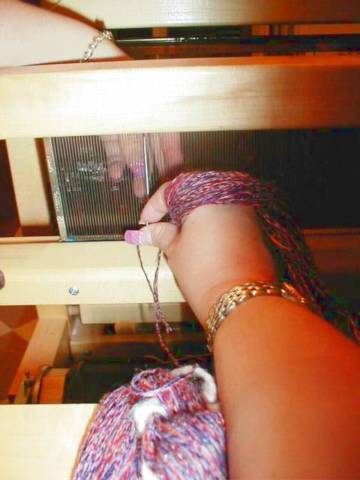
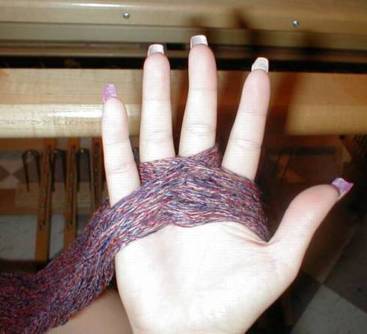
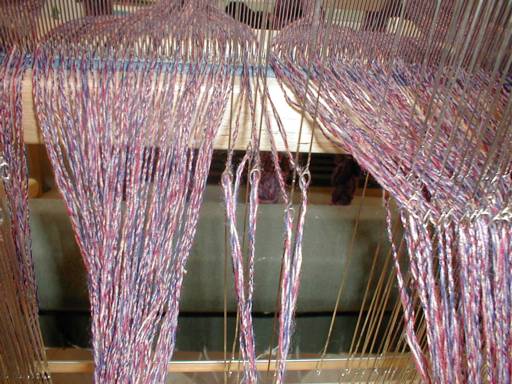
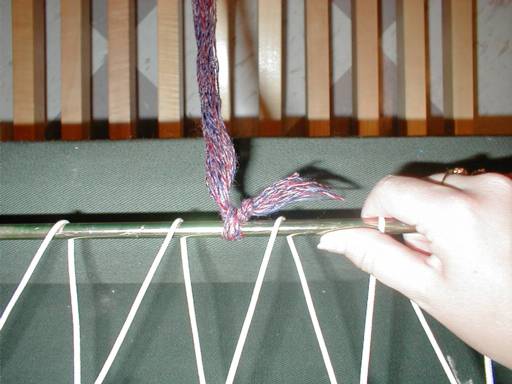
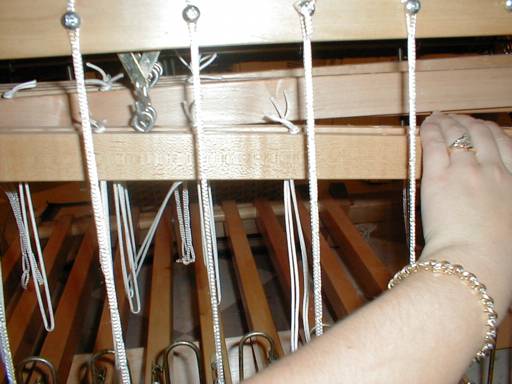
| Now I will get one of the chains that I just completed. Next I will tie on to the front beam with the chain. Unwrap the chain so that the weaver's cross extends about 6-8 inches over the reed. Keeping a loop on your chair drape the remaining chain over the front beam and bring it through the loop. Now the chain should be tied around the front beam. Now I will take the weaver's cross end of the chain in my hand. Then I separate the four arms of the cross and place them on my hand like this with fingers in between the cross much like the pegs on the warp board. |
| Now I will cut the ends of the loop. Try to keep this as close to center as possible. Remove all of the ties on each arm of the cross as well as the ties holding the cross. Now my hand should be holding the cross now with no ties. |
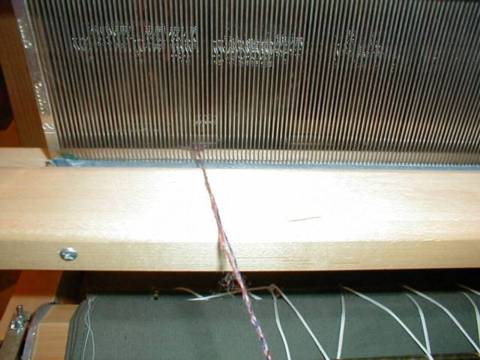
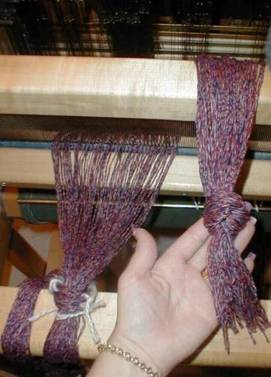
| Taking the top yarn from the cross, I will insert it into the first dent, 20 1/2 inches away from the center dent. This particular pattern calls for a sely pattern of 1dent, skip one dent, 1 dent, skip a dent, 3 yarns in one dent, skip a dent, 1 dent, skip a dent, one dent, skip a dent , 3 yarns in one dent, skip a dent, and repeat. This puts 10 ends in 12 dents. I will continue in this pattern until I have gone through all of my yarns. Once I have finished this chain, tie a knot at the end so that the yarns won't be pulled back through the reed. Continue sleying the rest of the 41 inches in the same manner. |
| Five inches sleyed |
| Tie knot |
 |
 |
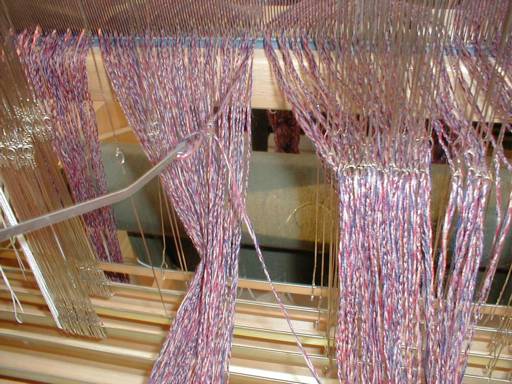 |
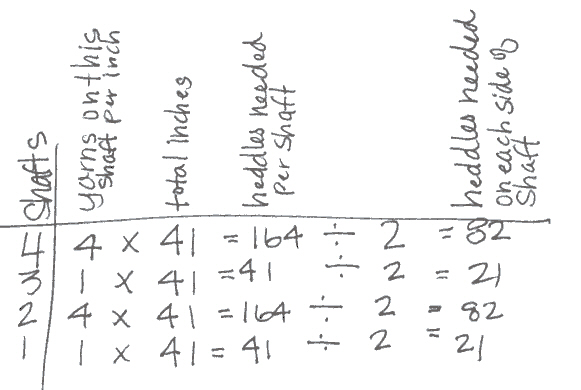
| Once I have all of my inches sleyed through the reed I can begin threading the heddles. Before I begin threading the heddles I see if I have enough heddles on each shaft needed for the pattern. My loom has a divider in the middle of each shaft, below is a calculation I use to determine how many heddles I need per shaft. |
 |
 |
| 4 |
| 3 |
| 2 |
| 1 |
| Now that I have my heddles figured out I always separate out all of the heddles needed on each shaft, then begin threading. The pictures below show the loom mostly threaded. To thread this pattern we pull the threads in this shaft order, 2,4,2,1,2,4,2,4,3,4 |
| Hook next yarn in the reed |
| Pull yarn through proper shaft |
| Yarns through heddles |
 |
 |
 |
 |
 |
| When finished threading inches tie loose knots so that your work will not be pulled out. |
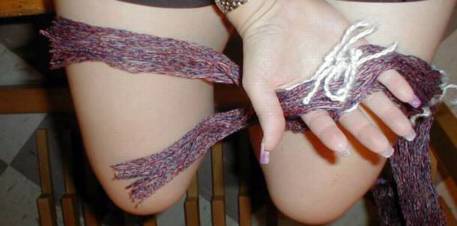
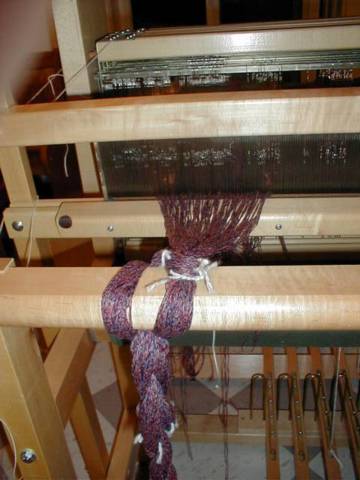
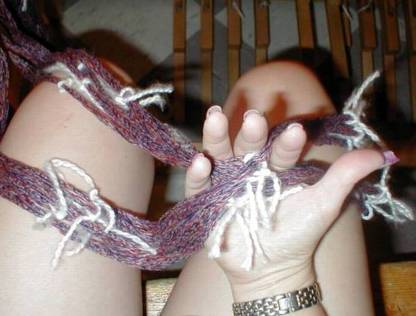
| The next step will be to tie on the the back apron rod. To begin, untie the loose knots and tie off the ends into inch increments with a knot as close to the end as you can get them. I try to get the ends the same lenght at the end before tying the knot. Now, I will take the center inch and bring it back to the center of the apron rod. Wrap the yarns under the rod, bring the end behind the lenght and bring the end through the loop and tighten down. I continue in this fashion until I have all 41 inches tie on to the apron rod. Work from the center out. |
| Wrap yarn under the rod |
| Bring end behind the lenght |
| Bring end through the loop |
| Tighten down |
 |
 |
 |
| One inch tied on |
| Half tied on working from the center out |
| 41 inches tied on to the apron rod |
| The next step will require two people, winding the warp onto the back beam. To do this release the break on the loom and untie the warp yarns on the front beam. Have one person crank the back beam while the other person holds the warp yarns taunt, 1/2 the warp yarns in each hand, holding tension on the yarns as they feed through the reed and wrap around the back beam. Occasionally stop and cut off the warp ties. If winding on a long warp, place warp sticks or heavy paper between each coil around the back beam so that you maintain tension. Continue cranking onto the back beam until you have 6-8 inches remaining in front of the reed. |
 |
 |
| Winding on to the back beam, knots are at the bottom of the beam, or a half turn |
| Stop winding when you have 6-8 inches in front of your reed. |
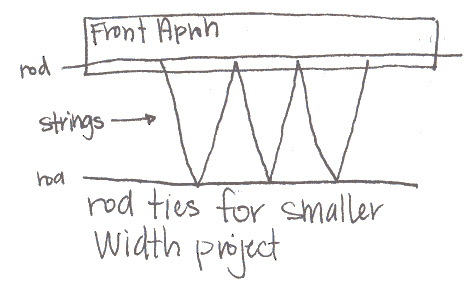
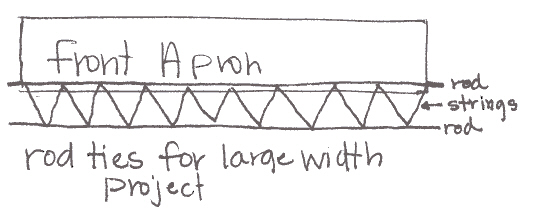
| Now it's time to tie on the the front apron rod. Because the project is 41 inches wide, I will wrap our apron rod with string all the way across the rod. If this were a narrower piece wI would want to only have the strings tied to the front rod as wide as the project. If I kept them the strings tied all the way across the rod for narrow project the rod would bend, bow towards the reed and cause the weft to bow also, See drawings. You will be able to see the rods and strings in the next few pictures. |
 |
 |
 |
 |
 |
 |
| To tie on to the front rod please see the next series of pictures for a step-by-step process |
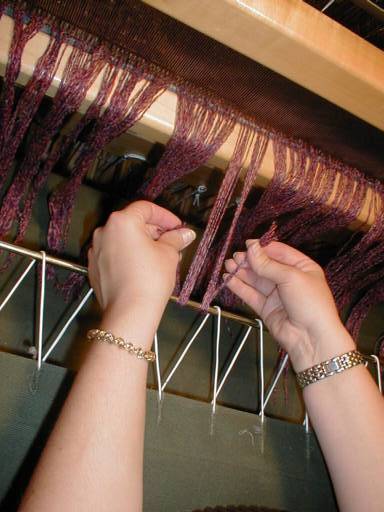
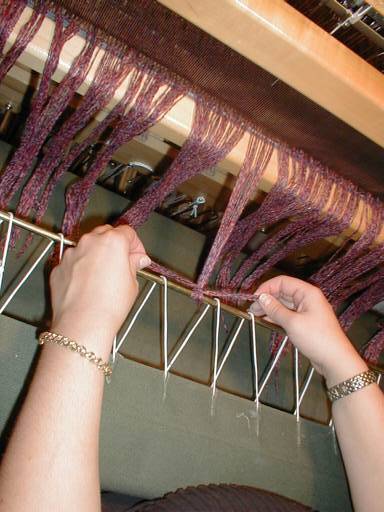
| Grab the 1st inch in the middle and divide into two halves. |
| Wrap each 1/2 under the front apron rod |
| Tie ends in a half knot over the length yarns, Contiue doing this working from the center out to the edge. |
| Once all yarns are tied on, press each inch and find your looser inches. Grab ends of those knots and tighten so all inches are the same in tension. |
 |
 |
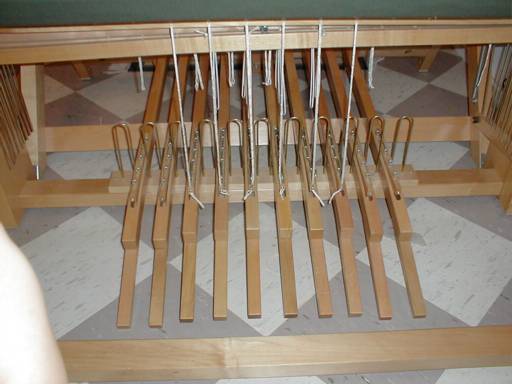
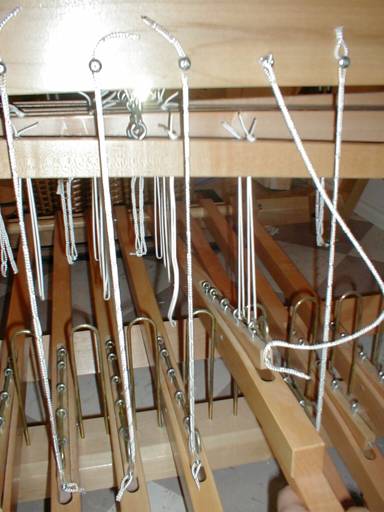
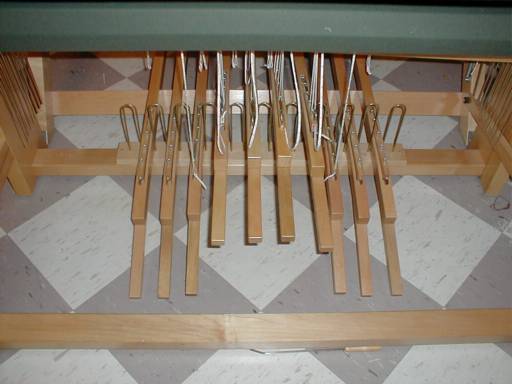
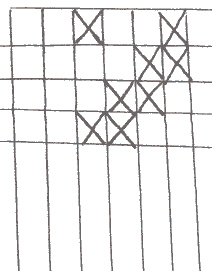
| Now I am to the final stage of dressing the loom, tying up our treadles. When I first began this page I told you that I would need to modify the tie up on this pattern because it is for a counterbalace loom and I weave with a Jack loom. The pattern shows X's on the left side of the draft. The "X" on a tie up draft means that it is a counterbalance tie-up. Jack loom tie-up will show an "O" in the tie-up draft. To convert this to a Jack Loom tie-up use the empty spaces as your tie-up. We will need to tie-up four (4) threadles for this pattern. |
 |
 |
 |
 |
|
| All threadles down, not tie-up |
| Lams |
| To begin, I will start doing the tie-up right to left. Put the threadle ties in the first and second holes for the first and second shart. then put the large cotter pin through the tie up and rings on the threadles, now the first treadle should be hanging. I will continue tying up the treadles following the pattern, going right to left. |
| One threadle tied up |
| All threadles tied up. |
 |
| The loom is now dressed. The next step is to see if I have any crossed yarns in my threading. Step on each threadle and then look down the side, inside your shed. If threaded correctly, I should be able to see straight through the shed without any yarns in the middle. If I do have some yarns showing in the middle trace the crossed yarns back to the heddles and see where the problem lies. Simply untie that inch from the front apron rod and re-thread or sley those yarns to their proper order, then re-tie to the rod. |
| **Because this page is very graphic intensive it may take a few moments for all pictures to fully load.** |
 |
| Chains |
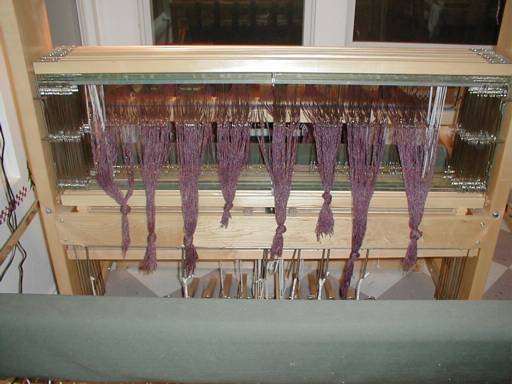
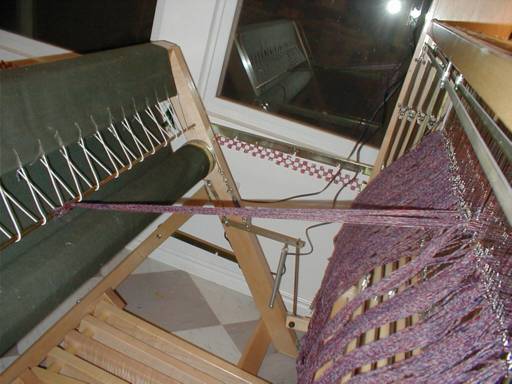
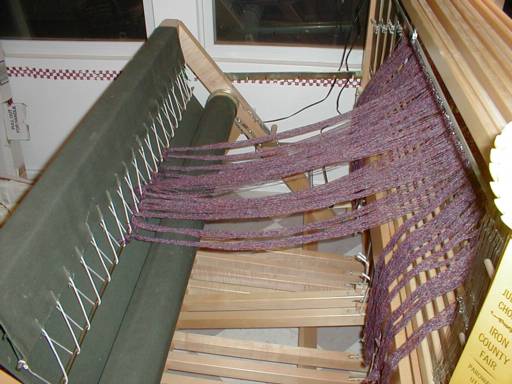
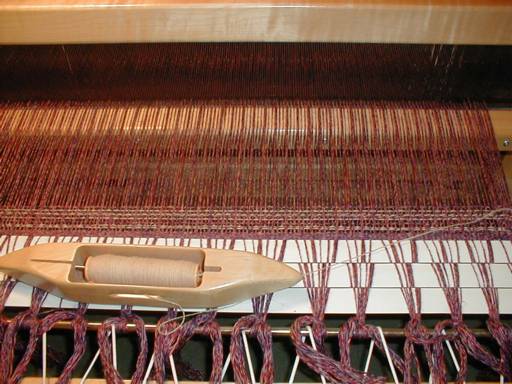
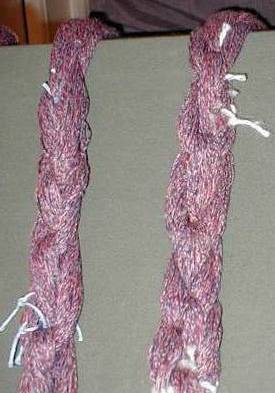
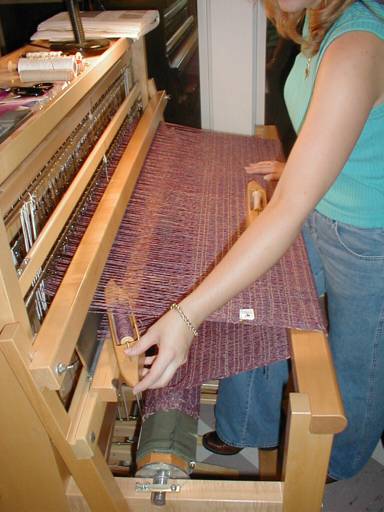
| To begin weaving I will need to wind my bobbins. I am using two colors in the weft, a tan and the warp yarn. Next, I will need to spread my warp. As you can see in the picture to the left, the warp yarns look like "V's"To speard the yarns I insert blind louvers. It usually takes 3 or 4 before the yarns spread evenly. Once spread, I can begin throwing the shuttles by following the draft, (the vertical part of the draft pattern) by steping on the treadles to lift the shafts, forming a shed. |
|
 |
 |
| Stepping on treadle #4 to produce a shed. Notice that some shafts rise to lift yarns |
| Passing the shuttle through the shed |
 |
 |
 |
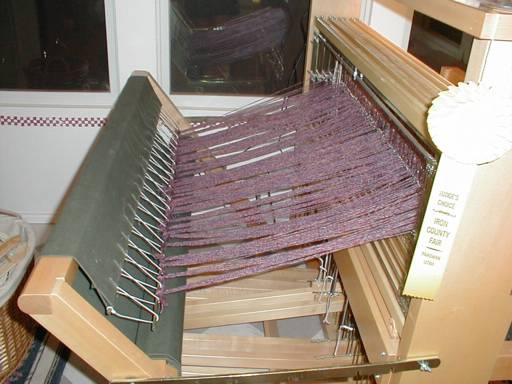
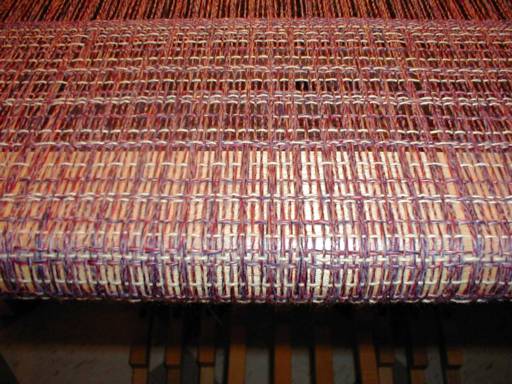
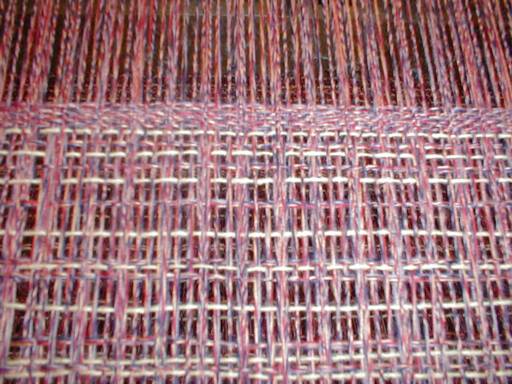
| Pattern on the loom |
| Close up, on loom |
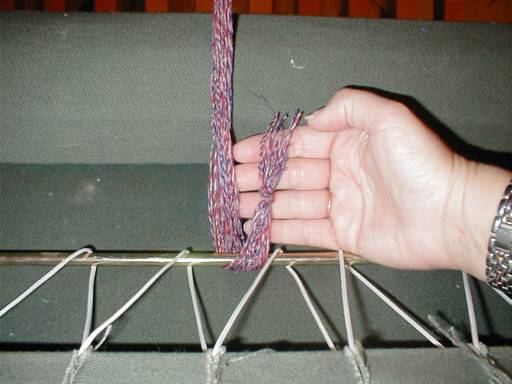
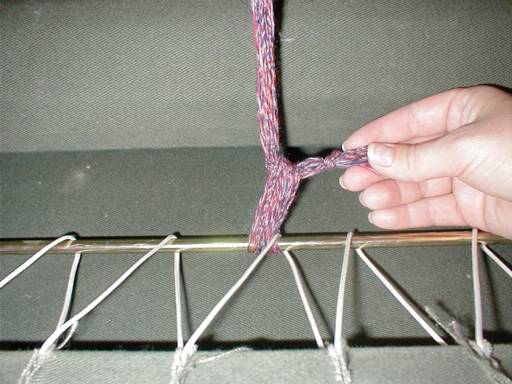
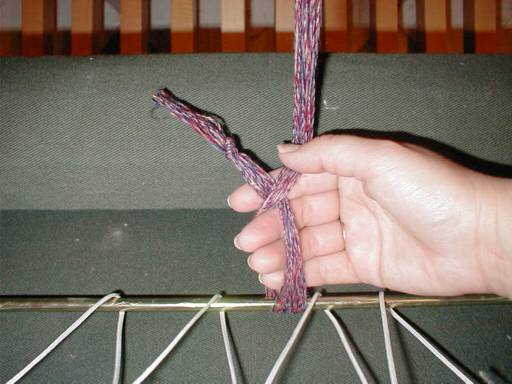
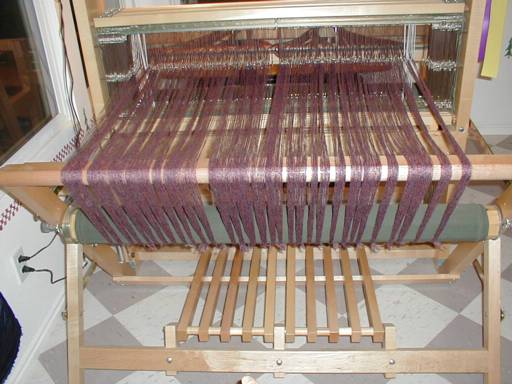
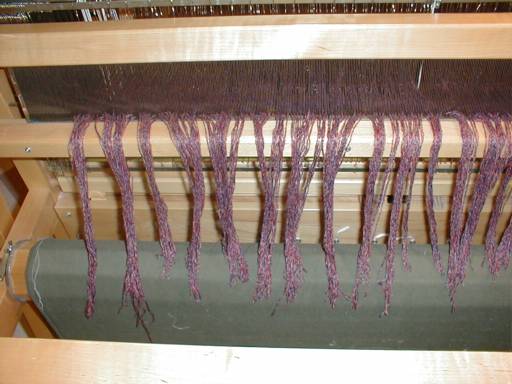
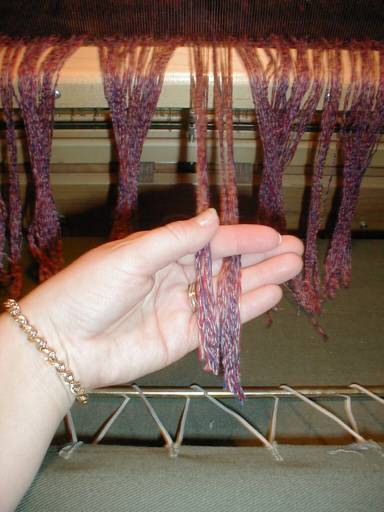
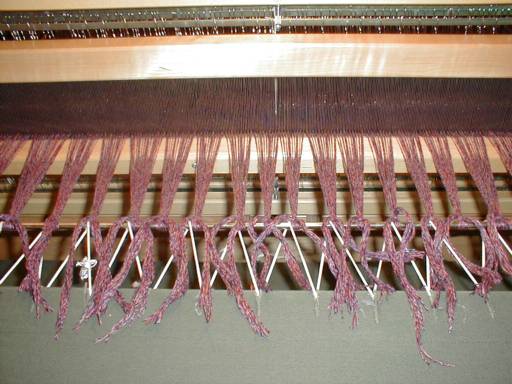
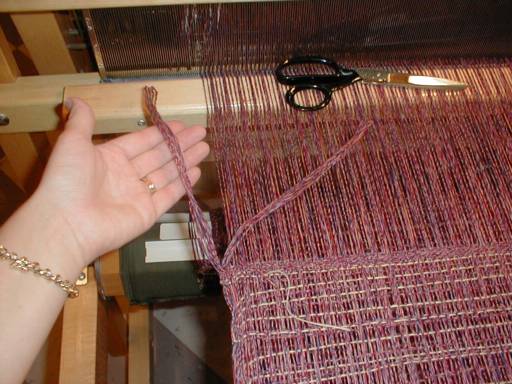
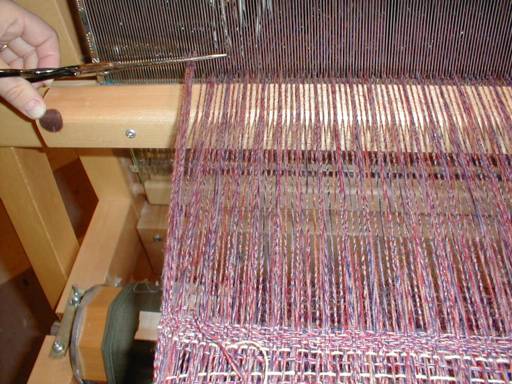
| Once I get to the end, 88 inches in this case, I advance the loom so that I will have enough yarn to cut off the loom and make fringe. Next I will take my sissors and cut the yarns and tie knots to make fringe. I am using 10 E.P.I. per knot |
 |
 |
| Loom advanced |
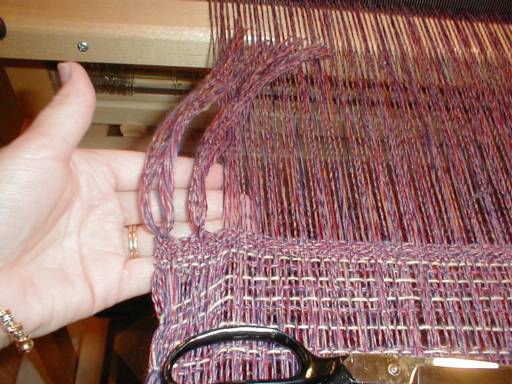
| Once I have the all of the knots tied I then unroll the front beam until I reach the beginning where I placed my blind strips. Because I am making fringe on both edges I will cut the yarns off at the apron bar. Be careful to not cut the apron strings. Once I have the entire cloth cut off I will tie fringe just like the other end, only the fringe length is substanially shorter this time. The last step is to trim off any yarns on the front that are hanging from bobbin changes. |
 |
 |
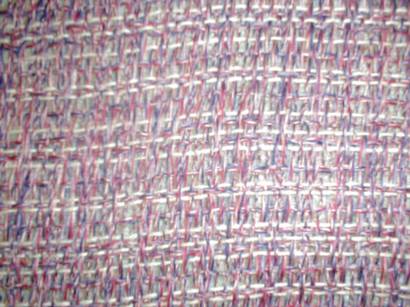 |
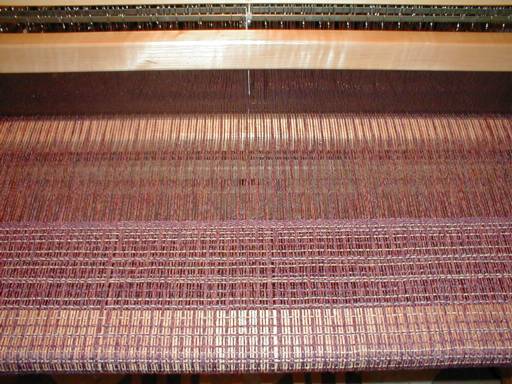
| Pattern off loom, much looser now because it's off tension. |
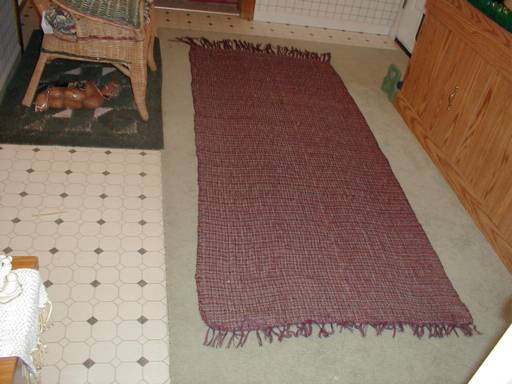 |
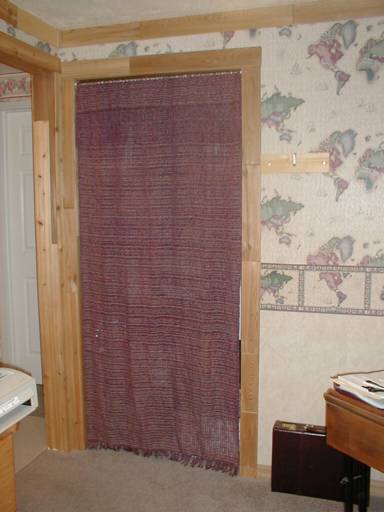
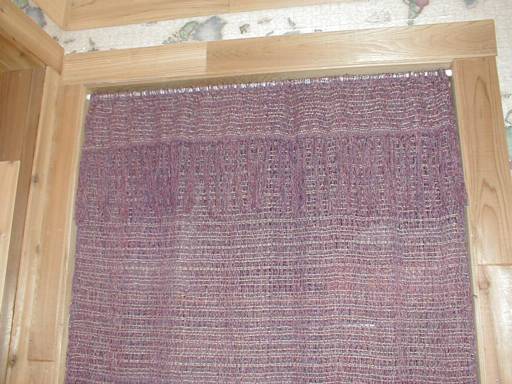
| Here is the finished curtain off the loom. Notice that the fringe is longer at the top. Now I will take this piece to the sewing machine and finish it off. I will fold over the top by 7 woven inches and zig-zag stitch across the lace about 2 inches lower than the fold. This will create a tunnel for the curtain rod to slip through. The top front of the panel will have the overhang and long fringe showing for decor. Please see the photos below for the finished product. |
 |
 |
|