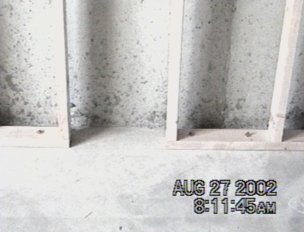
Figure 1 Baseboard nailed to floor with studs attached
(photograph courtesy of http://emrl.byu.edu/darren)
Figure 1 Baseboard nailed to floor with studs attached
(photograph courtesy of http://emrl.byu.edu/darren)
6. Be sure to frame any existing door or window openings. The studs will not be placed in front of any doors or windows. Place the studs at the edges of these openings. A 2x4 will be placed on the top and bottom (if necessary) to create an edge for the plasterboard.
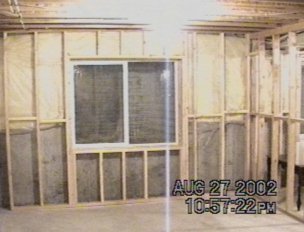
Figure 2 Framing around a window
(photograph courtesy of http://emrl.byu.edu/darren)
7. Bedrooms must have an escape window or exterior door. This is not just a safety issue. It is the law.
TIP: Masonry nails are different that standard wood nails. The masonry nails go through a hardening process to prevent bending and to increase penetration. The twisted flutes on the shank of the nail can distinguish these nails.