


|
|||||
|
|
|
|
|
|
"Outer space is no place for a person of breeding." |
Vortex Effect
Step 1 Create a new 200x200 pixel RGB 72 resolution image with a white background. 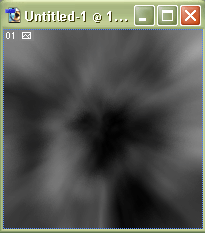 Step 6 Now with your duplicated layer selected (Layer 1 Copy), go to Filter > Distort > Twirl use these settings: Angle: 638 Step 7 Now with your Layer 1 selected, hit Ctrl+U for the Hue/Saturation options and use these settings (remember to check Colorize first): Hue: 189 Saturation: 50 Lightness: 0 And now with your Layer 1 Copy selected hit Ctrl+U again and use these settings (clicking colorize first): Hue: 196 Saturation: 50 Lightness: 0 Step 8 Now duplicate your Layer 1 (the non-twirled one), and drag it to the top of the list in your layers pallette. Now go to Edit>Transform>Flip 180�. Your layers pallette should look something like this now: 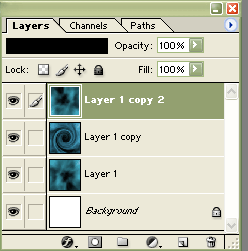 Step 9 Now select your Layer 1 Copy layer and set it's blending mode to Vivid Light (I am using version 7 of Photoshop, if you have an earlier version without Vivid Light as an option, I have found that Lighten works almost just as well):  Step 10 Now select your Layer 1 Copy 2 layer and set it's blending mode to Screen: 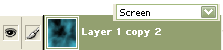 That's it! There you have your Vortex, my final result came to this: 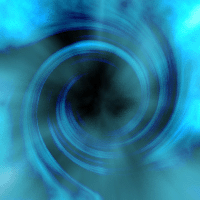 Remember: Some of the filters look different every time you use them, so you will not get the exact same result with this tutorial that I did. Feel free to change the settings for this tutorial, and send me your work! |
 on your layers pallette. Fill your image with black.