


|
|||||
|
|
|
|
|
|
"In the arena of human life the honours and rewards fall to those who show their good qualities." |
Time Warp Effect
Step 1 First, again, you want to create a blank image, with a white background. 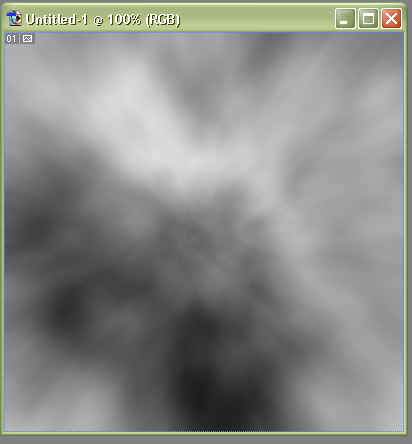 Step 5 It needs color now, so go to Image > Adjustments > Hue/Saturation or press Ctrl+U to get to the Hue/Saturation dialogue box and adjust the settings to these, be sure to click Colorize first: Hue: 90 Saturation: 50 Lightness: 0 There you are, you could always add a lens flare or change the colors, or even do some layer duplicating and/or blending to get a more complicated and in some cases a better-looking effect. But that all depends on what you are looking for in the final image. The final image should look something like this: 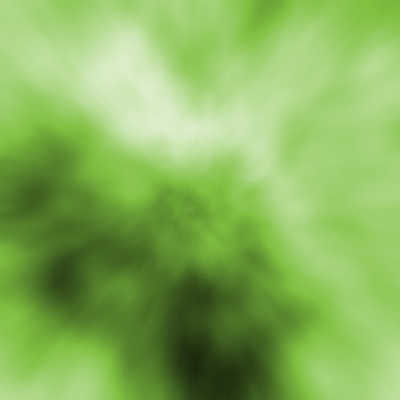 Remember: Some of the filters look different every time you use them, so you will not get the exact same result with this tutorial that I did. Feel free to change the settings for this tutorial, and send me your work! |