


|
|||||
|
|
|
|
|
|
"A fanatic is one who can't change his mind and won't change the subject." |
Small FighterMake sure you're in ALL VIEW.
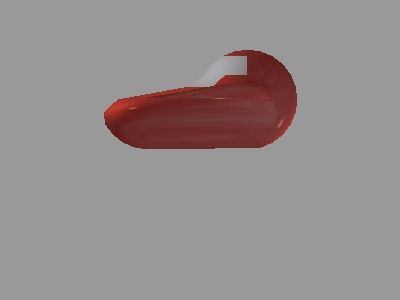
Start by adding a sphere with the following properties: 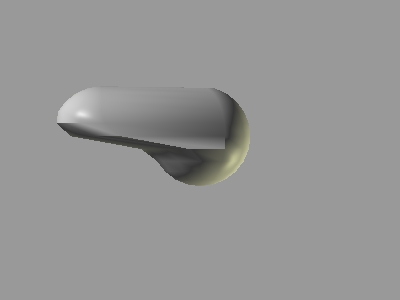 Now you can smooth it out if you wish by double clicking on your object, and setting the Smoothing Angle to about 45 or so. Go Edit > Rotate > Rotate Custom... and leave X and Y where they are but change the Z-axis to 180. Click OK. That'll flip the ship right-side up. 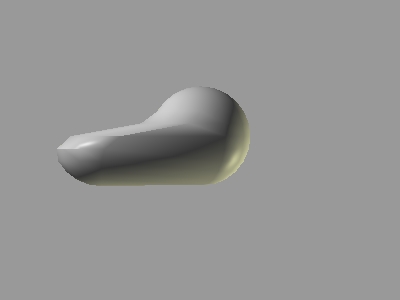 Alright, here it gets a little tricky, you should have a long triangle-shaped face on each side of your object, in Point Edit Mode, and Face Select mode, select that face and extrude it twice. Play with the points until you get the results in the following picture: 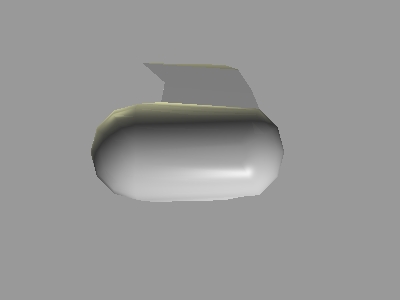 Go to Object Edit: Edit > Rotate > Rotate Custom...this time leave the X and Z where they are but change the Y-axis to 180. That'll turn the ship around 180 degrees. Click OK. Go Edit > Locate > Stand on Origin. Now select the same shaped face on the opposite side of the ship as where your first wing is and repeat the same step to acheive the desired result: 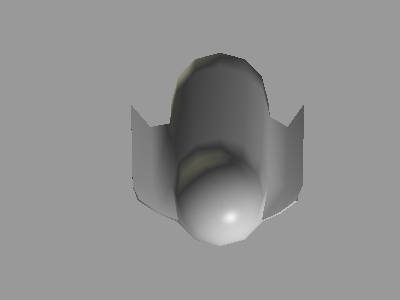 Now apply the texture which is available here along with all of the following attributes: R=205 G=34 B=20 H=3 S=197 L=105 The two sided box should be checked with only the front button indented. Ambient=0.300 Diffuse=0.500 Specular=0.300 Emissive=40 Rough=200 Brilliance=5 and Transparancy=1 I played around with the colors and everything for a while so you might not get the EXACT same color as me, if you would like the EXACT same color as me e-mail me and ask for them (or just ask for the model). So once that is done your ship should look something like this: 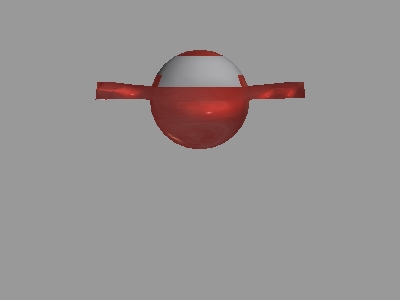 Now you're ready to make your cockpit texture. Set the following attributes: R=185 G=184 B=187 H=173 S=5 L=174 The two sided box should NOT be checked this time. Ambient=0.300 Diffuse=0.700 Specular=0.700 Emissive=0.000 Rough=32 Brilliance=1 and Transparancy=1 Name it "Glass" DO NOT APPLY THIS TEXTURE YET!!You can play around with the transparancy if you like but it didn't work for me because (I think, I could be wrong) of the fact that the two sided box was checked. But whatever you like. Here are a few thumbnails of what it should look like at this point (Minus the cockpit):
Now, if you aren't already, go back to the Object Edit Mode, and double-click on your model. Set the Smoothing Angle to 180. Click OK. Now go back to Point Edit Mode, and, using the Face Select tool, select you cockpit area, wherever you want that to be. |