


|
|||||
|
|
|
|
|
|
"Follow your inner moonlight, don't hide the madness." |
Flare Swirl Effect
Step 1 First, go to File>New and do this: 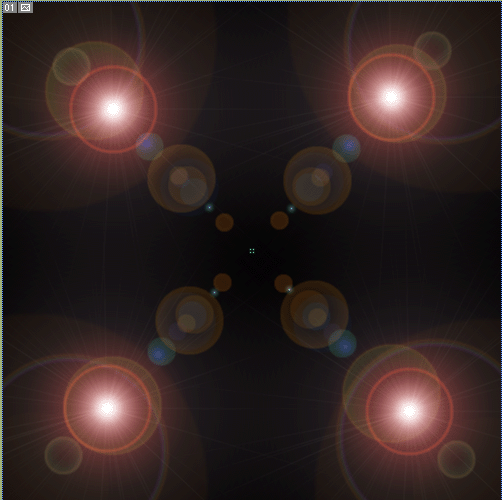 Step 4 Duplicate your layer by going Layer>Duplicate, and click on the original background layer and go to Filter>Blur>Radial Blur and use these settings: Amount: 50 Blur Method: Zoom Quality: Good Step 5 Now take your other layer, or your Background Copy layer, and go to Filter>Distort>Twirl and use these settings: Angle: 999 Step 6 So far you should have your Background layer underneath your Background Copy layer, or your blur layer underneath your twirl layer in your layers palette. Select your twirl layer, or your Background Copy layer, and change it's blend mode to Overlay like so:  You should now have something like this: 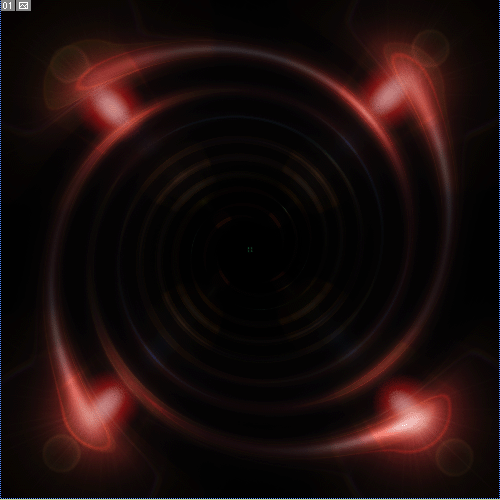 Step 7 Now with your Background layer selected, go to Filter>Render Lens Flare . Step 8 Place the flare in the center, and use these settings: Brightness: 100 Lens Type: 105mm Prime From here, these next few steps are optional, but you can do them to create a cooler-looking project. If you're not sure, save your file now, and then go on to complete the tutorial, if you don't like what you make, then just close it without saving it and you will still have your original saved file.
Step 9 Create a new layer by clicking here: 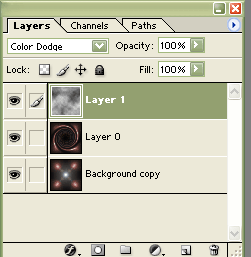 Step 10 Well, that's it for this tutorial. I hope it worked for you, if it didn't, send me a message in the shoutbox on the homepage. Otherwise, here is what I got: 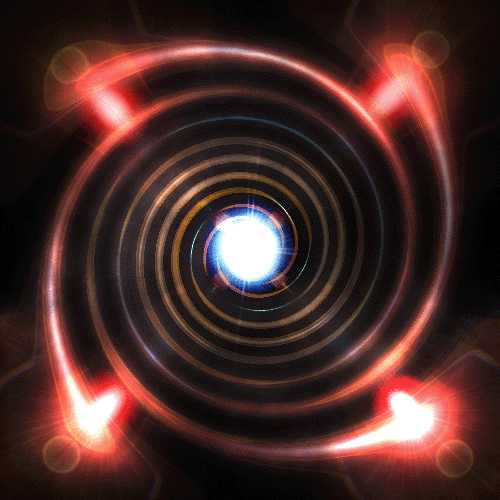 Remember: Some of the filters look different every time you use them, so you will not get the exact same result with this tutorial that I did. Feel free to change the settings for this tutorial, and send me your work! |
 and (make sure your foreground color is black and your background color is white) on that layer go to Filter > Render > Clouds.