|
|
|
|
|
|
|
|
|
|
|
|
|
|
|
|
|
|
|
|
|
|
|
|
|
|
|
|
|
|
|
|
|
|
|
|
|
|
|
|
|
|
|
|
|
|
|
|
|
|
|
|
Rusty bits! |
|
|
|
Next >> |
|
|
<< Back |
|
Home |
|
|
|
Archive |
|
|
|
|
|
|
|
|
|
|
|
 |
|
|
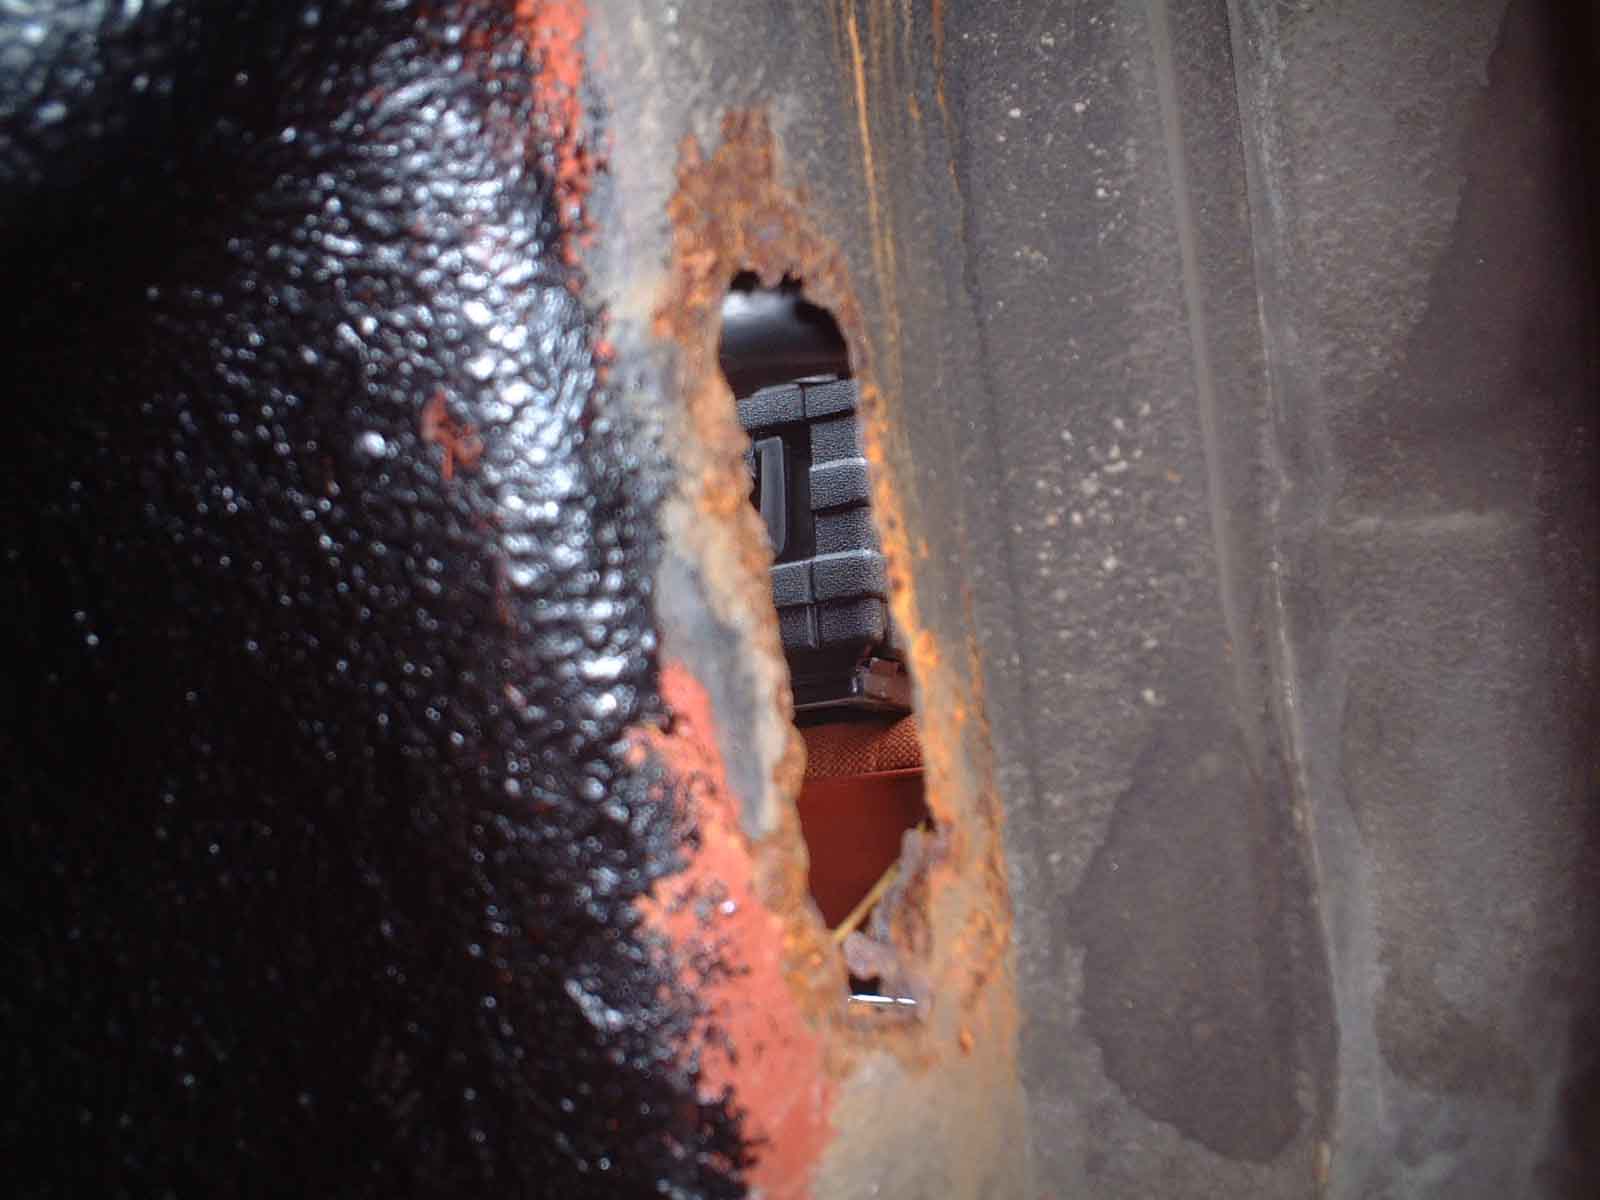
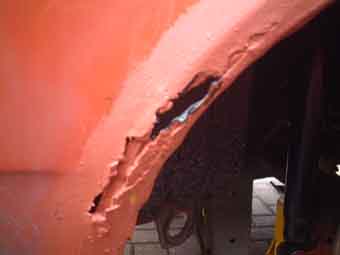
A sight familiar to most classic car owners! Thankfully the first owner liberally applied a Ziebart style rustproof to the shell so structurally it is very sound. This hole in the inner wing resulted from an attempt to remove a wheelarch liner, and yes, that is the interior through the hole! I always wondered why she was so draughty on the motorway. |
|
|
|
|
|
|
 |
|
|
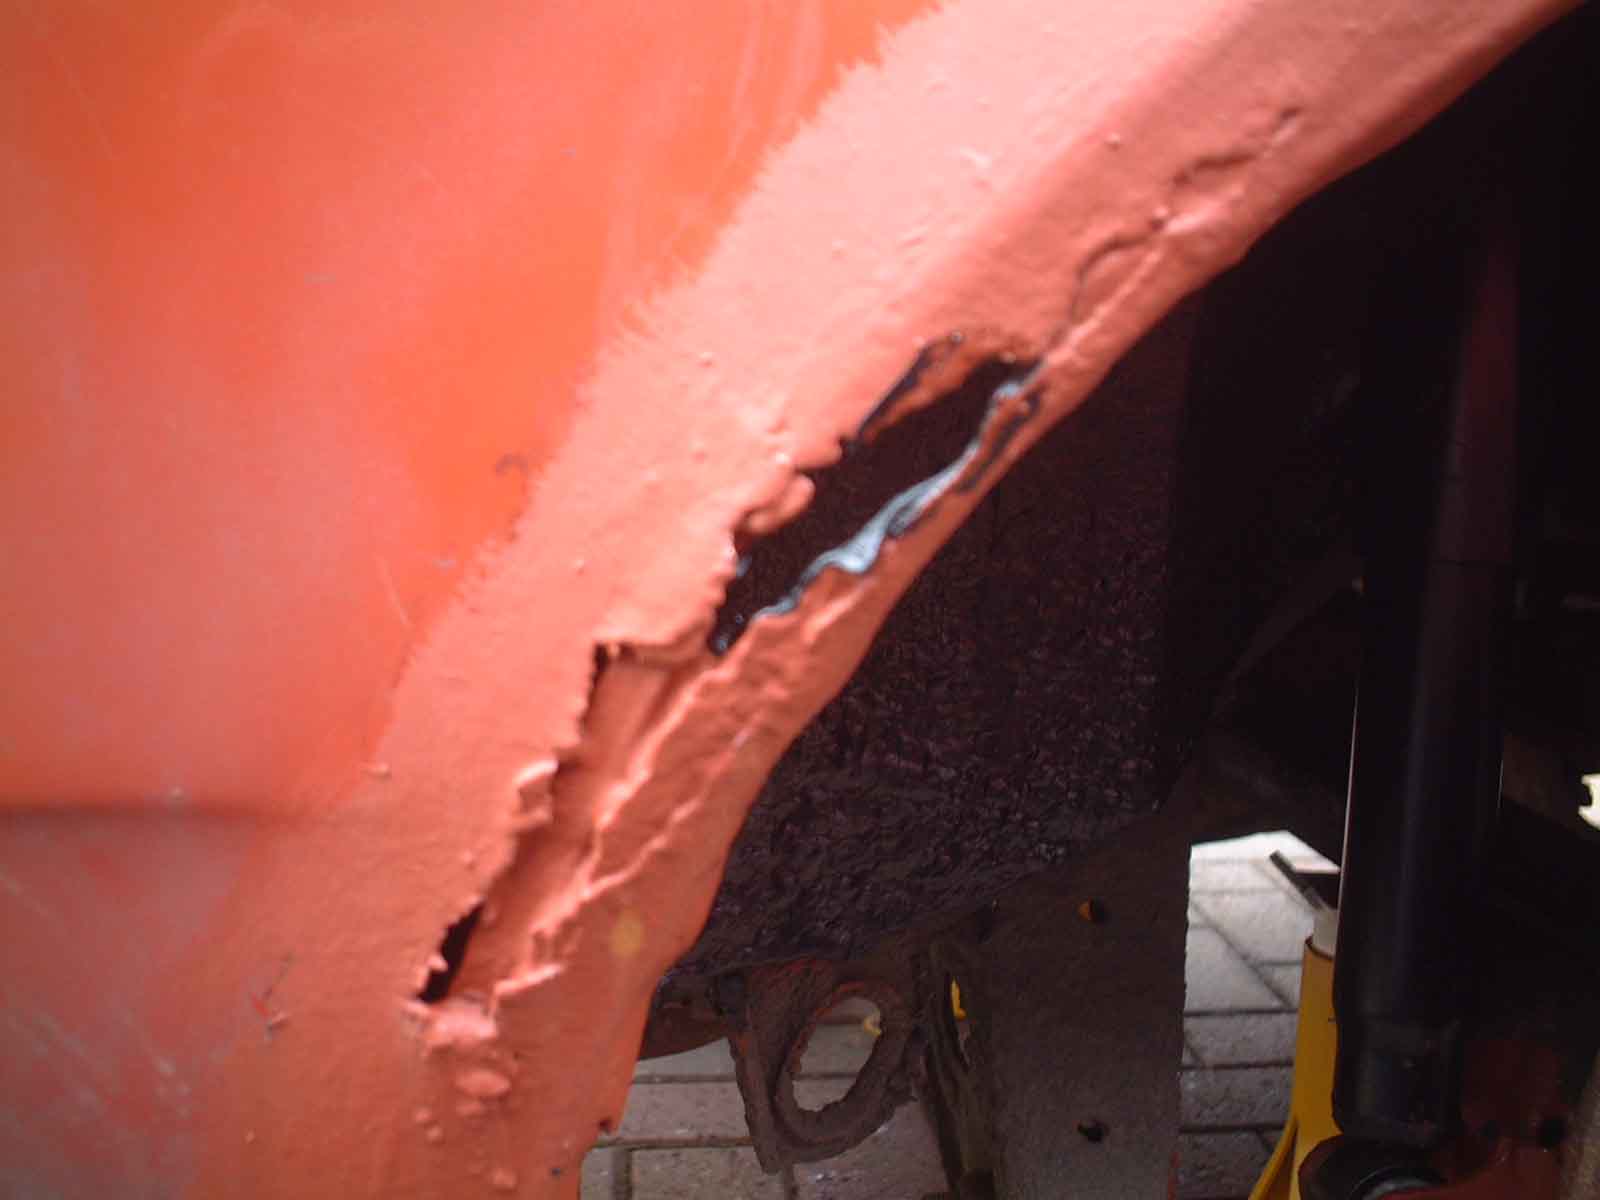
This hole was found by excited prodding with a screwdriver. The car is a very similar colour to red oxide primer, so it was brushed on in a vain attempt to stop the rot until I can have it fixed properly. The black stuff is Waxoyl underseal, I really should have shares in that! Considered filling the hole but think the best course of action would be to have it properly patched, skimmed and sprayed. |
|
|
|
|
|
|
 |
|
|
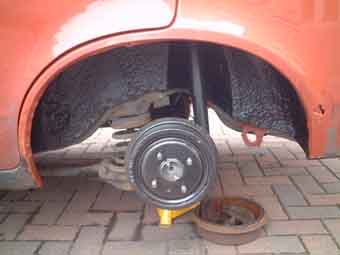
Evidence of rustproofing! The new back brakes looking good, with the arches primered and undersealed to match. After vigorous cleaning with a wire brush the chassis legs came up like new, so a coat of red oxide was in order to keep them like this. When I get time a very generous coat of underseal will also go on. |
|
|
|
|
|
|
 |
|
|
|
|
|
 |
|
|
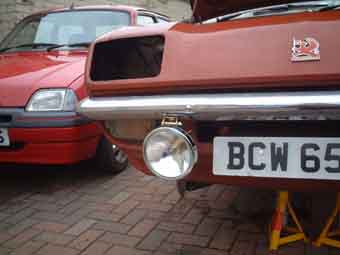
Bought these spotlights after seeing a period Vauxhall accessories brochure, and liked the look of the spots fitted from new. Unfortunately one of these was broken in transit so currently chasing up a replacement for it. This is just fitted for photo, will take more pics when finally fitted up. |
|
|
|
|
|
|
 |
|
|
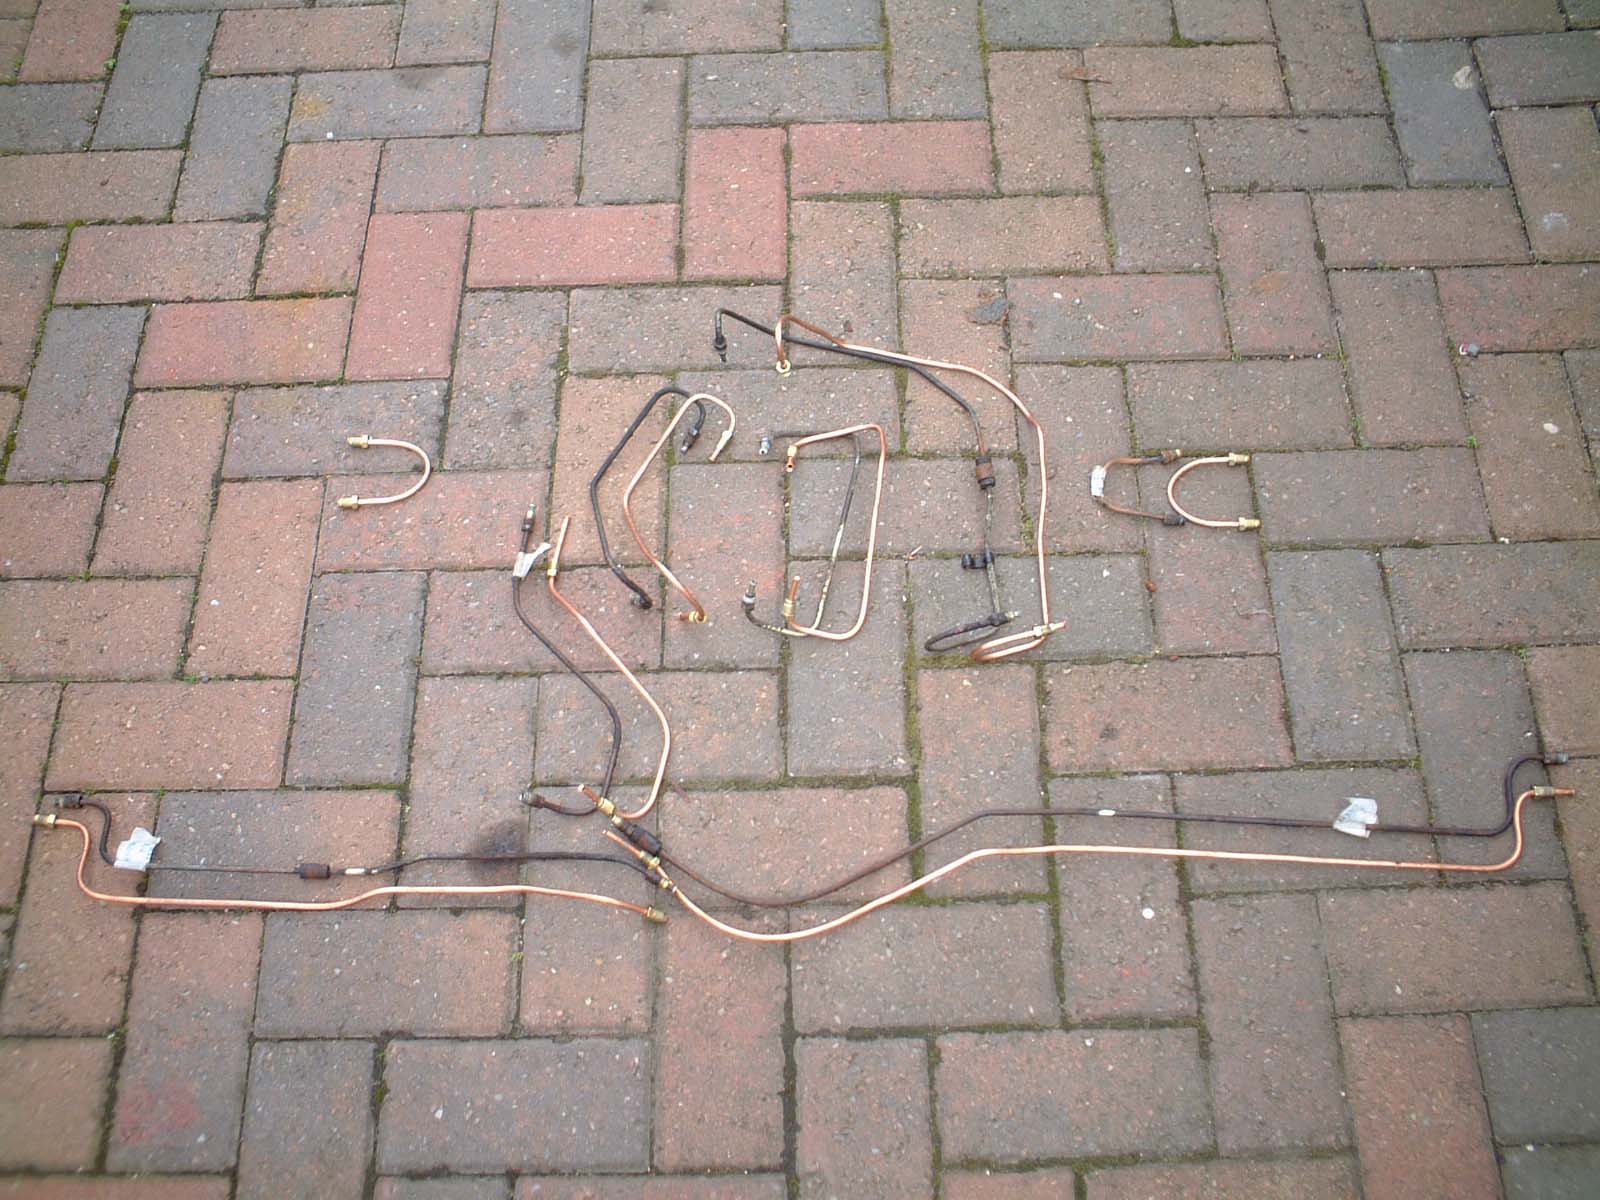
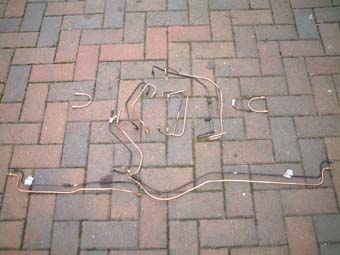
A complete set of new brake lines to be fitted to the car. These were made using a kit from Parts For Older Cars, possibly the best £40 I have spent so far. Very easy to use, it flares the ends of the pipes quickly and easily. |
|
|
|
|
|
|
 |
|
|
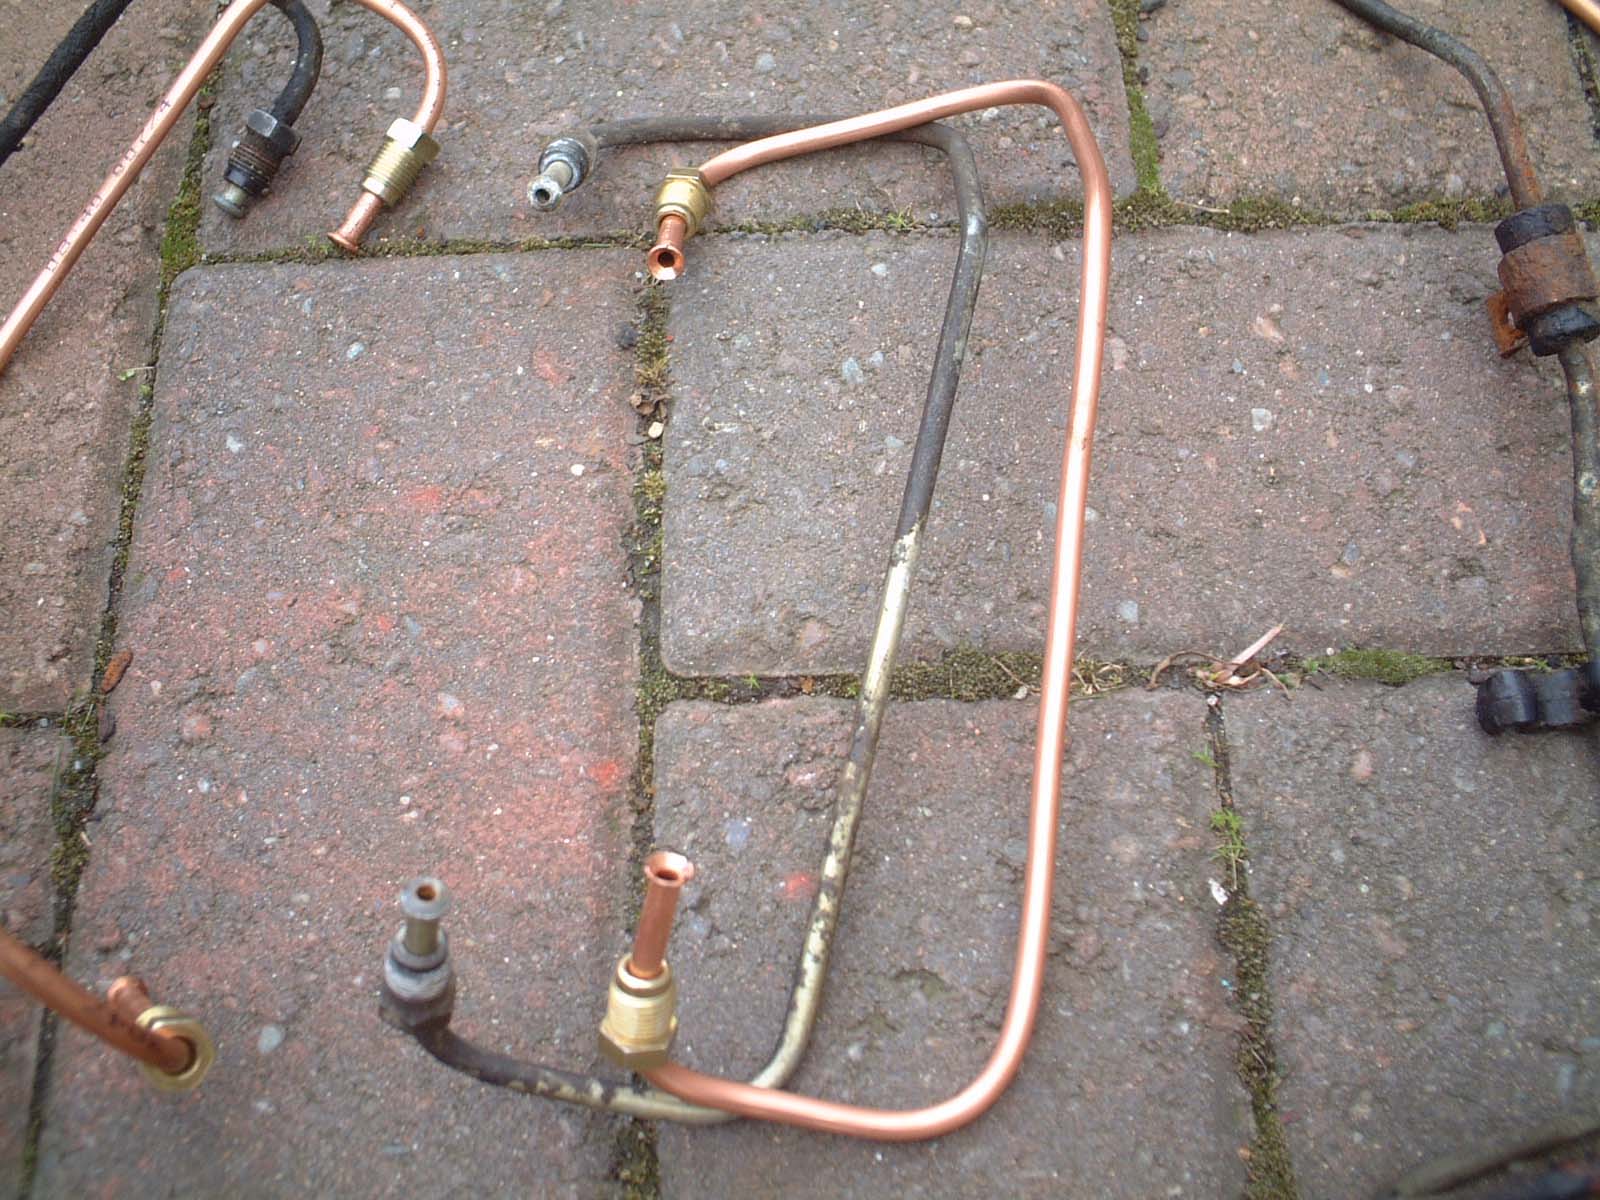
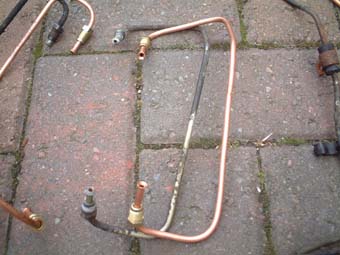
Close up shows the accuracy to the original pipes possible with the kit. The copper tubing is supplied in a large roll, daunting at first for me anyway, but soon I was happily bending away into the required shape. I'm a bit of a perfectionist, so all the angles and bends had to be spot on. |
|
|
|
|
|
|
 |
|
|
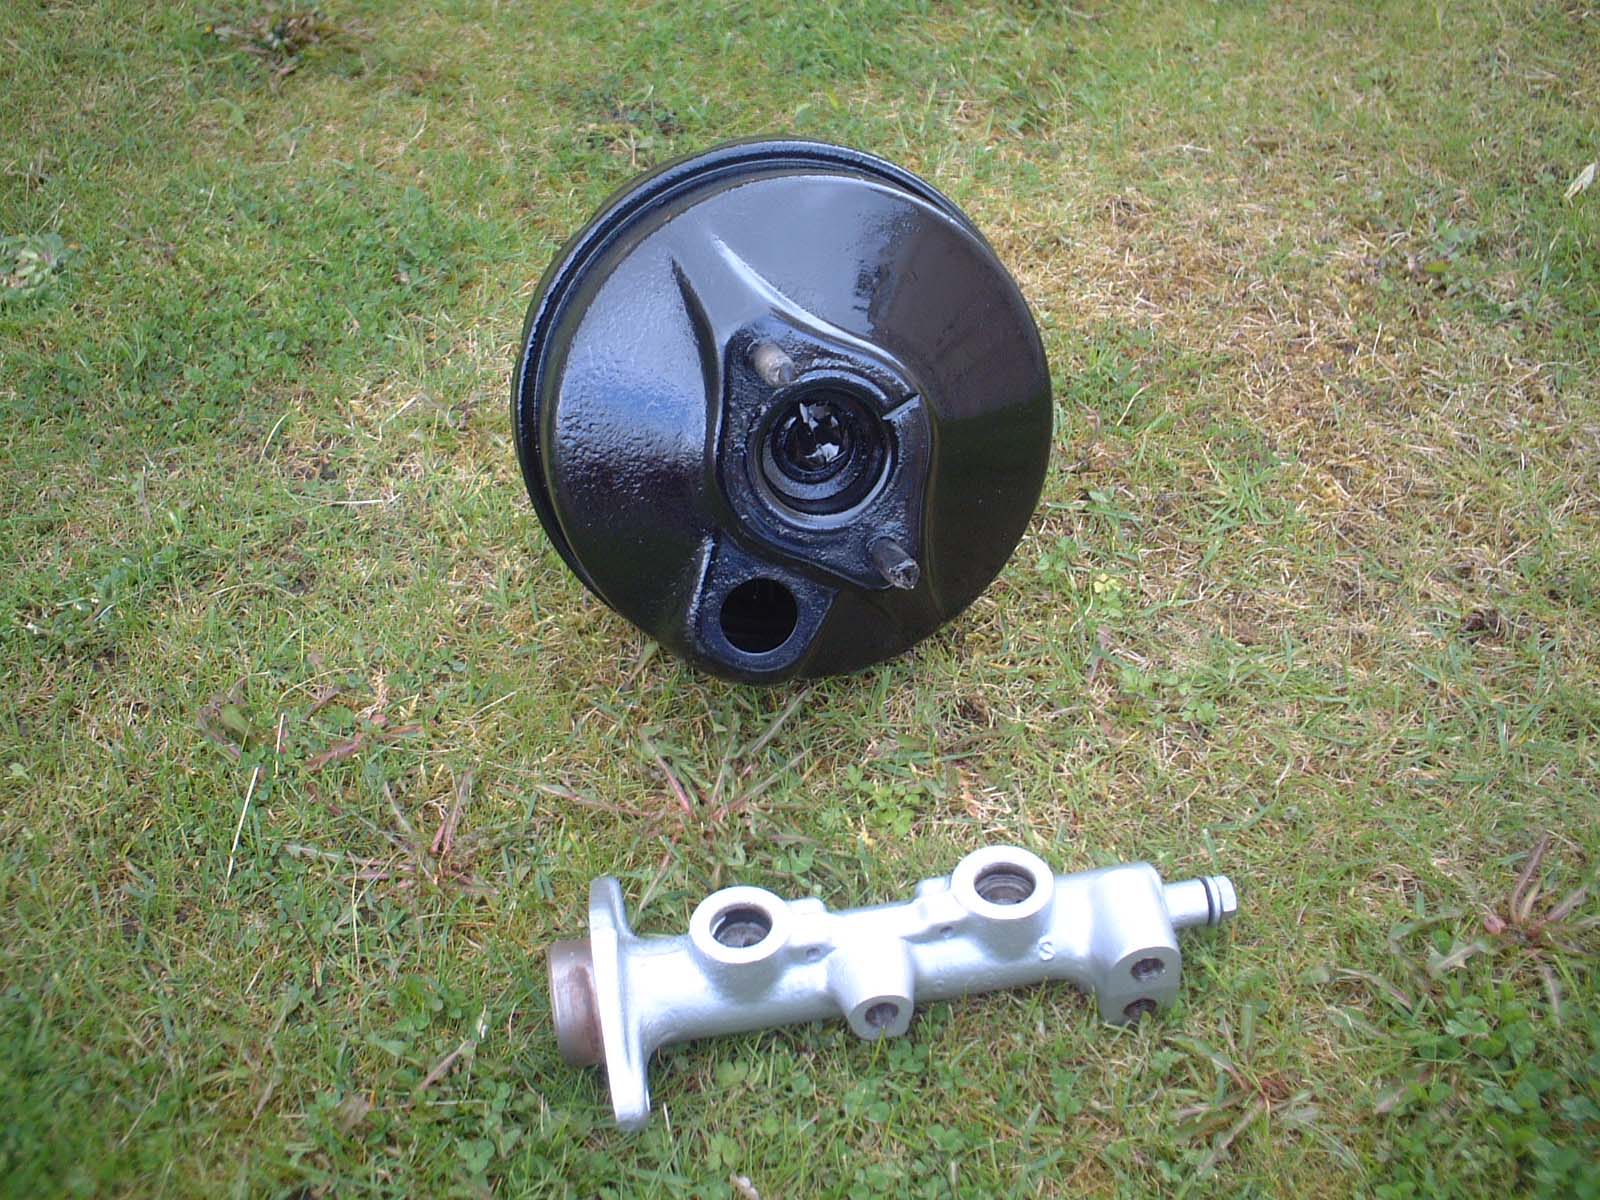
Refurbished brake servo and master cylinder, both having received a fresh coat of paint. I used hammerite spray paint for this which has produced a pleasing finish. Both have been rebuilt using kits, once again from Martin at Parts For Older Cars. I think he is getting to know me quite well. |
|
|
|
|
|
|
 |
|
|
A very rare opportunity to take a pic of her in the sun! The paintwork is almost trying to shine, tried cutting a small area of the roof back using cutting compound followed by Mer polish. Produced a fairly passable shine, if not quite up to showroom standard - but then it is over 21 years old. |
|
|
|
|
|
|
 |
|
|
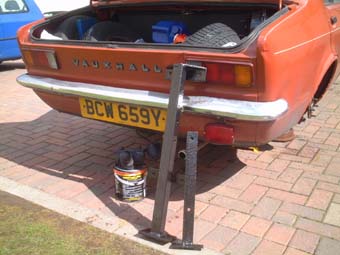
Removed the towbar fitting which appeared extremely rusty, but after a brief introduction to a wire brush it came up clean and solid. To keep it like this an application of red oxide primer followed by black hammerite was essential, as this car seems to rust as a hobby. |
|
|
|
|
|
|
Next >> |
|
|
<< Back |
|
Home |
|
|
|
|
|
|

|
|