Late Booster On Classic Musclecar:
The following information appeared in the July 1996 issue of Car Craft Magazine and should only be used as a resource for performing this modification to your vehicle.
Late Booster On Classic Musclecar:
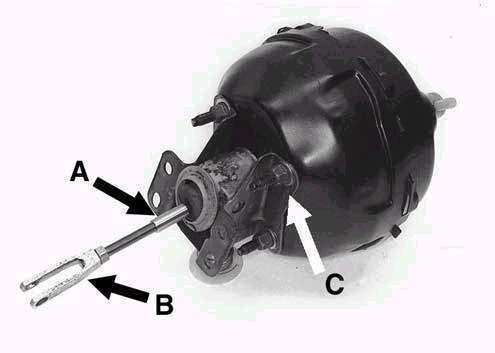
Retrofitting late-model four-wheel disc brakes to classic GM musclecars is gaining popularity. To achieve peak performance with such systems and a modern, high-tech look, it�s best to install a late-model dual-diaphragm power booster. However, commonly available late-model units (such as the 1982-1988 G-body, code "FB," GM 18010120) typically have a different firewall mounting angle and brake-pedal attaching rod than the early unit. The G-body booster can be modified to the hybrid configuration shown in the photo, allowing it to fit the early A-body (intermediate) or F-body (Camaro/Firebird):
1. Locate a 1967-1972 A- or F-body booster, and grind off the rivet heads that hold the firewall mounting bracket to the booster. Pry the bracket off the booster with a screwdriver.
2. Measure and record the length of the pedal pushrod between the brake pedal clevis and the rear face of the booster.
3. Extend the length of the G-body booster�s pedal pushrod by cutting the clevis end off the booster and either grafting on the "A" pedal pushrod or using a piece of Grade 8-quality 3/8-16 threaded rod stock to make the overall length of the G pushrod the same as that from the original "A" booster.
4. Thread the portion of the G-body pushrod that extends out from the booster body with a 3/8-16 die.
5. Procure a 3/8-16 coupling nut (McMaster-Carr #90264A210 or equivalent, photo, A), and assemble the pushrod halves using red Loctite(R) on the threads. Attach the old clevis and retain with a jam nut (B).
6. Place the previously removed firewall-to-booster bracket on the "G" booster�s existing firewall-mounting studs, and fasten with self-locking metric M10x1.5 nuts (C). In some instances it may be necessary to elongate the "A" bracket�s mounting holes slightly inboard.
7. Attach the clevis rod to the brake pedal, then fasten the booster to the firewall using self-locking American 3/8-16 nuts.
Powermaster For Early Cars:
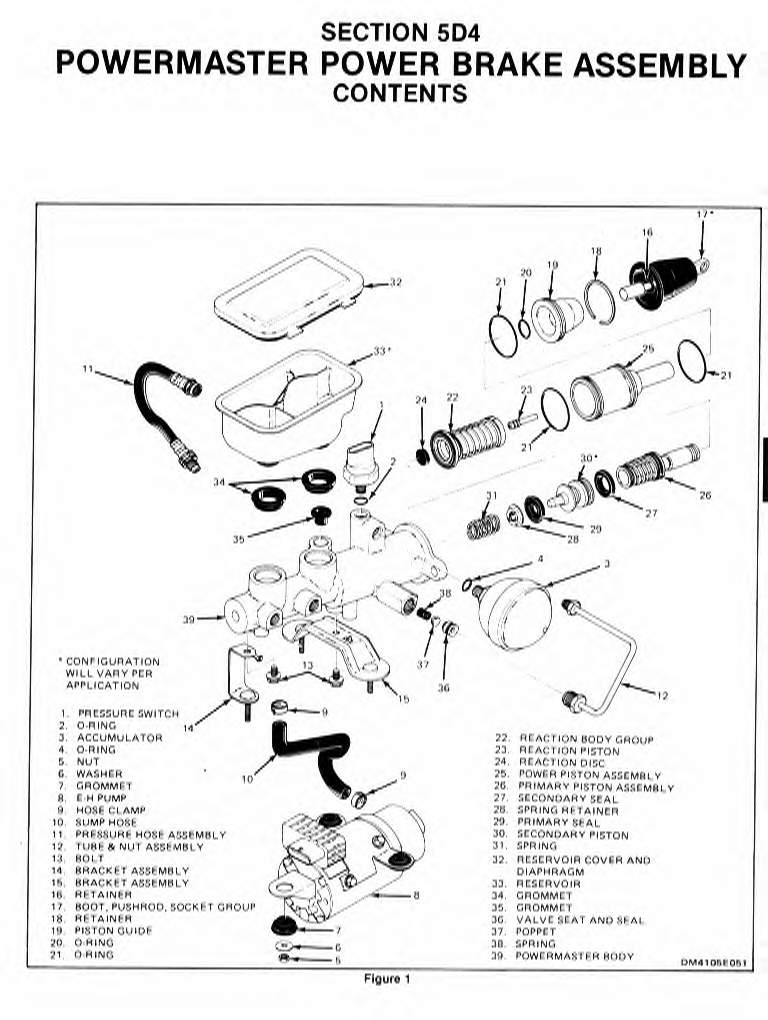
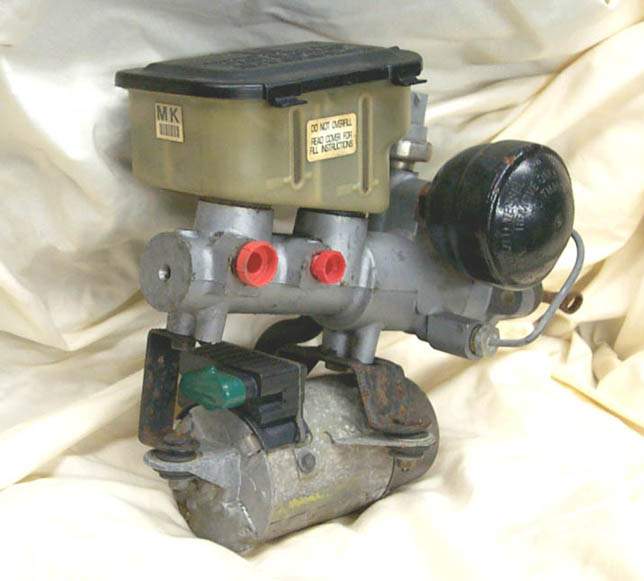 An alternative to the dual-diaphragm vacuum booster/aluminum cylinder setup is the Powermaster I electro-hydraulically boosted aluminum master cylinder. It has been reported that the Powermaster has a better pedal feel and more boost than even the dual-diaphragm booster. Plus, there are no big-cam/low-vacuum problems. The version to use on the A-body is the one originally installed on 1986 B-body wagons with Olds 307 engines (GM production No. 18013355, current service No. 18018236). Unlike the more common Grand National unit, this version has an angled reservoir that�s more suited to an A-body retrofit. Modify it just like the G-body vacuum booster.
Vacuum Pumps:
There is yet another option for power brakes. Many GM cars during the '80's had a supplemental vacuum pump that turns on to assist the vacuum booster to maintain sufficient amounts of vacuum.
The pump is still available new from GM (part # 22034995), though the same design pump can be found cheaper through specialty houses such as Master Power Brakes. But, if you are a junkyard dog (like myself) you can find these on GM cars that are in the boneyard awaiting the crusher.
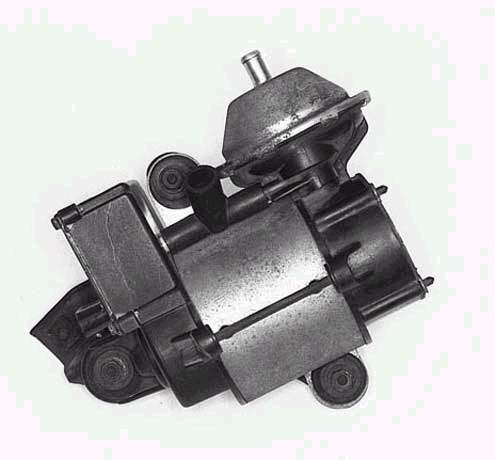
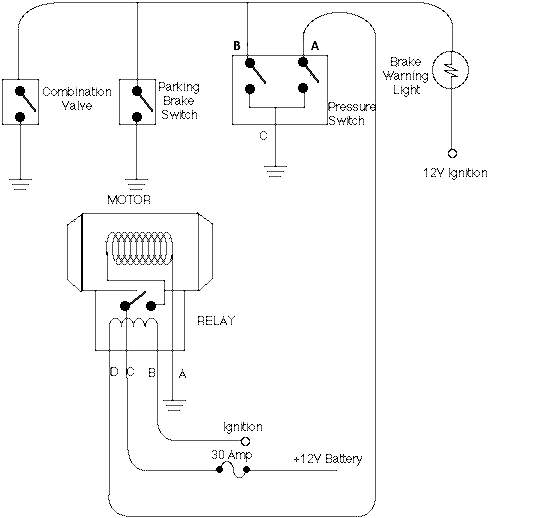
The pumps are generally located on the driver's side fenderwell. Be sure and grab the plug/connector for the wiring harness as well as the small carbon filter that is inline just before the pump.
The connector from left to right are wired:

Copyright � 2003-2006
NO PHOTOS, TEXT AND/OR CONTENT USED THROUGHOUT THIS PAGE MAY BE REPRODUCED,
TRANSMIITED OR USED IN ANY MANNER WITHOUT THE EXPRESS WRITTEN PERMISSION OF THE
COPYRIGHT OWNER.