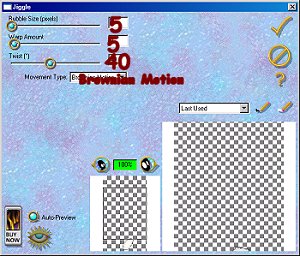
Bubble Size: 5 Warp Amount: 5 Twist: 40 Movement Type: Brownian Motion Click on the Check mark to add the effect.
2.Add a new layer and rename Left Leg. Open up rleftleg.sel and repeat the same steps as you did for the Right Leg. SAVE
3. Add a new layer and rename Leg Stitching. Open the legstitching.sel and flood fill with Black. Deselect and SAVE.
4. Add a new layer and rename Right Hand. Open rrighthand.sel and follow the same steps as you did for the legs. SAVE.
5. Add a new layer and rename Left Hand. Open rlefthand.sel and follow the same steps as you did for the legs and right hand. SAVE.
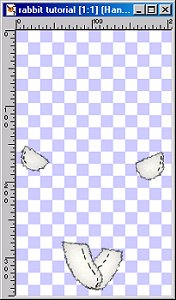
6. Add a new layer and rename Hand Stitching. Open handstitching.sel and flood fill with Black. Deselect and SAVE. This is what you should have right now.
7. Add a new layer and rename Bloomers1. Open bloomers1.sel. Flood fill with Black. Modify-contract by 1 and fill with White. Deselect and add a 7% noise. Move this layer down to where it's above Layer one.
8. Activate the Hand Stitching layer and add another layer and rename it Bloomers 2. Open the bloomers2.sel fill with Black, modify contract by 1 and fill with White. Deselect and add a 7% noise.
9. On the same layer, open bloomers 3 and fill with Black deselect. Open bloomers4.sel and fill with D52121. NOTE: You might need to magnify the image to get it to fill. Just bring the image back to the original size when you're done if you do. Deselect and SAVE.
10. Add a new layer and rename Dress1. Open dress1.sel and fill with Black. Modify contract by 1 and fill with the Pink Burlap pattern. To do this change your foreground to Pattern and locate your Pink Burlap and put in these settings; 100-scale Angle-45%.
Invert and add the same drop shadow but change color to E73F3F. Invert and add the same 7% noise. Deselect and SAVE.
11. On the same layer open dress2.sel and follow the same steps. SAVE
12. Add a new layer rename Dress2 and move below Right Leg and above Bloomers1. Open dress3.sel and fill with Black. Modify contract by 1 and fill with D52121. Deselect and add a 7% noise.SAVE
13. Activate Dress 1 and open dressdetail1.sel and fill with D52121. Deselect. On same layer open dressdetail2.sel and fill with same color. Deselect.
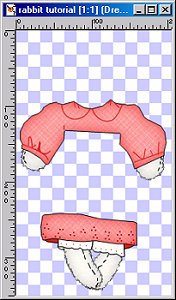
14. On same layer open dressdetail3.sel and fill with same color. Deselect and SAVE. This is what you should have so far.
15. Add a new layer and rename Lace. Open the dresslace1.sel and fill with D52121. Modify contract by 1 and fill with White. Deselect.
16. On same layer open dresslace2.sel and fill with D52121. Deselect and SAVE. NOTE: Again, you might have to magnify to fill the selection. Remember to bring back to original size when done.
17. Add a new layer and rename Apron. Open apron1.sel flood fill with D52121. Modify contract by 1 and fill with White. Float and add the following cutout. V&H: 0 Opacity: 50 Blur: 30 Shadow Color: D72919 Deselect and add a 7% noise. SAVE
NOTE: Apron2.sel through Apron4.sel will be on this layer.
18. Open apron2.sel and repeat the same above steps. Open apron3.sel and fill with D52121 and deselect. Open apron4.sel and fill with D52121 deselect and SAVE.
19. Add a new layer and rename Apron Back and move down to above Hand Stitching layer and below the Bloomers 2 layer.
Open the apron5.sel and fill with D52121 and modify contract by 1 and fill with White. Float and repeat the same cutout and noise you did for the apron.
20. Activate the Apron layer and add a new layer. Rename Apron Details and open aprondetail1.sel. Fill with D52121 deselect and add a 7% noise. SAVE (All these will be on the same layer)
21. Open aprondetail2.sel and fill with D52121 modify contract by 1 and fill with White. Deselect.
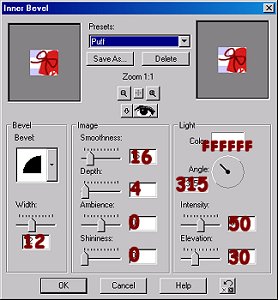
22. Open aprondetail3.sel fill with D52121 and deselect. Open aprondetail4.sel and fill with 800000 float and add the Puff inner bevel. (See screen shot below) Deselect.
23. Open aprondetail5.sel and fill with D52121 deselect and SAVE.
24. Add a new layer and rename Button. Open button1.sel and follow the same steps as for the apron.
25. On the same layer open button2.sel and fill with D52121 deselect. Duplicate-mirror and take your mover tool and move so it's even. SAVE
26. Activate the Dress 1 layer and add a new layer and rename Straps. Open straps1.sel and fill with D52121 modify contract by 1 and fill with White. Follow the same steps as you did with the Apron.
27. On the same layer open strap2.sel and repeat the same steps but keep selected while adding the noise. Deselect and open strap3.sel and fill with D52121 deselect and SAVE.
28. Activate the Copy of Button layer and add a new layer and rename it Dress Button. Open dressbutton1.sel and expand by 1. Fill with D52121 and deselect.
29. On the same layer open dressbutton2.sel and fill with White and deselect.SAVE
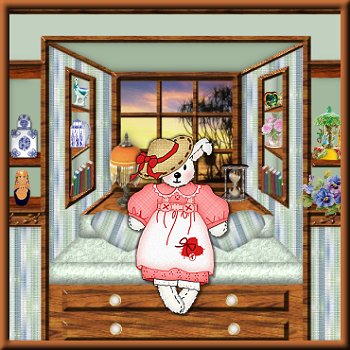
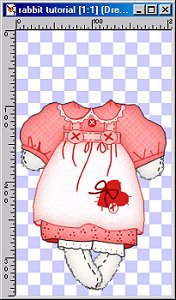
This is what you should have so far.
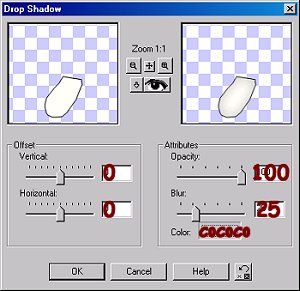
30. Add a new layer and rename Head. Open the head.sel and fill with Black. Modify Contract by 1 and fill with FFFFF5 or your choice of color. Invert and add the following drop shadow..V&H: 0 Opacity: 100 Blur: 25 Color: C0C0C0.
Invert and add a 7% uniform noise. Deselect and add the same Eye Candy 3.1 as you did for the hands and legs. SAVE
31. On the same layer open rightear1.sel and fill with Black. Deselect. Open rightear2.sel and fill with F9E1D9 and add a 7% noise.Deselect and SAVE
32. Same layer open nose.sel and fill with Black. Add the Round Inner Bevel default settings. Deselect.
Same layer open mouth.sel and fill with Black. Add the Puff inner bevel and deselect and SAVE.
33. Add a new layer and rename Eye. Open the righteye.sel and fill with Black and add the Round inner bevel deselect and SAVE.
34. Add new layer and rename Left Cheek. Open leftcheek.sel and fill with F3B6B6. Deselect and add a 4.50 Gaussian Blur. Duplicate and mirror.
The copy should be fine but if you feel you need to move it go ahead and move or reload the head.sel and invert and hit your delete button to remove any excess. SAVE
35. Add a new layer and rename Hat. Open the hat1.sel and fill with Black. Modify contract by 1 and fill with F9D591. Invert and add the following drop shadow.
V&H:0 Opacity:100 Blur: 30 Color: 745626 Invert and add a 7% noise.
While still selected add the Eye Candy 4000 Weave preset Linen default settings. Deselect.
36. On the same layer open hat2.sel and fill with Black. Modify contract by 1 and fill with D52121 deselect and SAVE.
37. Add a new layer and rename Bow1. Open bow6.sel and fill with Black. Modify contract by 1 and fill with D52121. Add a 10% noise and deselect. Repeat this for bow4.sel and bow5.sel. SAVE
38. Add a new layer and rename Bow2. Open bow1.sel and repeat the same steps.
39. Repeat the same steps for bow2.sel and bow3.sel. Then open bow7.sel and fill with Black. Deselect.
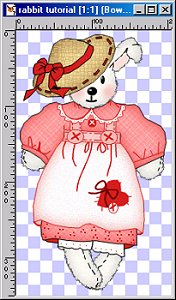
40. Open hat3.sel and fill with Black. Deselect and SAVE.