You need to click on the VM Tools and it will take you to another screen for the download.

You need to click on the Funhouse 1&2 and it will take you to another screen for the download.
Fantastic Machine:
My CA Rainbow pattern: Unzip and save to your PSP pattern folder:
PSP8 Metallic Gold01_gradient: Unzip and save to your PSP gradient folder.
PSP7 Metallic Gold01_gradient: Unzip and save to your PSP gradient folder.
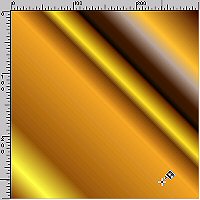
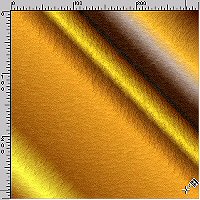
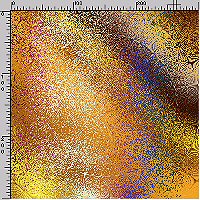
1. Open a new 300x300 new transparent image. Set Angle to 45 and Repeats to- 0. (Scale should be 100%) Invert: UNCHECKED. And set Style to Linear. Flood fill with metallic gold01 gradient or you can use your own gradient.
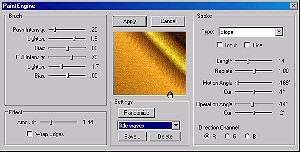
2. Go to Effects-Plugins-Paint Engine and use the little waves preset. These are the settings if you don't have that preset.
BRUSH:
Push Intensity: .20 Lighten: 1.9 Bias: .00 Pull Intensity: .79 Lighten: -1.7 Bias: .00
EFFECT: Amount: 1.44 Wrap Edges: UNCHECKED
STROKE: Type: Slope Input and Line: UNCHECKED Length: 14 Radiate: 1.00 Motion Angle: -169* Curl: -1* Operation Angle: -14* Curl: -2* Directional Channel: Check the circle with "R".
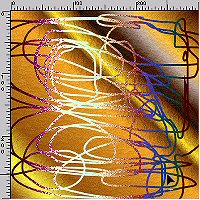
3. Change your Foreground to the-CA Rainbow Pattern scale 100 angle 45% and change your Background to Null
4. Take your Draw Tool-freehand tracking size 10 and line width to 3. Make swirls all around on the image.
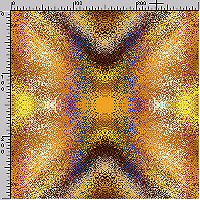
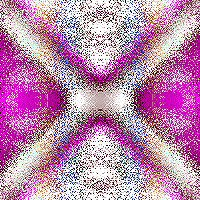
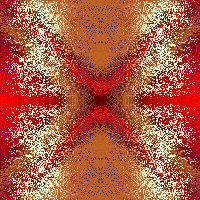
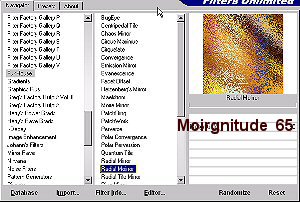
5. Go to Effects-Plugins- Funhouse (or locate it in your Filters Unlimited) and use Radial Moirror default settings.--> Moirgnitude: 65. I have mine saved in Filters Unlimited.
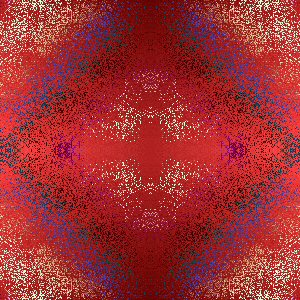
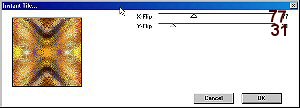
6. Last step go to your Plugin VM Toolbox- Instant Tile and use the default settings.
X-Flip: 77
Y-Flip: 31 Merge flatten and save.