3. Add a new layer and rename Left Hand. Go up to Selections-Load from Disk and click
on left hand.sel. Click Open. Flood Fill with D8B582. Deselect and go up to
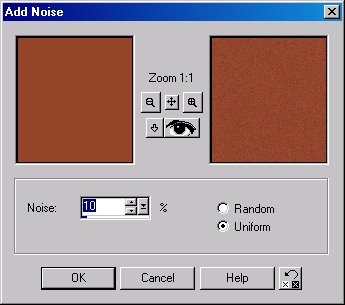
Effects-Noise-Add and change the number to 8 and keep uniformed checked. Click Okay
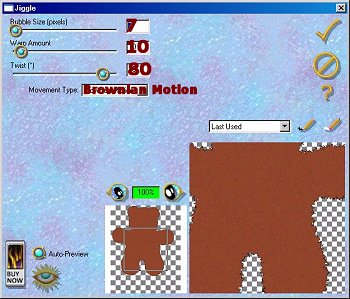
and add the same Eye Candy jiggle. SAVE
4. Add a new layer and rename Right Hand. Go up to Selections-Load from Disk and click
on right hand.sel. Click Open. Flood fill with D8B582. Deselect and follow the same steps
you did for the left hand. SAVE
5. Add a new layer and rename Left Foot. Go up to Selections-Load from Disk and click
on left foot.sel. Click Open. Flood fill with D8B582 and follow the same steps as you did
for the hands. SAVE
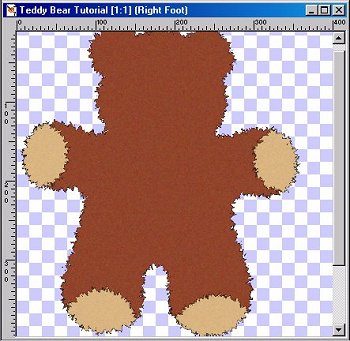
6. Add a new layer and rename Right Foot. Go up to Selections-Load from Disk and click
on right foot.sel. Click Open. Flood fill with D8B582 and follow the same steps as you did
for the hands. SAVE
7. Add a new layer and rename Left Inner Ear. Go up to Selections-Load from Disk and
click on left_inner ear.sel. Click Open. **Do not fill with Black on the inner ears** Flood
fill with D59E48. Follow the same steps as you did for the feet and hands. SAVE
8. Add a new layer and rename Right Inner Ear. Go up to Selections-Load from Disk and
click on right_inner ear.sel. Click Open. Flood fill with D59E48. Follow the same steps as
you did for the feet and hands. SAVE
9. Add a new layer and rename Eyes. Go up to Selections-Load from Disk and click on
eyes.sel. Click Open. Flood fill with Black (000000) and then Deselect. Go up to
Effects-3D Effects-Inner Bevel and apply the Round Preset default settings. SAVE
10. Add a new layer and rename Nose. Go up to Selections-Load from Disk and click on
nose.sel. Click Open. Flood fill with Black (000000) and then Deselect. Add the same
round inner bevel. SAVE
11. Add a new layer and rename Mouth Line. Go up to Selections-Load from Disk and
click on mouth line.sel. Click Open. Flood fill with Black (000000) and deselect. Move
this layer below the Nose layer and add the round inner bevel. SAVE
12. Activate the Nose layer and add a new layer and rename Left Cheek. Go up to
Selections-Load from Disk and click on left cheek.sel. Click Open. Flood fill with DB6D75
deselect and go up to Effects-Blur-Gaussian Blur-and put in 15 and then click on Okay.
Duplicate the Left Cheek layer and go up to Image-Mirror and rename this new layer
Right Cheek. Use your Mover tool to move your right cheek over next to the nose. Don't
worry about any hanging over we will get rid of that. *S* SAVE
13. While still on the Right Cheek layer go up to Selections-Load from Disk and click on
bear_body.sel and click Open. Go up to Selections-Invert and hit your delete key on
your keyboard. Go up to Selections-Select None. SAVE
14. Add a new layer and rename Heart. Go up to Selections-Load from Disk and click on
heart.sel. Click Open. Flood fill with Black (000000) and go up to Selections-Modify-
Contract and put in 1. Click Okay. Flood fill with C00000 and deselect. Go up to
Effects-Noise-Add and add the same noise as you did earlier which was 8 uniform. Next
go up to Effects-3D Effects-Inner Bevel and apply the pillow preset.
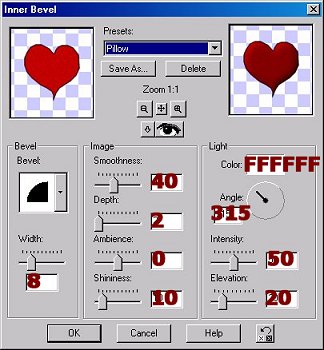
SAVE
15. Add a new layer and rename Lines. Go up to Selections-Load from Disk and click on
lines 1.sel. Click Open. Flood fill with Black (000000). Deselect. SAVE
16. Add a new layer and rename Bow 1. Go up to Selections-Load from Disk and click on
bow1.sel. Click Open. Flood fill with Black (000000) and go up to
Selections-Modify-Contract and put in 1 and click Okay. Now flood fill with FF4040.
Deselect and go up to Effects-Noise-Add and put in 10 uniform. Go up to Effects-3D
Effects-Inner Bevel and add the Pillow preset default settings. SAVE
16. Add a new layer and rename Bow 2. Go up to Selections-Load from Disk and click on
bow2.sel. Click Open. Flood fill with Black (000000) and go up to Selections-Modify-
Contract and put in 1 and click Okay. Now flood fill with your choice of color. I used
FF4040. Deselect and go up to Effects-Noise-Add and put in 10 uniform. SAVE
17. Add a new layer and rename Bow Lines. Go up to Selections-Load from Disk and
click on bow lines.sel. Click Open. Flood Fill with Black (000000). Deselect. SAVE
Turn off the visibility of all layers but the Bow 2 & Bow Lines. Go up to
Layers-Merge-Merge Visible. Rename the merged layer Bow 2. Make all layers visible and
add a drop shadow to Bow 2. I used V&H: 2 Opacity: 30 Blur: 3 Color: Black. Repeat
Drop shadow and change the V&H to -2. SAVE
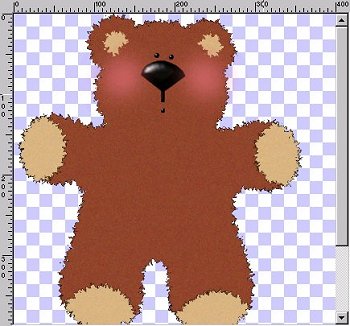
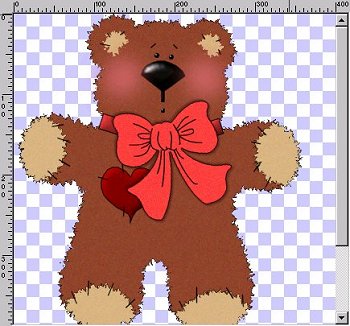
19. Last layer. *S* Add a new layer and rename eyebrows. Go up to Selections-Load
from Disk and click on eyebrows.sel. Click Okay. Flood fill with Black (000000) and
deselect and save. At this point you can add any drop shadows or do anything else
you like with the bear before you merge. When done go up to Layers-Merge-Merge
Visible. If you resize don't forget to sharpen your image. Also, don't forget to tube this
little guy for future projects. *S*

HOME
BACK
NEXT
Copyright
� 2003
Designs by Cheri All Rights
Reserved.