|
|
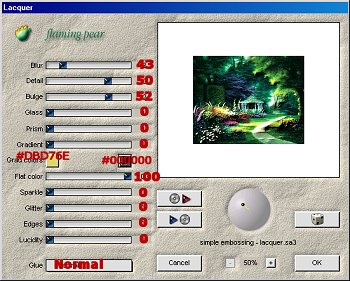
2. On the first copy go to Flaming Pears Lacquer and use the Simple Embossing Lacquer preset default settings.(see screen shot) then click the OK button.
***SAVE***
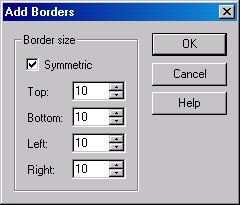
3. Make your Background color White. Go up to Image-Add Border- 10 symmetric. Click the OK button
4. Take your Magic Wand and touch the White border you just made.***If part of your image is selected undo and chose another color***Go to Effects and then Ulead-Art Texture. When screen is up click on the Edit button. Click on Palette-5 then click on the OK button.
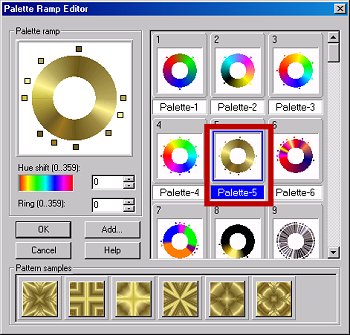
On this screen I picked the third one on the top, then click the OK button.
***SAVE*** Never know when your program will boot you off. :(
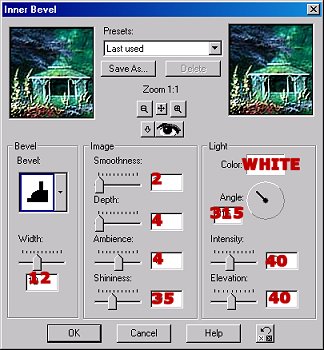
5. Go to Effects-3-D- Inner Bevel and key in the following settings.
6. Go up to Selections-Invert then add a new layer and go to Effects-3-D Effects- Cut Out. V&H: 5 Opacity: 100 Blur: 30 Shadow Color(001410)***Or pick color of your choice. If using own graphic pick a dark complimenting color. Click the OK button. Appy the same cut out again but change V&H to -5. Go up to Selections-Select None then up to Layers-Merge-Merge Flatten. **SAVE**
7. Background color should still be White. Go up to Image-Add Borders 25 Symmetric. Take your Magic Wand and touch the new border.
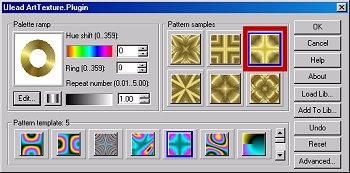
8. Change Foreground to pattern and pick the copy you minimized. Angle 45* Scale 100. Flood fill the white border with this pattern. Add the same Flaming Pear plugin - Lacquer Simple as you did in step 2.
***KEEP SELECTED.***
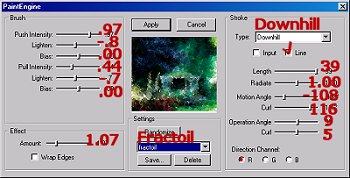
9. Fantastic Machines- Paint Engine-Fractoil default settings. (see screen shot) Click on the Apply button.
10. Selections-Select none. Then repeat steps 3-5
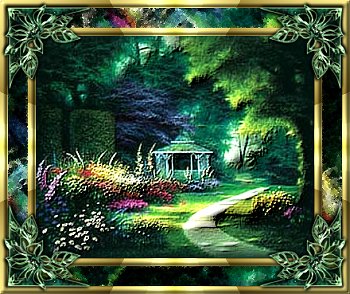
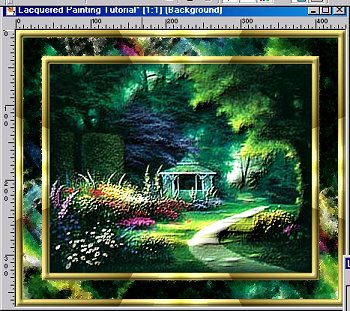
11. This is what you should have at this point.
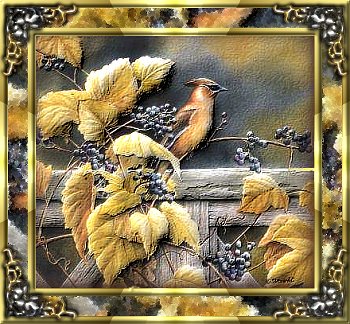
You can either leave as is or you can add corner fonts or dress it up however you like. If you need to resize make sure you sharpen your image afterwards. Here is another one I did using a different graphic.