Halloween Door Hanger


HDH1

This tutorial is written in PSP7 and assumes you have a working knowledge of PSP at a beginners level. I am sure this can easily be done in other versions of PSP.

This tutorial was written and created by me, Cheri Anderson. It is copyrighted by law and you may LINK to them only. Do not change the words, graphics, or any part of this tutorial around and reproduce it as your own without my written permission. Do not send this tutorial through the email, any type of mailing lists, Yahoo Groups or other sites. You may print and save this tutorial for your personal use only. Creations you make from this tutorial are YOUR creations and you may do what you like with them.

If you would like to use this tutorial for group lessons OR you are having trouble doing this tutorial, please contact me at Cheri


FOR THIS TUTORIAL YOU WILL NEED:

JASC's PSP (30 day free trial)- Just click the Paint Shop Pro 7 button
PSP7


Eye Candy 3.1: Comes with PSP7.04 or you can use Eye Candy 4000


Eye Candy 4000: Click on Eye Candy 4000 and then click on Demo.
Aiken Skin Software


My Selections just click the folder: Selections
Make a folder for these selections so you don't get them mixed up with your other selections. *S*


1. Open a 300x300 new transparent image. Add a new layer and rename it Wire 1.

2. Open the wire1.sel and flood fill with #000000. Deselect and add the round inner bevel.

3. Add a new layer and rename CBody. Open the cbody.sel and flood fill with #000000. Invert and add the following Drop Shadow. V&H=0 Opacity= 100 Blur=35 Color=808080. Deselect.

4. On the same layer open the cfeet.sel and flood fill with #FFFFFF. Deselect and add a 7% noise. Add the jiggle and SAVE.

Jiggle Settings


5. Add a new layer and rename Welcome Text. Open the text.sel and flood fill with your choice of color. I used #E56A07. Deselect and add the round inner bevel.

Step 5


6. Add a new layer and rename Holes1. Open holes1.sel and flood fill with #000000. Deselect and add the round inner bevel. SAVE

7. Add a new layer and rename CTail. Open the ctail.sel and flood fill with #000000. Invert and apply the same Drop shadow as in step 3, but change your blur to 15. Deselect, add a 7% noise and apply the same Jiggle. SAVE

8. Add a new layer and rename CEars. Opent the cears.sel and flood fill with #000000. Modify Contract by 5 and fill with #DF89A1. Deselect. Now Select all, float and invert and apply the same drop shadow but change the blur to 10. Deselect and add a 7% noise and the same jiggle. SAVE

9. Add a new layer and rename CBow. Open the cbow.sel and flood fill with #FFFF00. Deselect and add the round inner bevel. SAVE

10. Add a new layer and rename CHead. Open the chead.sel and flood fill with #000000. Invert and apply the same Drop shadow but change the blur to 35. Deselect and add a 7% noise and apply the Jiggle with the same settings. SAVE

Step 10


11. Add a new layer and rename CNose. Open the cnose.sel and flood fill with #DF89A1. Deselect and add the Puff inner bevel. SAVE

Puff Inner Bevel


12. Add a new layer and rename CEyes. Open the ceyes1.sel and flood fill with #FFFFC0. Deselect. On the same layer open the ceyes2.sel and flood fill with #000000. Add the round inner bevel and deselect.

13. Add a new layer and rename mouth. Open the cmouth1.sel and flood fill with #FFFFFF. On the same layer open the cmouth2.sel and flood fill with #000000. Deselect and add a 7% noise. SAVE

14. Add a new layer and rename CWhiskers. Open the cwhiskers1.sel and flood fill with #000000. Deselect. On the same layer repeat the same steps for cwhiskers2.sel and cwhiskers3.sel. Deselect and SAVE

Step 14


NOTE: YOU CAN MERGE VISIBLE THE CAT NOW IF YOU LIKE.

15. Add a new layer and rename Bag. Open the bag.sel and flood fill with #000000. Modify contract by 1 and fill with #E56A07. Invert and apply the same Drop shadow but change the color to #E9A47B. Deselect and add a 7% noise. SAVE
16. Add a new layer and rename BMouth. Open the bmouth.sel and flood fill with #843900. Deselect

17. Add a new layer and rename BEyes and Nose. Open the beyes1.sel and flood fill with #000000. Modify contract by 1 and fill with #FFFF00. Deselect.

On the same layer open the beyes2.sel and fill with #000000. Add the round inner bevel and deselect. Still on the same layer open the bnose.sel and fill with #000000. Add the round inner bevel and deselect. SAVE

Step 17


NOTE: YOU CAN MERGE VISIBLE THE BAG NOW IF YOU LIKE.

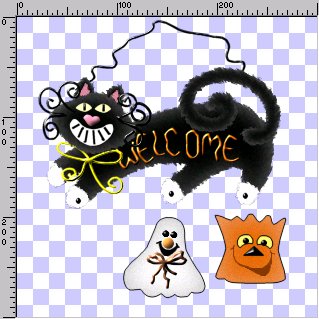
18. Add new layer and rename Ghost. Open the ghost.sel and flood fill with #000000. Modify contract by 1 and fill with #FFFFFF. Invert and add the same drop shadow but change the color to #C0C0C0. Deselect and add a 7% noise.

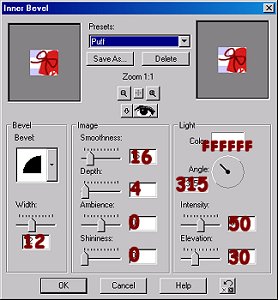
19. Add new layer and rename GNose. Open the gnose.sel and fill with #D5873B. Deselect and add the Puff inner bevel.

20. Add new layer and rename GEyes. Open the geyes.sel and fill with #000000. Deselect and add the round inner bevel.

21. Add a new layer and rename GMouth. Open the gmouth.sel and fill with #000000. Deselect and SAVE.

22. Add a new layer and rename GBow. Open the gbow.sel and fill with #F18E55. Deselect and add the round inner bevel changing the Intensity to 30 and the Elevation to 20.

Step 22


NOTE: YOU CAN MERGE VISIBLE THE GHOST NOW IF YOU LIKE

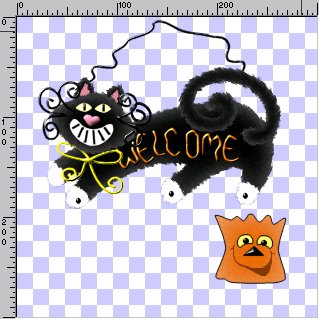
23. Add a new layer and rename Pumpkin. Open the pumpkin.sel and fill with #000000. Modify contract by 1 and fill with #E56A07. Invert and apply the same Drop shadow but change the color to #E9A47B. Deselect and add a 7% noise. SAVE

24. Add a new layer and rename PMouth. Open the pmouth.sel and fill with #843900. Deselect and SAVE.

25. Add a new layer and rename PNose. Open the pnose.sel and fill with#000000. Deselect and add the round inner bevel.

26. Add a new layer and rename PEyes. Open the peyes1.sel and fill with #000000. Modify contract by 1 and fill with #FFFF00. Deselect. On the same layer open the peyes2.sel and fill with #000000. Add the round inner bevel and deselect. SAVE

27. Add a new layer and rename PStem. Open the pstem.sel and fill with #000000. Modify contract by 1 and fill with #004000. Invert and apply the same drop shadow but change the color to #8FBD8F and blur to 15. Deselect and SAVE

28. Add a new layer and rename PLeaf. Open the pleaf1.sel and fill with #000000. Modify contract by 1 and fill with #407B21. Invert and apply the same drop shadow but change the color to #0E700E and blur to 20. Deselect and add a 7% noise.

On the same layer open the pleaf2.sel and fill with #004000. Deselect and SAVE.

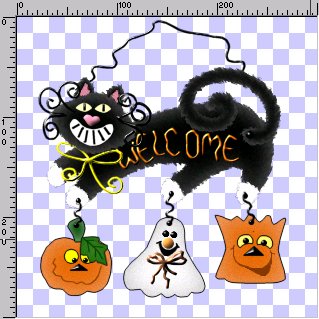
29. Add a new layer and rename Holes2. Open the holes2.sel and fill with #000000. Deselect and add the round inner bevel.

On the same layer open the wire2.sel and fill with #000000. Add the round inner bevel and deselect. SAVE

HDH Finished


That's it! Merege visible and you're done. :o) Thank you so much for taking the time to do my tutorial. I hope that you have enjoyed doing this tutorial as much as I have making it. :o)


Amber Results


Home

Back

Next


Sept2003_TutWriter_md


Email me at Designs by Cheri


Copyright �September 12, 2003
Designs by Cheri All Rights Reserved.
Hosted by www.Geocities.ws

1