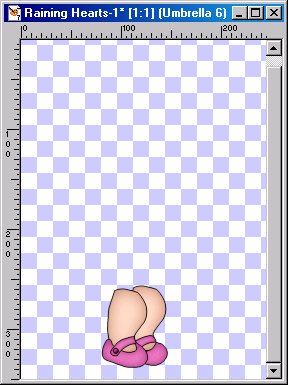
9. Add a new layer and rename Slip. Open the rslip.sel and flood fill with #000000. Modify contract by 1 and fill with #FFFFFF. Invert and add the same drop shadow but change the blur to 15 and color to #C0C0C0. Deselect and add a 5% noise and SAVE.
10. On the same layer open the lslip.sel and repeat the same steps. But invert and add the 5% noise before deselecting. SAVE
11. Add a new layer and rename Bow 1. Open the bow1.sel and flood fill with #000000. Modify contract by 1 and fill with #FFFFFF. Invert and add the same drop shadow and noise. SAVE.
12. Add a new layer and rename Bow 2. Open the bow2.sel and repeat the same steps. On the same layer open the bow3.sel and fill with #000000. Deselect and SAVE.
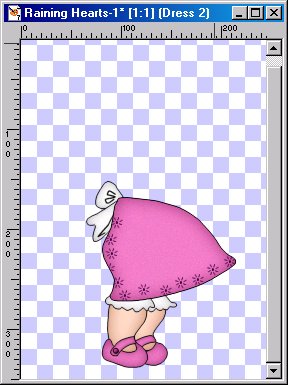
13. Add a new layer and rename Dress 1. Open the dress1.sel and flood fill with #000000. Modify contract by 1 and fill with F17DC7. Invert and apply the same drop shadow but change the Blur to 25 and the color to #A3357B. Deselect and add a 5% noise. SAVE.
14. Add a new layer and rename Dress 2. Open the dress2.sel and fill with #400040. NOTE: You may have to zoom in for this. Deselect and SAVE.
15. Add a new layer and rename Neck. Open the neck.sel and flood fill with #000000. Modify contract by 1 and fill with #FFDCC9. Invert and apply the same drop shadow but change the blur to 7 and the color to #C48166. Deselect and SAVE.
16. Add a new layer and rename Apron 1. Open the apron1.sel and flood fill with #000000. Modify contract and fill with #FFFFFF. Invert and apply the same drop shadow but change the Blur to 20 and the color to C0C0C0. Deselect and add a 5% noise. SAVE.
17. Add a new layer and rename Apron 2. Open the apron2.sel and flood fill with #000000. Modify contract by 1 and fill with #FFFFFFF. Invert and apply the same drop shadow but change the Blur to 10. Deselect and apply a 5% noise. SAVE
18. Add a new layer and rename Apron Hearts. Open the ahearts.sel and flood fill with #000000. Modify contract by 1 and fill with #F17DC7. Invert and apply the same drop shadow but change the Blur to 7 and the color to A3357B. Deselect and add a 5% noise. SAVE
19. Add a new layer and rename Handle. Open the handle.sel and flood fill with #000000. Modify contract by 1 and fill with #F17DC7. Invert and add the same drop shadow but change the Blur to 10 and the color to #B62C84.
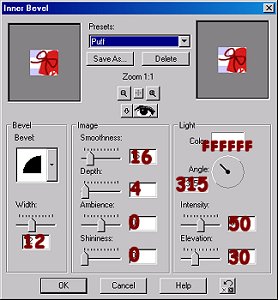
Deselect and add a 5% noise. Then add the puff inner bevel. SAVE
20. Add a new layer and rename Hands. Open the hand1.sel and flood fill with #000000. Modify contract by 1 and fill with #FFDCC9. Invert and apply the same drop shadow by change the Blur to 10 and the color to C48166. Deselect and SAVE.
On the same layer open the hand2.sel and repeat the same steps. Deselect and SAVE
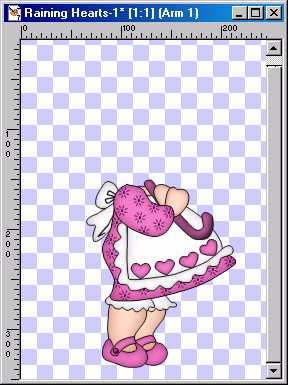
21. Add a new layer and rename Arm. Open the arm1.sel and flood fill with #000000. Modify contract by 1 and fill with F17DC7. Invert and apply the same drop shadow but change the Blur to 15 and the color to A3357B. Deselect and apply a 5% noise. SAVE
22. On the same layer open the arm2.sel and fill with #400040. You may need to zoom in to fill the selection. Deselect and SAVE
23. Add a new layer and rename Hair 1. Open the hair1.sel and flood fill with #000000. Modify contract by 1 and fill with AE776E. Invert and apply the same drop shadow but change the color to 5D3E39. Deselect and add a 5% noise.
On the same layer open the hair1detail.sel and fill with #402D2A. Deselect and SAVE
24. Add a new layer and rename Head. Open the head.sel and flood fill with #000000. Modify contract by 1 and fill with #FFDCC9. Invert and apply the same drop shadow but change the Blur to 25 and the color to #C48166. Deselect and SAVE
25. Add a new layer and rename Cheeks. Open the cheeks.sel and fill with E99DAB. Apply a 5.00 Gaussian Blur. SAVE
26. Add a new layer and rename Nose. Open the nose.sel and fill with #FFDCC9, deselect and add the round inner bevel. Change the smoothness to 80, apply this inner bevel twice. SAVE
27. Add a new layer and rename Eyes. Open the eyes.sel and flood fill with #000000. Deselect and apply a round inner bevel. SAVE
28. Add a new layer and rename Hair 2. Follow the same steps here as you did for Hair 1 in step 23. Don't forget to apply the hair2detail.sel. SAVE
29. Add a new layer and rename Details. Open the detail.sel and flood fill with #000000. Deselect and SAVE.
30. Add a new layer and rename Hearts. Open the hearts.sel and flood fill with #000000. Modify contract by 1 and fill with #F86683. Invert and apply the same drop shadow but change the Blur to 7 and the color to #BA2C47. Deselect and add a 5% noise. SAVE
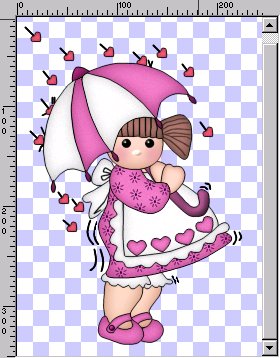
You still with me? *S* All we have left is the Umbrella.
31. Add a new layer and rename Umbrella 1. Open the umbrella1.sel and flood fill with #000000. Modify contract by 1 and fill with #B62C84. Deselect and add the Puff inner bevel. SAVE
32. Add a new layer and rename Umbrella 2. Open the umbrella2.sel and flood fill with #000000. Modify contract by 1 and fill with #FFFFFF. Invert and apply the same drop shadow but change the Blur to 20 and the color to C0C0C0. Deselect and add a 5% noise. SAVE.
33. For selections umbrella3 thru umbrella5 you can either alternate colors or use the same colors. Put each of these on their own layers so that you can add the 5% noise.
Make sure that you pick a darker color of the color you choose or a contrasting colors. The drop shadow and blur will stay the same.
34. Add a new layer and remame Umbrella 6. Open the umbrella6.sel and flood fill with #000000. Modify contract by 1 and fill with #B62C84. Deselect and add the Puff inner bevel.