|
|
|
... the evolution of my Monster continues (and continually gives creedence to the law that black holes suck everything in sight (includiing $$$ )...
For more ideas and info on modding your Monster as well as the cameraderie of other Monster owners, please visit the DML website!
|
|
 |
|
|
Mod Legend
Please note: costs, effort and time requirements are relative. Time requirement is dependent on your personal skills and access to tools as well as prep-time.
|
|
x1 |
x2 |
x3 |
x4 |
| Cost ($US) |
 |
$0 - $100 |
$101 - $250 |
$250+ |
|
| Effort |
 |
minimal tools |
tool box & some brains |
tools + friend with extra tools |
|
| Time (hh:mm) |
 |
00:00 - 00:30 |
00:31 - 01:00 |
01:01 - 02:00 |
02:00+ |
|
|
|
|
|
|
|
|

| Mod Type
|
Modification
|
Notes
|
Pics
|
Mod 11
06/2002 |
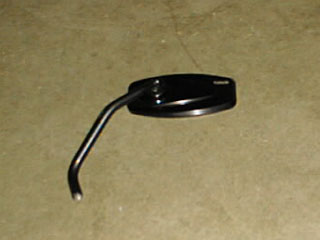
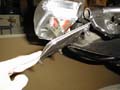
Roadracing mirrors
|
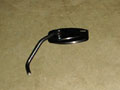
After looking at the velcroed bicycle mirror for such a long time, I decided to go with some Roadracing Mirrors. I bought them used for about $100 total. The glass has a bluish tint to it and the view looked great! However, the mirrors are all aluminum. Be sure you don't torque down the sleeve nut, as it will cause problems later. I went on a ride 2 weeks later and apparently because of the tightening of the sleeve nut, my L-hand mirror flew off at around 45 mph. I was lucky enough that one of the other riders in the group was able to stop and pick it up. Needless to say, I ended up riding home with 1 mirror only. The picture is of the broken mirror. I couldn't find the good mirror at the time I took the picture.
The quality of the RR mirror is excellent because the glass didn't break or shatter when it hit the asphalt. Upon closer inspection, I found a small chip in the corner of the mirror. Other than a small scratch on the elbow-bend on the stem (and the shearing of the threading when the mirror flew off), nothing else seemed to be damaged. I would still recommend this product if you're looking for a mirror upgrade.

|
|
Mod 12
08/2002 |
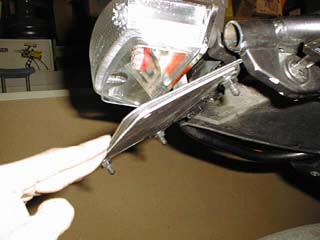
Clear tail lens
|
I installed a $50 clear tail lens from Clear Alternatives + an LED bulb from Road Rider in San Jose. The OEM bulb kept breaking almost every other month. The LED bulb works great. I purchased it for $25. |
 |
Mod 13
10/2002 |
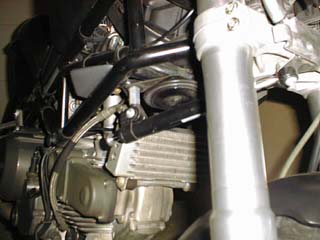
Steering Damper
|
I purchased a [relatively] low cost steering damper for $100 used. Having the steering head shake every time I rode over the little freeway pucks (i.e. the lane reflectors) as I changed lanes convinced me that the lightweight front end needed some help.
I was glad to have it on when I was leaning through a turn and ran over a pothole! It was enough to take anyone by surprise! I may upgrade to a better steering damper in the future.
|
|
Mod 14
11/2002 |
CRG blindsight mirror
|
I finally got around to replacing the velcroed bicycle mirror with a CRG blindsight mirror. I purchased it used for $30. I still ride with only L-hand mirror. I don't feel like my awareness has decreased because of running with only one. The blindsight is just what its name implies... you can visualize vehicles behind you but with the diameter being much smaller than the CRG hindsight, the convex lens definitely shows you what the "objects are closer than they appear" scenario looks like on a moto. After gauging the distances, I've found that the distance of a vehicle behind me is about 1/2 of the apparent distance in the mirror.
|

|
Mod 15
11/2002 |
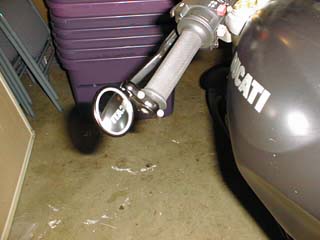
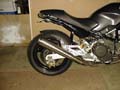
Sil Motor exhaust cans
|
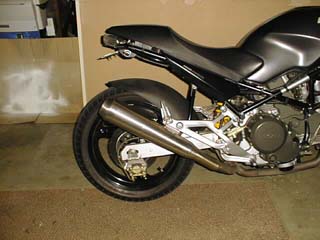
After mulling over and over and over on the idea of some aftermarket cannisters, I decided to go with a set of low mount Sil Motor exhaust cans. I really liked how the Sil Motors sounded. I had already heard a set of Arrows, Termigionis, and Remus cans. Still, the Sils really got my attention. After deciding on the make, the style was hard to choose. I ended up going with the conical cans for the "retro" look. I think they look great! The low mounts were preferable since I wanted to be able to ride 2-up with brushed stainless pipes. The only downside is that the stainless tends to have a high heat retention. In all, the pipes were about $550 or so.
|
|
Mod 16
11/2002 |
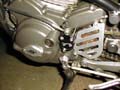
Sprocket cover
|
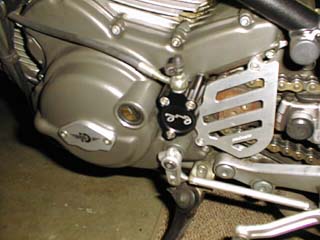
Another cosmetic mod, the aluminum sprocket cover replaced the OEM plastic one. It looks much nicer, although it was $50. I also got to see all the road-crap that tends to build up behind the cover when I did the change.
|
|
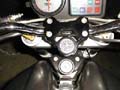
Mod 17
12/2002 |
Bar-clamp clock
|
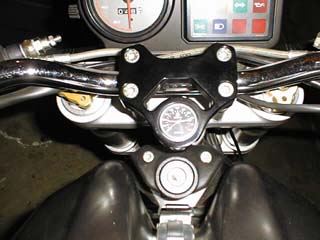
Decided to install a clock on the monster. I've run with fairly inexpensive watches from stores like Target strapped onto the handlebars. They eventually failed from exposure to the rain when I ventured out in the elements. I found a Rizoma barclamp clock that looked way cool from Motostrano. It was under $100. It took about 5 min. to install.
|
|
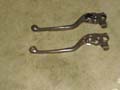
Mod 18
12/2002 |
Adjustable levers
|
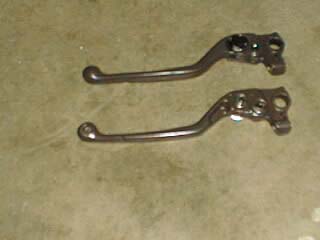
Went with some fairly inexpensive LP adjustable levers for about $12 each. Ended up switching them out after installing the Evo slave cylinder (see Mod 20).
|
 |
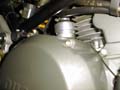
Mod 19
01/2003 |
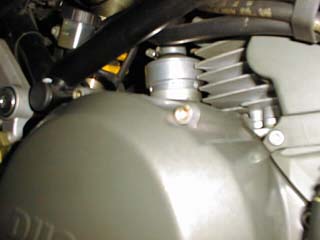
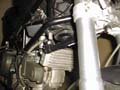
Oil breather
|
I was not happy with the oil blow-by created by the stock oil breather so I switched to a $100 billet unit purchased from Britalia. Since conversion, the rear part of the engine still remains immaculate (in relation to the oil breather). No more cleaning up that mess! I did not use a spanner for installation. The Nichols unit comes with a spanner. I used a philips-head screwdriver to lightly tap (with the BFH) the threaded billet breather into place.
|
|
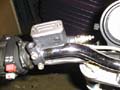
Mod 20
01/2003 |
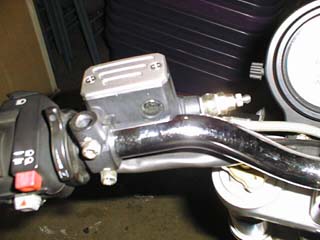
Evo slave cylinder
|
I finally got around to switching to the Evo slave cylinder in black (it comes in black, gold, or silver). I believe it was around $130 or so. It was quite a pain to bleed the air out. Be sure to put some tarp under the area where you're working and try to cover any painted parts of your bike with rags. You'll have to fill the master cylinder with brake fluid (the clutch and brake fluid are the same), which is quite caustic on painted parts.
The evo unit comes with a master banjo bolt for bleeding the unit. We eventually used this to finish bleeding the darned thing. The whole process of bleeding took about 3 hrs or so. I'm sure it doesn't take nearly this long if you're a pro at it. The clutch feel is way nice now! It's about a 20% decrease in clutch pull and is very noticeable.
|
|