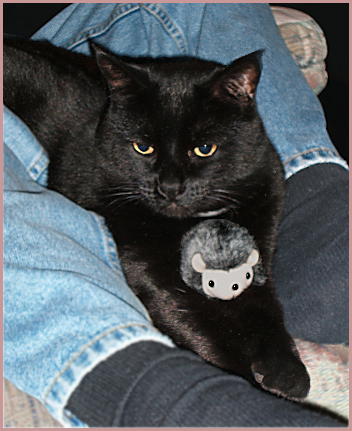
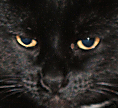
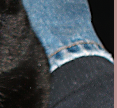
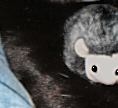
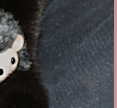
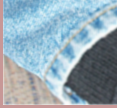
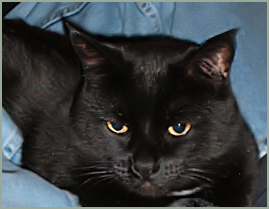
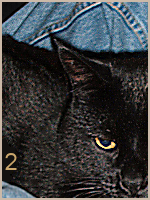
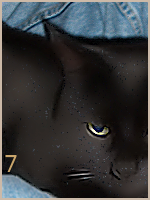
| Photo Fixes, Part 3: Removing Noise This is Leo, our senior cat, being cooperative by holding a toy (which is there because Leo's cute about things like that and because otherwise his front would be unrelieved blackness). This picture is smartsized-down-to-20% of the original cropped photograph, not yet sharpened. Characteristically, I had to do something about the shadow that gave him a double-tufted ear and the gray plastic tail of the toy mouse (it's vertical, against Leo's one white horizontal marking). Then I used Unsharp Mask set at 1.25 - 125% - 4, cloned away some irregularities in the sharpened ear-shadow, and blurred my husband's threads (literally) in the foreground very slightly and very carefully (Gaussian, r=.55 twice, altering the selected area). The camera's autofocus chose the area where sock meets jeans; I really can't blame it, since Leo is basically a shadow, but it would be nice to get a really good picture of him. When I looked at the result in my browser, I found that my blurring been too conservative. So I added to the selection and used a radius of .65 (which is my favorite setting), twice, again altering the selections. |
 |
|
|
|
|
|
|
|
|
|
|
|
|
|
|
|
|
 |
 |
 |
 |
 |
 |
 |
 |
 |
 |
 |
 |
| <--- Finally! I can start playing with the Adjust menu's other photo-fixing tools. |
|
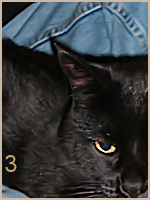
Here's the result of One-Step Noise Removal. It doesn't work for this photo, because it removes too many of the highlights from Leo's fur and changes the fabric of the jeans to brushed denim. But I like it: it's soft without being fuzzy, and it does dampen the contrast between light and dark pixels both in Leo's dark fur and my husband's much lighter jeans. It's also a tool to keep in mind for this pleasing soft effect for its own sake, an extra "soften" filter. |
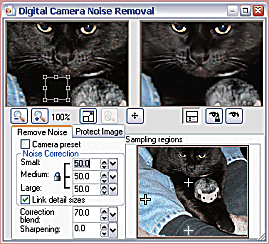
But I persevered and learned that the default settings reduce noise to about the same degree as the OneStep tool, and that the bounding box below Leo's chin is one of the Sampling Regions shown as crosses in the lower pane; perhaps because they're sampling black, gray, and light blue (pretty representative of everything in the picture but Leo's eyes), moving and resizing them caused no noticeable difference in noise-removal results.
|  
|
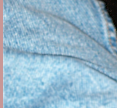
· The second: Remove Noise (medium or large) set at 100, Correction at 70, and Sharpening at 50; but Remove Noise set at zero, Correction at 70 or 0, and Sharpening at 50 (i.e., only sharpening) produces the same #2 effect.
· The third: Remove Noise (small only) set at 50, Correction at 70, and Sharpening at 25; this smooths the denim but actually adds noise (colored pixels) to Leo's fur.
· The fourth: Remove Noise set at zero, Correction at 70 or 0, and Sharpening at 25.
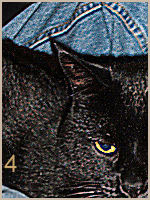
· The fifth (below) is what happened when I applied number 4's settings to number 4's results (interesting).
· The sixth: Remove Noise (linked) set at 100, Correction at 100, and Sharpening at 100 (fascinating; I saved a copy of this one). I quit the Remove-Noise Tab with that, happy.

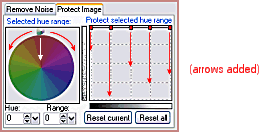
· The seventh image is the result of the same settings on the Remove Noise tab as the sixth; pretending I wanted to protect the texture of the jeans, I moved the pip around to the blues (218°) and almost all the way in (toward the center) until the protected segment showed the edge of blue-violet, all the blues and cyans, and a bit of the bluish greens (122°), and then I pulled all the nodes on the 'Protect selected hue range' down to the bottom of the grid. By leaving some nodes up—the one at far right, e.g.—I could 'unprotect' certain shades of blue; this adjustment is like the Hue Map, only it affects lightness instead of color. One difficulty with protecting a hue this way is that the blue pixels in Leo's fur (and in the upholstery fabric) were left to contrast with the smoothed areas around them; they need to be cloned away. Still, 'Protect Image' worked on the denim (Help suggests that it's particularly useful for leaving skin tones unchanged in an otherwise noisy photo).
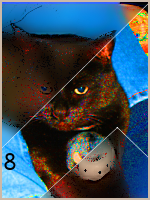
· For the eighth image, I increased the saturation of the whole image by 100% and selected out an odd shape that contains the full range of hues and shades before using the Noise Remover. Then I set the Remove-Noise-tab numbers all to 100 (like numbers 6 and 7); on the Protect-Image tab I protected the hues in a 30° segment on either side of pure red that were in the darker half of the lightness range; and protected hues of blue-cyan (206°) in a 130° segment that were in the darkest 25% of the lightness range. Protect Image works! Notice, at lower right, how only the lighter part of the sock is smoothed, how at upper right the orange in the upholstery is not protected, how Leo's face at left has (protected) dark-red noise amid the smoothness.
Final Observations:
· Digital Camera Noise Removal is a resource hog. My computer has a dual-core 2.6 GHz CPU, and I am not used to waiting for preview images to appear, but during all phases of this noise removal, I had to wait 4 or 5 seconds—long enough to begin wondering whether or not I'd see any effect at all.
· It's also frustrating to use, and I think Corel knows it, for Help refers one to the JPG-Artifact-Removal and Edge-Preserving-Blur and Texture-Preserving-Blur tools for effects that this noise-removal tool can probably accomplish with greater control. For almost as much control and much less frustration, I think Xero's "Improver" plugin is worth a try; it is fun to use.
· Still, some of the noise-removal effects—and the degree of control that this tool allows—are pretty impressive. But the overcomplicatedness of the controls with its attendant subtlety of effect has little to do with removing ordinary noise from ordinary photographs. But I have learned, somewhat, how to use it.
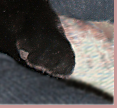
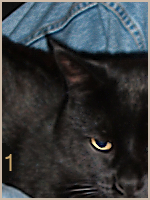
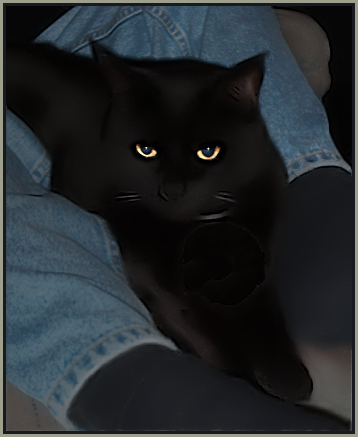
Take away Leo's toy, and he becomes a rather intimidating fellow, doesn't he?
 |
|
|
|
|
|
|
|
|
|
|