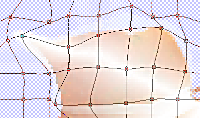
 The next step is to warp the gradients so that their highlights follow the contours of the leaf-lobes. Activate one of the lobe-layers; you may need to reduce its opacity on the layer palette so you can see the leaf below. Select the Mesh Warp tool and get to work. The next step is to warp the gradients so that their highlights follow the contours of the leaf-lobes. Activate one of the lobe-layers; you may need to reduce its opacity on the layer palette so you can see the leaf below. Select the Mesh Warp tool and get to work.
|
|
The screenshot shows only the mesh-nodes that I moved; the ones you can't see haven't been moved at all. The idea here is to make the thickest part of the gradient appear along the leaf-vein that defines the lobe and, if you want to do it right, a little bit above the vein (toward the top) to suggest a highlight on the opalescent surface. The gradient should extend beyond the edge of the leaf.
|
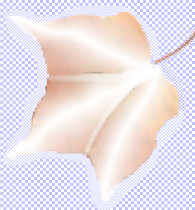
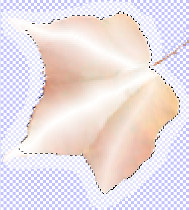
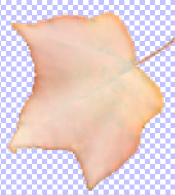
| When you've warped the gradient on all three lobes, your leaf will look similar to this.
|
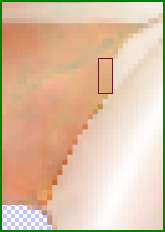
| Now it's time to remove the overlapping parts of the gradients. Make one of the lobe-layers invisible so you can see the area near the stem clearly (in the screenshot below, I didn't—but I did when I got closer to the stem, where the top lobe interfered with my view); increase the transparency of one of the remaining lobe layers (I did this to the middle lobe), so the overlapping area of the other lobe is obvious. Then use a small brush and erase. You'll be able to see where you erased too much: the leaf-layer's color will be vibrant, so fix that with Undo. Some slight overlap is inevitable, but those pixels will be partly transparent on both layers and will blend. When you've removed the overlap from all three layers, merge them—just the gradient layers! keep the leaf-layer separate.
|
|
ERASING THE OVERLAP
|
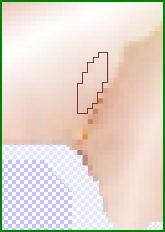
Once all the gradient highlights are on the same layer, you can use a fairly small, soft brush (I used the Calligraphy brush) to smooth their previous borders with the smudge or similar tool. Then apply a Gaussian blur to even out the surface of the three lobes. Set the radius at 2, 2.5, or 3 (the degree of blur needed depends on your smoothing and what you like). The gumdrop leaf—or should we call it 'the opalescent irregular object'?—is taking shape... and it's time to load that first selection of the original leaf from the alpha layer and give this object a shaping trim.
|
SMOOTHING THE BORDERS
|
TRIM BY INVERTED SELECTION
|
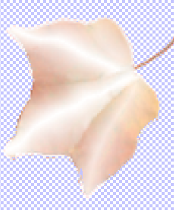
RESULT OF FIRST TRIM
|
FEATHERING THE SELECTION
|
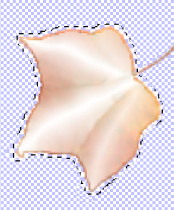
RESULT OF 2ND TRIM
|
| With the gradient layer active, load the selection, invert the selection, and press the delete key. Voila!—well, almost. The gradient layer will probably extend beyond the leaf or appear to. With the selection still active—or reloaded from the alpha channel—feather its inside by a pixel or two (with earlier PSP versions, contract and then feather), invert the selection, and delete. Getting your leaf to look like the result on the right is a matter of experimentation, undoing, re-doing, and deciding how thin you want the gradient at the edge.
|
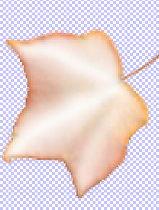
| Be patient, and don't worry. It's really hard to estimate where the visible edge of a feathered, inverted selection will be, but trial-and-error works. If you don't like the result, undo it; make a copy of the gradient layer and tuck it away, invisible, as the bottom layer. Then you can't mess up completely. Besides, you're almost done, and a revelation awaits you. When you've got the edge of the gradient layer and the edge of the leaf aligned ("2nd trim"), adjust the transparency/opacity of the gradient layer to the degree of opalescence that pleases you. Here's what I decided was thick enough for opalescence but transparent enough to remain a leaf.
|
|
|


