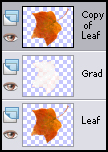
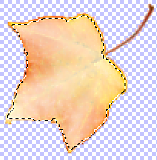
 Here comes the revelation. In the layer palette, duplicate the leaf layer and move it to the top. Here comes the revelation. In the layer palette, duplicate the leaf layer and move it to the top.
|
|
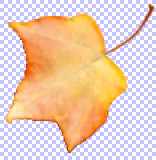
Set the layer blend mode of the copy to Overlay, and reduce the opacity until...
(You can also leave the blend at Normal, or try other modes...)
|
|
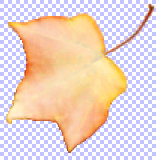
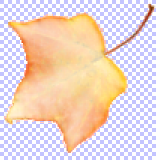
Definitely "Voila!" this time. If you're happy with it, you're done except for the very last clean-up step below. If you want to experiment further, read on....
These are some more can't-stop-tweaking things you can try:
|
|

|
|
|
|
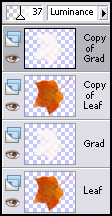
| Copy the gradient layer, put it on top, change its blend mode and transparency. Load the leaf-outline selection again, invert it, fuss with the borders (keeps the top layer from being too thick). You can keep producing (subtle) changes.
|
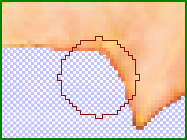
| NEXT-TO-LAST STEP
|
| I found the outer edge of the leaf a bit too dark, so I used the Lighten / Darken tool; I set the round brush to a medium softness and increased the step value to 20 so I wouldn't have to undo any too-dramatic changes. You can see the already-lightened edge to the left of the brush shape.
|
|
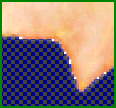
| THE LAST STEP
|
| Finally! This last little step prevents embarrassing surprises when you print or use your leaf on a web page. Do File � Preferences � General Program Preferences � Transparency and Shading, and make your transparency-background dark. There will probably be some translucent pixels that are too light (I edited the screenshot to make them obvious). Fix the pixels one-by-one so you won't have to change the transparency-checkerboard to a very light color and repeat this process to fix over-corrections; these pixels are on the opaque-transparent border, and if they're too light or dark they will show. Erase each offending pixel and clone the satisfactorily-dark color of the adjoining pixel into its place.
|
|
Now that you've finished, I must remind you that the three-lobed highlight-plus-dimension you made is a complex object, more difficult and exacting than most of what you can apply this process to (or: most other applications of it will be easy). Remember my first
"gumdrop leaf" navigation button? —Make something like that. Try out the opalescense on a little image of a VW bug or some other rounded, inanimate object. Having to make only one highlight (gumdrop gradient) layer simplifies things amazingly. Then you can give a cartoon character (duplicate) rosy gumdrop cheeks. Then you'll want to apply the process to a complex object, and you'll know that you can because you've done it! And you'll discover that doing it again, even with an irregular shape, takes a lot less time than you've spent fussing with this three-lobed leaf.
I'll be happy and gratified to see your results. Send me an email, or post your image(s) in the The Showcase at the PSPUG Forums.
|
|

