|
![[Build Your Own Arcade Controls!]](images/arcadecontrols.jpg)
![[Ultimarc: Ultimate Arcade Controls]](images/ultimarc.gif)
![[Oscar Controls]](images/oscar.jpg)

I am sedentary by nature, enjoying passive entertainment, eating when the mood takes me, and playing with my food.
I try to avoid conflict, but when I'm angered, I can be a devil - if you force me to fight, I will crush you. With apples!
What Video Game Character Are You?
|
| CONSTRUCTION |
- GETTING STARTED
-
According to the Cabinet Plans on ArcadeParadise.org, I needed
3 sheets of 4' X 8' wood. What kind to buy? From my reseach it appears most people were using MDF or flake board. Both are realativly
easy to work with and cheap. The downside of using these materials is that if you *screw up a hole* (no pun intended), it's difficult
to redrill the hole for new threads. Also, moisture in the air can weaken flake board and really make pieces sag and warp... especially
if they are lode bearing.
Flash back to the 80's... I do't know about you, but when I got killed in a game I used to kick the machine or slam my hand down on the
control panel. Stupid barrels! Curse you Donkey Kong! I was going to need something that could stand up to the pouning of
grown-ups and kids. For these reasons and the others mentioned above, I decided to use 3/4" plywood. Harder to work with, but it will
deffinitley take a *pounding*. (Ha-ha! Pun intended!)
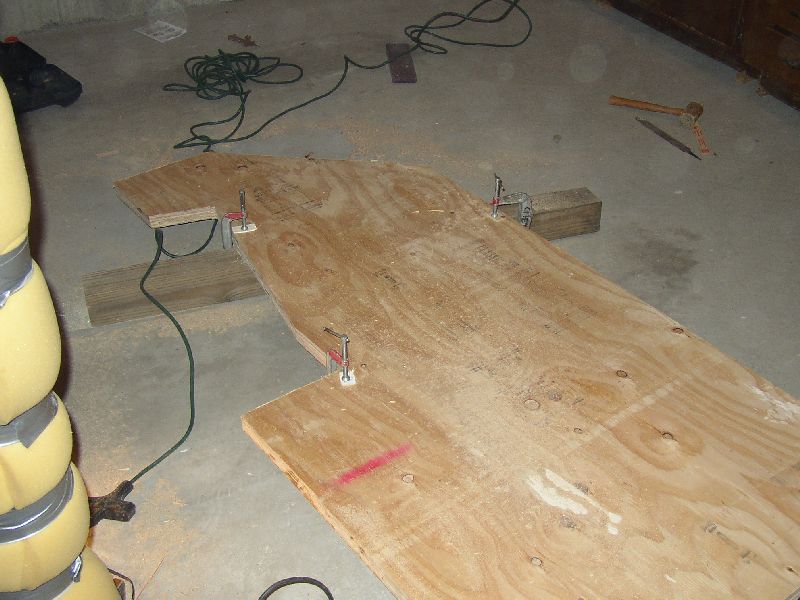
- ENDLESS CUTTING
-
Cutting and more cutting. It seamed likeit would never end! Some suggestions:

- Wear ear and eye protection when cutting. You want to enjoy this thing when it's done, right?
- Wear a hat to minimize the sawdust in your hair.
- Always wipe your feet before going in for lunch to avoid nags from the wife.
- Clamp matching pieces together so they both come out the same.
- Measure 3 x's... Cut once!
- DESIGN MODS
-
 The cabinet plans called for cutting up a bunch of 1" x 1" lengths for bracing inside the cabinet. Continuing with the
"I need something stronger" mentality, I used 1/4" lag screws to attach the cross pieces
to the cabinet body. The heads were recessed with a spade bit, and covered up with wood putty. I also added
metal "L" brackets to the inside corners to really beef it up.
The cabinet plans called for cutting up a bunch of 1" x 1" lengths for bracing inside the cabinet. Continuing with the
"I need something stronger" mentality, I used 1/4" lag screws to attach the cross pieces
to the cabinet body. The heads were recessed with a spade bit, and covered up with wood putty. I also added
metal "L" brackets to the inside corners to really beef it up.
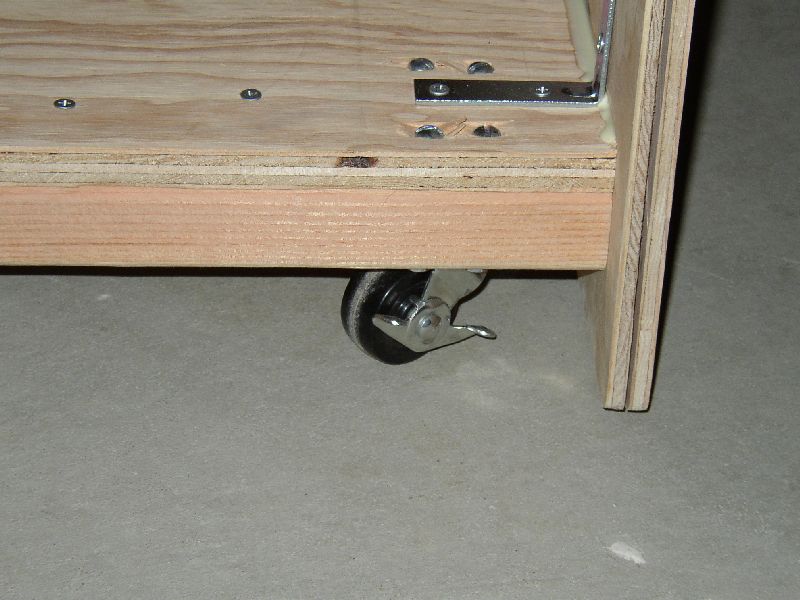
 Realizing that this thing is more like a tank than a video game cabinet, I thought it would be a good idea to put
caster wheels on the bottom so I could move the cabinet easliy. Also, me crazy wife likes to re-arrange the furniture
in the house at random times, so I figured I'd make it easy for her to move the cabinet.
Realizing that this thing is more like a tank than a video game cabinet, I thought it would be a good idea to put
caster wheels on the bottom so I could move the cabinet easliy. Also, me crazy wife likes to re-arrange the furniture
in the house at random times, so I figured I'd make it easy for her to move the cabinet.
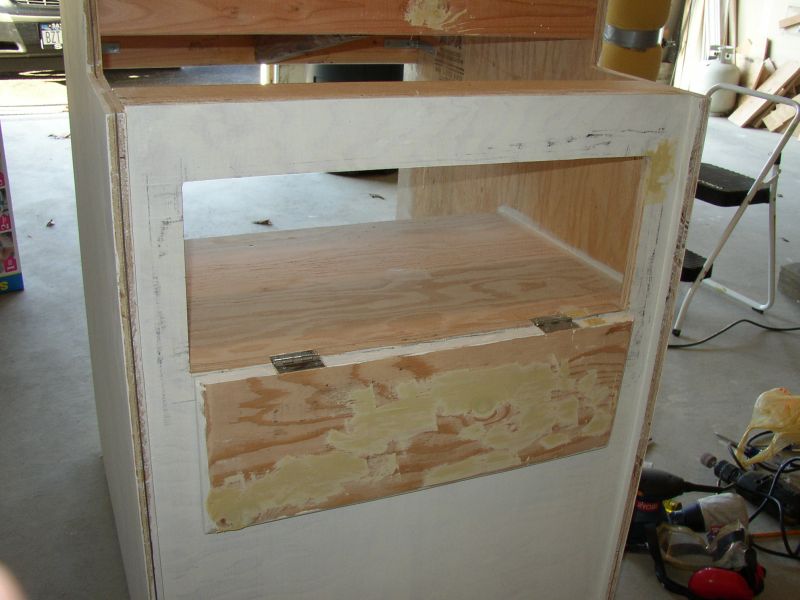
 You can't tell by looking at the pictures, but the cabinet is too wide to fit through a standard door. Errrr!
I made the control panel removable and now it fits through no problem. While we're on the subject of easy access, I
added a front access panel and put hinges on the control panel top in case I need to get "under the hood".
You can't tell by looking at the pictures, but the cabinet is too wide to fit through a standard door. Errrr!
I made the control panel removable and now it fits through no problem. While we're on the subject of easy access, I
added a front access panel and put hinges on the control panel top in case I need to get "under the hood".
I decided to leave the back of the cabinet open and unfinished. Unless you want your cabinet in the center of the room,
it's probably going to be against a wall so who's cares? Some people have added exhaust fans and fancy vents to dicipate heat,
but I figureed this is the cheap way out. Also, if I ever need to replace the computer or monitor, this provides easy access.
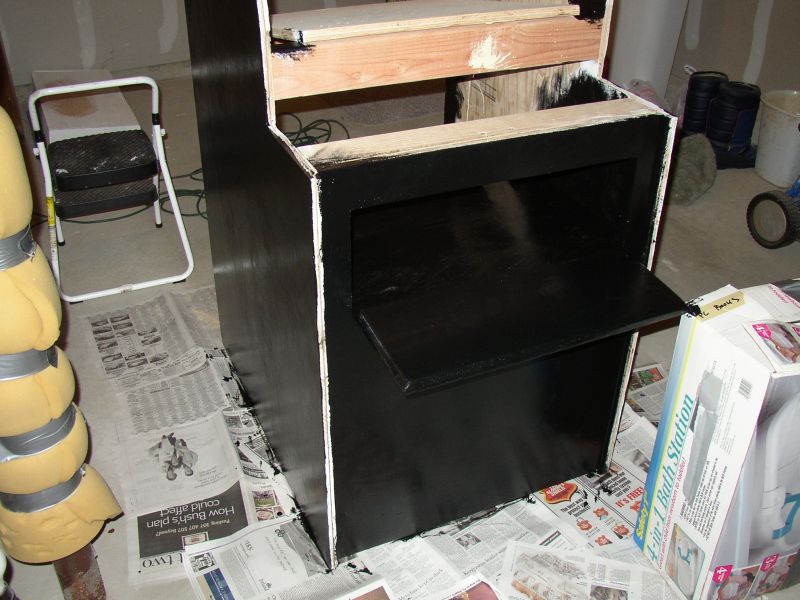
- FINISHING
-
Before you get started... Sand! Dust off, sand again. Repeat at least 3 x's. Once the cabinet is sanded to your liking,
you need to prime it before you paint. Wait 12 hours. Lightly sand the primed surface and dust again. Add a second coat of primer.
Wait another 24 hours, sand and dust again.
 For the black coating I used an exterior high-gloss latex enamel. Also, shell out the extra $5.00 for a good quality brush.
Usually the bristles break off from cheap brushes and get stuck in the thick latex paint. Wait 24 hours between coats. Lightly
sand with a high 400 grit sand paper after the first coat so the second sticks better.
For the black coating I used an exterior high-gloss latex enamel. Also, shell out the extra $5.00 for a good quality brush.
Usually the bristles break off from cheap brushes and get stuck in the thick latex paint. Wait 24 hours between coats. Lightly
sand with a high 400 grit sand paper after the first coat so the second sticks better.
|
|
![[www.MAME.net]](images/mame.png)
![[Yet another MAME cabinet...]](images/yamc.png)