| Project "Roja" Rockkrawler 4.5" lift |
 |
| The springs wouldn't fit in the shackels no matter how hard we tried. We measured the bushing and found it was almost 1/4 inch to long. Our first thought was that the stock shackels were too small, so we bought after market shackels. The leaf spring bushings still wouldn't fit. Now I know that suspension components are supposed to fit snuggly, but when Ivan and myself with a very large hammer couldn't get them in; well we knew we had to do a little trimming. |
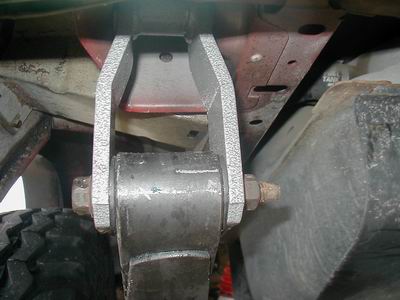 |
| After trimming the thickness of a sawsall blade on both sides and grinding the metal bushing down a bit; we still needed the hammer, but we eventually got the leaf springs to fit. |
 |
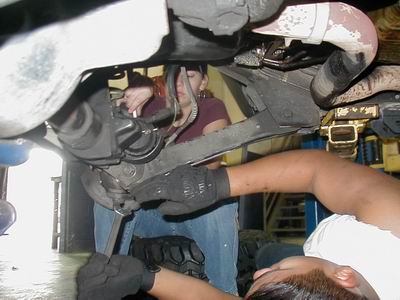
| We mounted the leaf springs to the axel housing. The total pain and agony of this project can not be adequately explained. It took a full day to remove the rear springs and another day to get the new ones on. When I say a full day, I mean eight hours. Now finaly we can get to the front where we expected the project to be difficult. |
 |
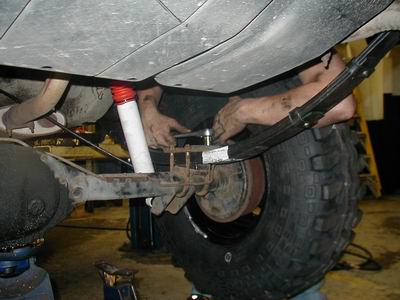
| We raised the front end, and supported the axel housing with a jack. "Fez removed the drag links and track bar, while I removed the upper control armst. This system doesn't use upper control arms, so after removing you can discard them. Keep the hardware though. |
 |
| Now that the upper control arms, drag links, and track bar are removed, we can lower the axel housing low enough to remove the springs. While Tracey removes the springs "Fez" removes the lower control arms. |
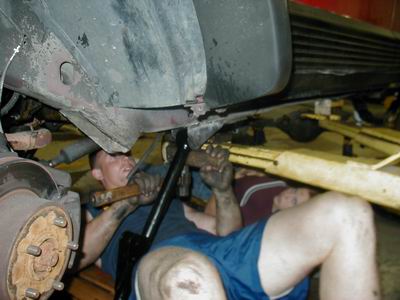 |
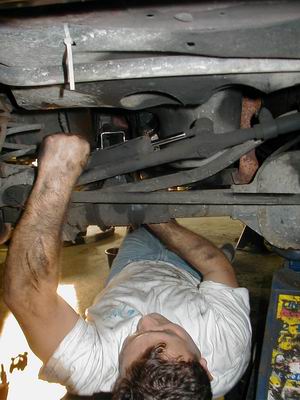
| Now that the brackets are out of the way, Ivan mounts the lower control arms. Again we needed to trim the metal bushing and shave the rubber to get them to fit. Notice the large hammer he still has to use to get them in. The lower control arm with the bracket goes on the drivers side, it will hold the torq arm. |
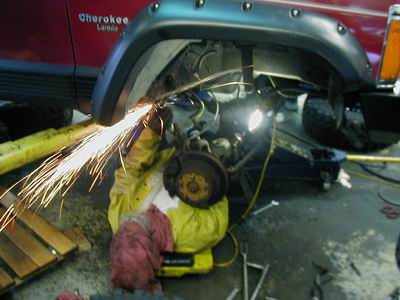 |
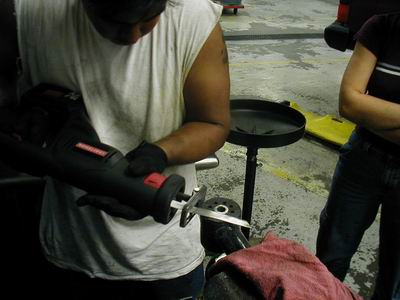
| "Fez" our resident metal cutting expert, removes the old lower control arm brackets. We used a cutting wheel at first, but switched to a sawsall later. |
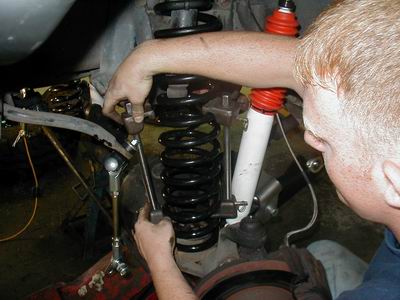 |
| Using a spring compressor we installed the new springs. Surprisingly this was rather easy. |
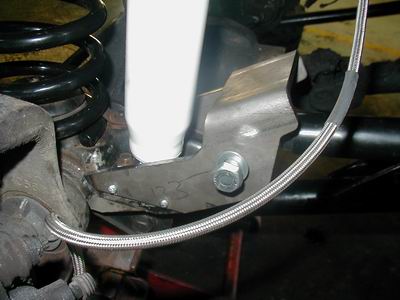 |
| We installed the torq arm bracket with sheetmetal screws on the shock mount pad. Now the screws are not load bearing, they are only there to hold the torq arm bracket in place while we weld it. We followed the instructions on this one as closely as possible, since we don't really understand how this component is going to work. This is what replaces the upper control arm. We were supposed to weld it in place at the same time as we did the lower control arm brackets, but we couldn't fit it in place when the vehicle was stock height. |
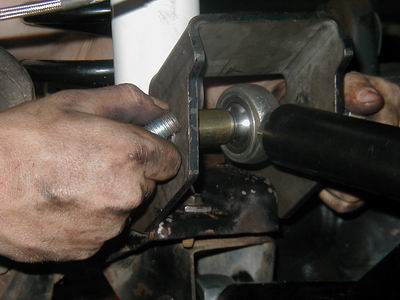 |
| We now mounted the torq bar. You have brass bushings that center the torq arm in the bracket, the other side mounts to the lower control arm. The torq arm is to be adjusted to 9" initialy. I highly recommend that the lower control arm side is the side that you adjust. It took us a long time to realize that the lock nut on the torq arm was preventing us from being able to mount the torq bar, because it bound on the lower control arm's bracket. |