

The above picture pretty much explains it all; try to get all the red tiles so that they are in ascending order (I thru XVI, with the asterisk as tile #16). After solving, the 4x4 red grid is at the lower-right quadrant of the 5x5 grid, with the vertical levers pointing downward while the horizontal levers are to the right.
If you are already a cube expert, then I strongly urge you to go directly to Jaaps' Puzzle Page for the XV solution instead. That site will explain the solution clearly in a few simple paragraphs. However if you are a cube novice, then go ahead and read this site, which will help you solve the XV puzzle tile by tile.
The 3 vertical levers can move independently, along with the single large central horizontal lever. The other 2 horizontal levers have certain restrictions:
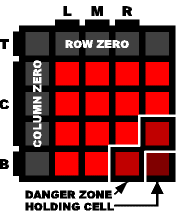
The three verticle levers are labeled as L, M and R (for Left, Middle, and Right). The three horizontal levers are labeled as T, C, and B (for Top, Center and Right).
The square in the extreme lower-right is known as the holding cell; while the two adjacent squares (directly above and to the left) and the holding cell itself are all refered to as the danger zone. There is a reason why they are labeled so; just read on.
The extreme upper row is called Row Zero, while the the extreme left column is called Column Zero. Because of this, the first column and the first row are actually a tad inward of the 5x5 grid.
L |
Push the LEFT vericle lever (upwards or downwards) |
M |
Push the MIDDLE vericle lever (upwards or downwards) |
R |
Push the RIGHT vericle lever (upwards or downwards) |
T |
Push the TOP horizontal lever (left or right) |
C |
Push the big ol' CENTER horizontal lever (left or right) |
B |
Push the BOTTOM horizontal lever (left or right) |
Upward or downward; left or right; Exactly which way does that lever go? The answer is, just move it to the other direction.
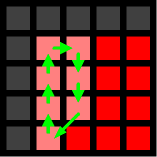 L C L CSwaps around 7 (out of 8) |
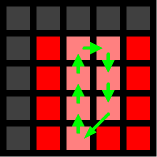 M C M CSwaps around 7 (out of 8) |
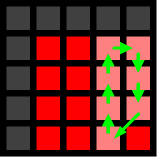 R C R CSwaps around 7 (out of 8) |
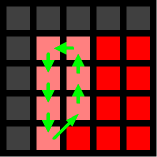 C L C LSwaps around 7 (out of 8) |
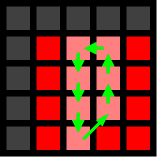 C M C MSwaps around 7 (out of 8) |
 C R C RSwaps around 7 (out of 8) |
Notice how you can control any square in the 4x4 grid except for the single square at the lower-right. For this reason alone, I aptly named it the holding cell.
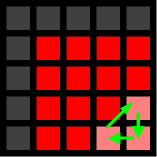 |
B R C R
|
You may have to bail a tile out of the holding cell here or there throughout the solution. I will not remind you at each and every time you might need to free a tile, so remember this move! Notice how one tile is released from the holding cell, while another takes its place. All three squares are at risk of landing in the cell, thus the name danger zone.
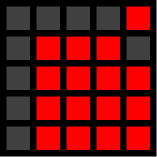
Before you start, you must reset the levers:
You only have to do this once; because after each and every move used in this solution, the levers automatically become reset again at the end.
 |
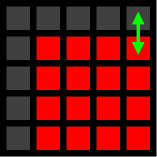 |
Use any of the NORMAL MOVES to navigate the blank tile | |
Do the move to swap the |
LMR T LMR C | ||
 |
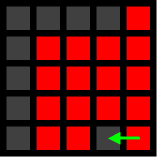 |
If the blank tile is in the |
B R C R |
- And continue afterwards to send the blank tile to Row Zero. | |||
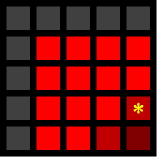 |
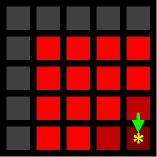 |
Use any of the NORMAL MOVES to navigate the asterisk | |
Do the move to transfer the |
B R C R | ||
The only reason for this step is to fill the holding cell with a tile that won't be used for awhile. The asterisk won't remain in jail forever, but at least the tiles for the first three columns will be free to solve (without any annoying interruptions).