Well I've finally got the new "dolley" done...(This will make working on the underside of the car much easier! )
Here you can see that the frame of the dolley is made of basic 2" X 3"-100 wall mild steel. (This was a perfect project for sharpening my welding skills.
I used a sacrifical cross member, and welded it to the stand after cutting the profile into the top of the two up-right pieces...
The rear cross member was much easier to make...
As you can see, I used the transmission mounting holes to attach the dolley at the rear...
The new stand is much more stable and makes it much easier to move around and work under. I also made the wheels for the dolley so that they can be moved around...(At some point in time I plan on making a race car as another project and was thinking I might dip the whole car, and having removable wheels will allow the whole car dolley and all to be dipped.)
I'm hoping this will also make it easier to load onto the trailer...
As a kid making model cars, I always wanted to see the tires on. And to fill that childish need, I did a dry run of the rear left suspension, all in primer to get an idea of how the car looks with the tire on. I explained it away to myself as a worthwhile exercise, before sending the suspension bits off to the powder coater...(you know to make sure all the parts fit and to get an idea of what's involved with putting it back together... ;)
I took this picture to visually check the tire clearance, and alignment of the rear swing are and spring plate...
This tire is actually off the front of my 76... While my 76 is stored for the winter I used the old cookie cutters to save flat spotting the good tires...
As you can see, my sixteen inch Fuchs fill the rear wells. These are 205/55/16 and are not the correct size for the year, but I don't think they look too bad!
This is the front right inner fender well. Currently, I am patching the holes that the dealer made for the airconditioner and retaining screws.
This picture shows the entire inner fender. The rust damage will be cut out and patched with new metal as well as the air conditioner holes...(the two pictures on the right show the "bulkhead" after I cut and shaped new patch panels
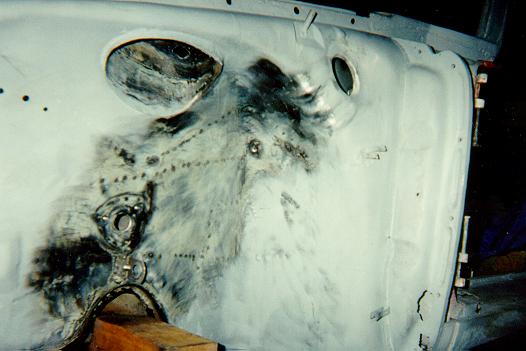
This is a picture of the left inner fender after I've patched the six holes of various size and shape. ( I have NO idea why the holes were drilled in the first place, but I've addressed the problem)
Here you can see the extra holes that I've plugged and welded shut...
Coming Soon in Phase IX, you'll see the chassis on a new fixture that will allow me to rotate the chassis, and new fender mounting panels, and a new left rocker panel getting installed!!