 Home
Gourds
How to make a Pine Needle Basket
Row 3
Other Starts
Wood Burning
Gourd w/pine needle rim
Dyeing
My Home & Family
Home
Gourds
How to make a Pine Needle Basket
Row 3
Other Starts
Wood Burning
Gourd w/pine needle rim
Dyeing
My Home & Family
Baskets By Debbie Norton
Wood Burning
2784 Heartland Acres
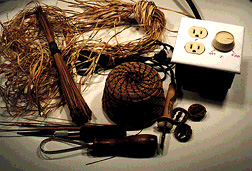
This is what I use to burn with a simple "Hot Tool"only120v and 20 W 60HZ. You can get one of the expensive tools. But for me I liked this better. I use that wall box and light dimmer in a switch plate to control the temperature. I marked the Off and On with a pen. Where it is setting is about where I use it most. It you want a temperature controller and can't make one (about $12.00). You can buy one from Sugar Pine Woodcarving Supplies 1-800-452-2783.
They also have the burners and extra tips like Knife Blade, Multi-Grove #56, Feather Tip, Needle Tip and the Dial Temp. Hot Tool (control temperature box). They also carry the more expensive wood burners.
I use just a hobby knife with a saw blade to cut my gourds. I get those from the Caning Shop 1-800-544-3373. Again you can spend more $$ and get a fast miniature jig saw. I did not like it, I would miss my marks by the time the blade stopped and found tight 90 degree turns harder than my craft knife.
The wooden handle tool is used by potters, it can be found in many craft shops. The Caning Shop also carries three styles and a great bird house tool. This tool is perfect for cleaning out the gourds. Take out the seeds and stuff. Soak the gourd in warm water for 30 minutes or so and scrape away. Sand with a "WET" sand paper. Let the gourd dry and over night before burning.
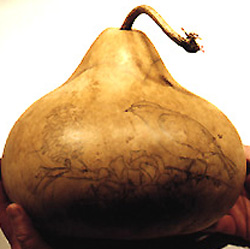
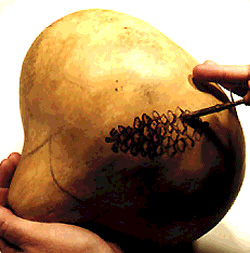
Draw in the pattern you wish to burn. Be sure to mark clearly where you will need the dark colors or shadows. A hard pencil will not smear off as easily.
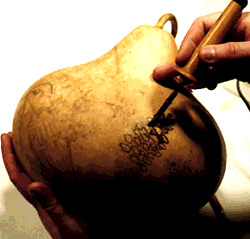
I never start on the front I give my self some warm up time. If it only has burning on the front, work 30 minutes on a scrap first. It makes a big difference for me. I also will burn on a gourd till I am done. NO Sleep, phone calls or cooking. So start early, let the machine get it, and leftovers are good. This is because the next day I will have a different feel for the burning. It will look different from day to day. This is why I warm up also. Outline lightly steady your hand using your little finger against the gourd. I can't say enough Go Lightly!!!
Just let the burner glide over the surface do not push down. The burner will do the work for you. The slower you go the darker the line, the faster the lighter.
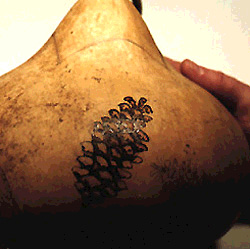
I shade the darker areas first and I go lighter than what I want the finished product to be. I will make it darker as I go.
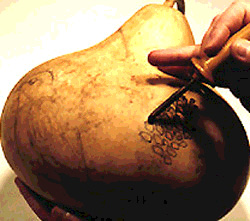
Top of the petal, underside of petal just a soft outline using more of the rounded part of the tip. Then do the ridges in the under part of the petal.
The last thing you do is the lightest area. And to give depth it is next to the darkest area.
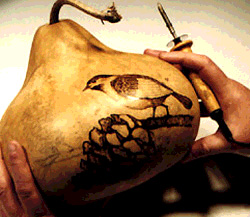
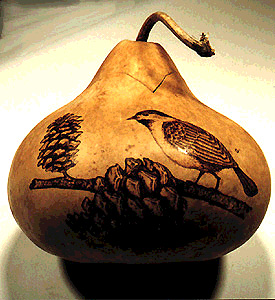
A one feather at a time, burning the shadow, and breaks in the feather sides should be light.

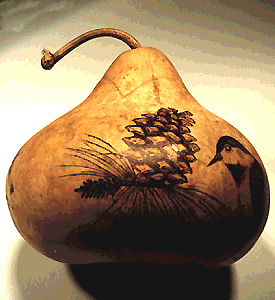
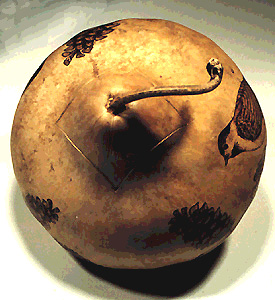
Well you can see the progression and how I change the gourd to get the angle right. If you are right handed it might work better to have the source of light coming from the left.
� 1997 [email protected]
This home page <�> Copyright 1998, by Debbie Norton.
Photography by Greg Norton of Creative Images by Greg
Photos <�> Copyright 1998, by Greg Norton
This page hosted by
![]()
Get your own Free Home Page