The Store
Updated: 4/6/2016 to fix html errors
With all the little details inside a store, this one is going to be an interesting build. Not only will I be building all the interior furniture, equipment, and walls, but all the little things that are usually in a store for sale.
Since I wanted the store to be smaller than the gas station I started with, I cut the base into three pieces and glued only the outside pieces back together to form the base I'll be using for the store.

This is what I ended up with. I started drawing the basic layout on it with a sharpie, but it has changed since this photo.
I didn't like the way the base looked with the angled area completely around the base so I cut it off. Once again, the layout has changed since this picture has changed.
Since I had shortened the base, now the front wall is much too long. I definitely had to do something about that.
Well, here it is all cut down and waiting for the glue to dry. I cut the sections just to the left and right of the roll up door so that the buildings lines would match up.
While I was at it, I cut the indention out of the wall where the second side door was and filled it in.
Here are the walls all puttied up and waiting to be sanded down to blend everything together once the filler completely dries. The first picture is the front wall. In the second picture you can see where I slipped with the knife while cutting the unneeded door our and gouged the wall and door. In the third picture you can see where the factory wall locating rib is located (which I later removed) and the protruding door like the one I removed to make the interior wall as flat as possible.
Fast forward through all the sanding and puttying and sanding and puttying and sanding and puttying and sanding and finally primering and here we are. This is the store with the sidewalks made from modified pump islands. I was sitting at the table looking at the base trying to figure out what I wanted to do about the walk ways since I cut off the slanted areas I didn't like and saw the pump island bases sitting there and decided to see what they would look like as walkways. I left the slanted areas in front of the doors for handicap accessibility.
In the first picture the extension to the right is a full pump island with the rounded end cut off. On the left side I split the island in the center and then cut it into sections to finish off the walk way. I also built a small plant area that I will fill in with either flowers or small shrubbery, depending on what is available in either the doll house or rail road supplies. I also filled in the rest of the open areas with strips cut from a plastic sign. The gap in the picture between the walk way and the slanted area for wheel chair access to the bathroom door is where the Ice Machine that Ed Shaver was kind enough to build for me is going to be located.
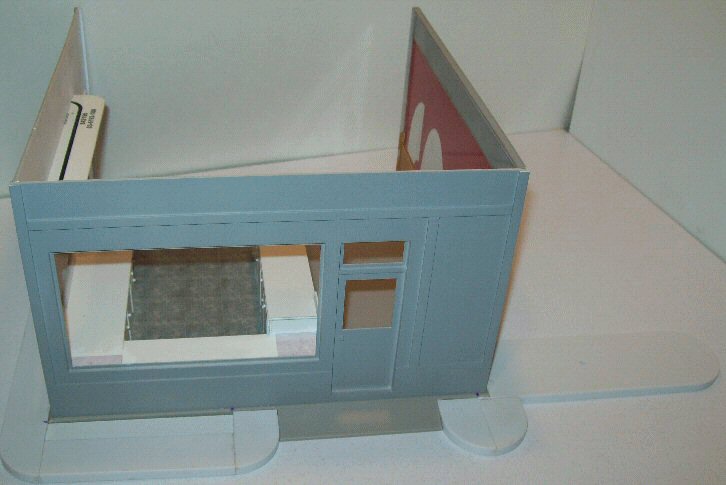
Here's an overall interior shot of the store's interior. You can see the counters and base cabinets I built for the interior. Almost everything on the interior of the buildings was built by me using plastic signs with knobs made by cutting a one millimeter section from styrene round stock and ribbed styrene sheet representing wood on the lower part of the walls that I purchased at a local hobby store. You can see in this picture that I cut the locater rib off the wall and have installed a piece of L shaped styrene to locate the interior bathroom wall.
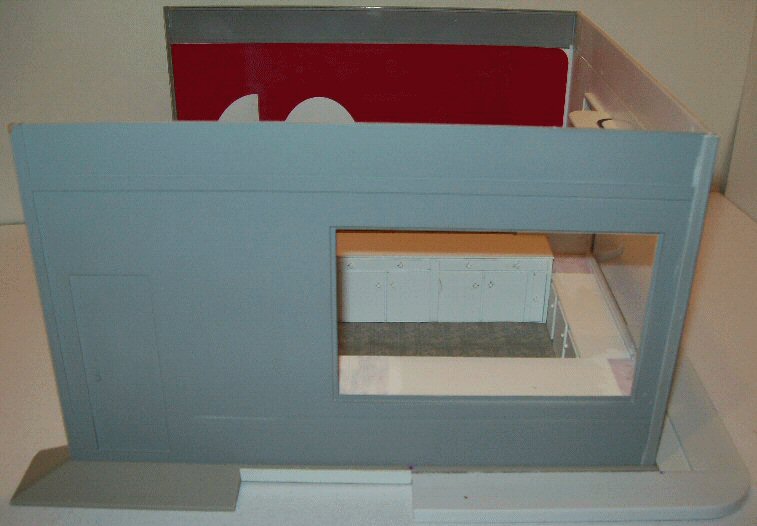
In these pictures, you can see the shelves I built in better detail along with the sit down desk area I built into the counter facing the left side window. They will be painted putty colored with a white tile counter top. I still need to put a second coat of paint on the wood on the lower half of the wall. Once the painting is done on the wall and counters and everything has had a chance to dry, I'll build the back wall and attach it to the rest of the building. Its just easier to position and install everything with it not in place.
In the photos of the counters, you can see the pattern I will be using the for the floor tiles. The picture above is a better representation of what I will be putting onto the floor. I found the slate tile pattern at a doll house materials web site that has downloadable floor and wall paper patterns.

At the site I found the slate tiles at I also found a wall paper pattern and boarder that I will be using on the walls of the store. I did change the colors of the thin stripes and dots in the pattern to better match the paint I am using on the wood part of the walls.
If you wish to use these corrected patterns for a project you're working on, right click on them and choose "Save As" to download them to your computer.
I also have several other images that I have saved to my computer from my searches if you are looking for something other than what I have here. Just send me a message and I'll check when I can to see if I might have something that will work for you.
Please be aware that I don't check my messages every day, and it does take time to look through my files, so I might not get back to you right away. Also, if you send multiple messages there is a good chance that my Spam filter will grab them and I will not see any of your messages.


This is the completed interior walls of the bathroom and trash can holder I built for the rear of the store using the same process I built the cabinets in the earlier pictures. In the first couple of pictures you can see how the wall paper pattern looks in the store. In the lower couple of pictures you can see the putty color I will be painting the rest of the cabinets. The color of the wall paper is not correctly represented in the last picture. The true color is a blue green as in the other pictures.

This is a better look at the tile pattern and color I will be using for all of the counters. This one was also found at the same place I found the slate flooring and the wall paper.

This is the wall counter and hot dog cooker I made to put on the wall opposite the main counter. The hot dog cooker was built from scraps of plastic I had cut while working on the main counter and the same round stock I used for the door pulls. I will be making a bun and condiment holder for this as well as tiling the counter top and back splash.
Well, that's all I have done on this part so far. More updates will be added as
they happen.