| Lesson One Basic Scene Building |
 |
| Step One |
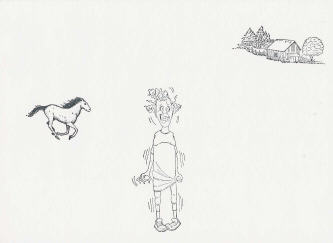
| Select the Stamps you want to use as the main elements of your scene. I selected the galloping horse (All Night Media), the shaking woman (Art Impressions) and the barn with trees (Lady and the Stamp). Notice that the barn seems to be facing to the left, while the horse is running toward the right. I positioned both of these stamps so that they are facing into the center of the page. |
| She doesn't look very happy, does she? Maybe it's because she looks like a giant next to the horse and the barn. As I'm sure you know, things that are farther away from us look smaller than things that are close by. Let's put the horse and barn as far from our nervous friend as we can, and see if she'll cheer up. |
 |
| Step Two |
 |
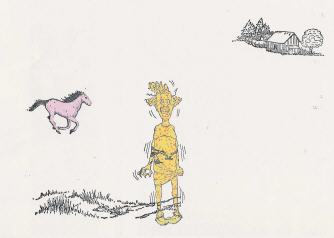
| Proper Placement of your images is what will make your scene work. When I put the horse and barn at the top of the page (A), it helped put the barn in proportion to the woman. Now it's okay that the barn is so small compared to her, because it looks like it's far away. But the horse looks almost the same size as the barn. So I moved the horse down a bit, closer to the woman (B). That looks better. I wonder why she still looks so nervous? Maybe it's because she's just floating there in the air. |
| A |
| B |
 |
| Step Three |
| Ground your images by adding grass, water, a road or whatever you want them to have underfoot. Before I started grounding my images, I masked the woman and the horse. That way, when I remove the mask, the grass line (Beeswax Rubber Stamps) won't be going across the woman's legs, for example. |
| Step Four |
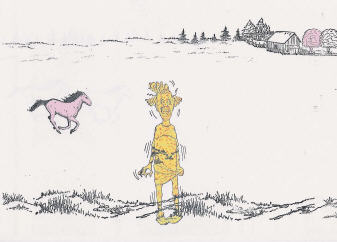 |
| I continued the grassy knoll stamp across the bottom of the page, then created a faint horizon line using a small grass stamp (Darcie's Country Folk). I used a very light touch, so that the image was a bit blurred. I started adding pine trees (Art Impressions) across the horizon line, again purposely using a partial image. In the case of the pine trees, I inked only the tips of the pine trees, using a Marvy marker to ink the stamp. I also masked the tree on the right, and inked just that portion of the barn and trees stamp, then stamped the tree again. Because I used a mask, the tree on the far right will appear to be behind the tree next to the barn. |
 |
 |
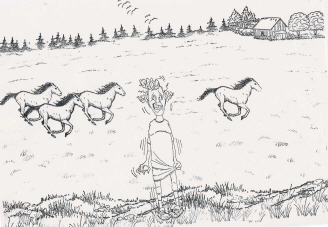
| Filler and details add interest to your scene. I decided the first horse looked lonely, so I added a few friends (by repeating the same stamp). I also continued the line of pine trees all the way across the horizon, added the birds (a partial image of a stamp by Art Impressions) and added some grass filler (Art Impressions) at the bottom and in the center, which also helped to ground the horses. |
| No, she's not falling, the scan came out crooked. But she still doesn't look very happy. Let's add some color and see if she cheers up. |
| Step Five |
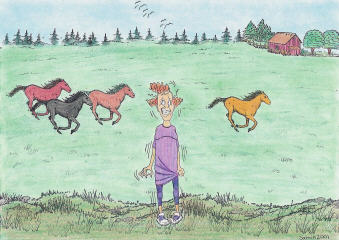
| Color in your scene using your favorite techniques (or try new ones!). I used colored pencils on the smaller areas (the woman, horses and barn) and chalks on the rest. The poor dear still didn't look happy, so I decided to give her a reason for being so upset. |
| "I thought you said Rubber Stamp Round Up!!" |