 |
| Lesson Two Masking Basics |
|
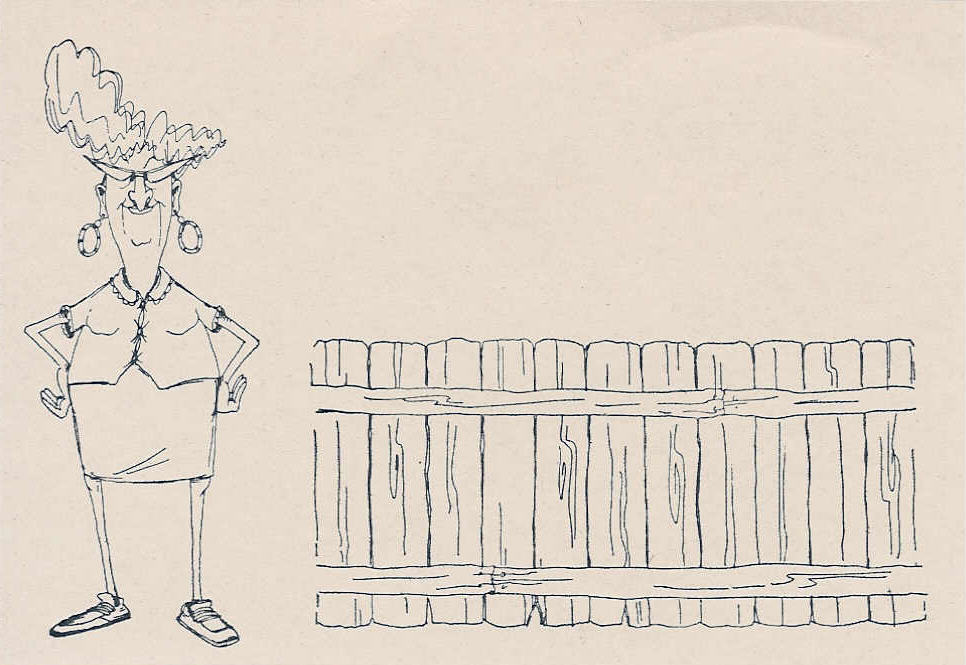
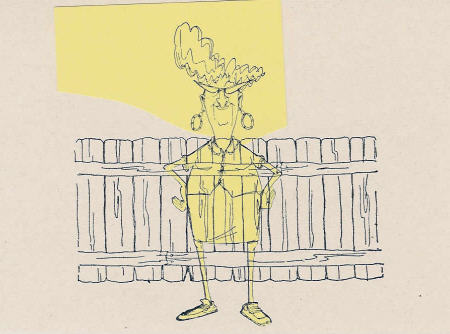
| To begin: Here we have Eunice and the fence, both by Art Impressions. A charming couple, but wouldn't it be nice if we could get them a little closer? |
| In stamping, we use masks to make some objects appear to be behind others. In scenic stamping, this helps create the illusion of depth - we think that the scene is not confined to a flat piece of paper, but actually exists in three dimensions (rather like looking at a photograph). |
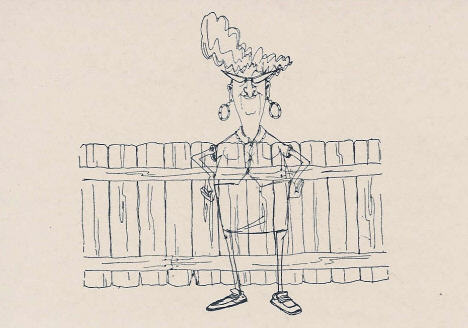 |
| Here's how it looks if I stamp the fence, and then Eunice, without using a mask. What a mess! She looks kind of ghostly, with the fence showing through her body. Too bad I don't need a Halloween card right about now. Let's try it again, maybe with the fence in front of Eunice... |
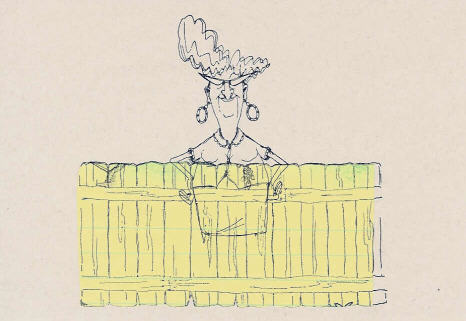 |
| Mask to the rescue! I want the fence in front of Eunice, so I stamped the fence first, on the gray paper. Then, I reinked and stamped the fence again, on a large yellow Post-It note (make sure at least part of your image is right up at the sticky edge of the Post-It, so the mask will stay in place.) |
| The stamped image on the Post-It is your mask. Cut it out, making sure to cut a little bit inside the outer lines of the image (along the top of the fence, in this case). If you don't, when you stamp Eunice, there will be a little blank area where the fence and Eunice meet up (this blank area is sometimes called a halo. The one case I know of where you don't want a halo is in masking and stamping). Put your mask over the first image you stamped. You can see here that my mask is a little too small and doesn't reach all the way to the end of the fence on the right hand side, but that doesn't matter in this case, because I'm only going to add Eunice in the middle. Then I stamped Eunice. Notice I didn't bother to even ink her legs, since I didn't want them to show, anyway. |
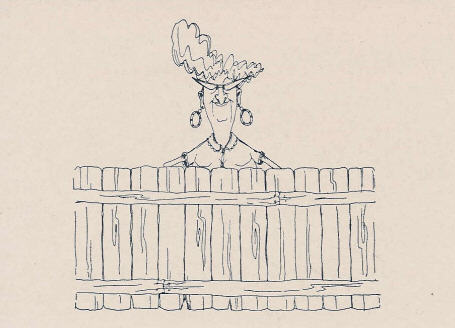 |
| Not bad! We've got Eunice safely tucked away behind the fence, and not a halo (blank area) in sight. But what if we want Eunice to be in front of the fence? You guessed it, we need to stamp her first, then mask her and stamp the fence. Remember, whatever we want to be in front must be stamped first. |
 |
| Here I stamped Eunice, then masked her (using the same method of making a mask, by stamping the image on a Post-It note and cutting it out). Note that I even took a craft knife and cut out the holes made by her arms. Also, notice that I didn't trim the mask around her head - I didn't want the fence to be as high as her head, so I thought I wouldn't need to bother. Well, take a close look at her shoulder on the right side of the picture! I should have trimmed it a bit more, because I lost some of the image of the fence, and had to go back and draw it in with a fine tip pen. |
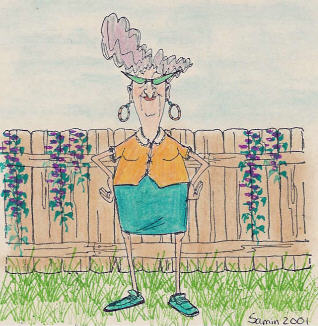 |
| Here's the finished product! She looks pretty self-satisfied, wouldn't you say? Maybe the grass really is greener on this side of the fence... Speaking of grass: the grass, ivy and flower images are all by Art Impressions. Also, I stamped the grass with the mask of Eunice still in place. By the way, there are several different ways to make masks, aside from using Post-It notes. That just happens to be my preference. Check out the new masking material by Therm-O Web, for example... |
| For more on-line information about masking, check out these great websites: Cloud 9 Tips & Techniques, The Stampin' Place Tips, Remedial Rubber For tips on how to store your masks, check Lesson 7 on Keeping a Stamping Journal. |