 |
|
Projects with Pallets.
Since moving house in November 2004 Tracy & I have found ourselves to be slightly broke. We went from a situation where we had no mortgage (well, £1) to one where the mortgage was barely affordable. However, lots of stuff needed to be done to the house & garden, and I needed to find a way to do it on virtually nothing. So, after an assessment of what I could use, I realised that I had a virtually unlimited supply of pallets available to me at work. After coming to an agreement with the works manager I can take as many pallets as I like, when I like. This saves me money, increases recycling and also saves the company disposal costs - winners all around.
Over the last year I've used around 100 pallets, and this is what they've been used for:-
Work Benches
Vegetable Plot Edging
Garden Table
Wellington Boot Rack
Runner Bean supports and Anchor Pegs
Book Case
Shelves
Bird Table
Fencing
Compost Heap Frames
Barn weatherproofing
Sledge
Cold Frames
Mower body
Firewood
I also have the following uses lined up:-
Garage extension
Charcoal
Folding Garden Table
8ft (2.4m) Lutchens style Garden Bench
Cloches
Fruit cages
Gazebo
Rapberry Supports
Bird Nest Boxes
I reckon I'm only scratching the surface too..
How is it that there are so many uses?
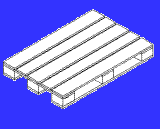
This is the problem I initially had, and what started me off was a different way of seeing a pallet. Really a pallet is a collection of 4ft (or 8ft) long planks of moderate to poor quality timber held together by some nails. The biggest hurdle to get over mentally is imagining those planks separated from the pallet! Once you've done that, it's time to think about what you can make the pallets into.
Tools Required
To take a pallet apart you need as a minimum:-
Club Hammer
Crow Bar (also known as a "Wrecking Bar")
The following tools are nice:-
Sledge Hammer
Pliers/ Water Pump Pliers
Angle Grinder (to cut off those nails that are just impossible to hammer out)
Saw to chop off ragged ends (I use a 10", 1500W mitre saw)
You will find that each good quality pallet takes about half an hour to dismantle. Also, while you theoretically have about 40ft of board available in each pallet, don't expect to average more than 30ft of usable timber - you will inevitably break a few planks or need to trim off ragged ends. The broken bits can be used for firewood, at the moment I have about half a cubic metre of broken bits, blocks and off cuts stored for winter - meaning a saving on my heating bills as well as reducing waste.
I do not save nails. This policy occasionally hurts when I see all the nails I'm throwing out, but quite frankly it's not worth the effort of straightening bent nails. To hold everything together I use pozidriv headed screws. These are cheap and can be driven in without a pilot hole using an electric screwdriver - saving time and effort.
Projects
Here are a few projects where pallet timber can easily be used:-
Wellington Boot Rack
Vegetable Plot Edging
Garden Table
Runner Bean supports
Book Case
Wellington Boot Rack
Let's start off with something simple that will use up a few of the blocks of wood you always get when dismantling pallets. This rack will hold up to four pairs of wellington boots upside down outside your back door. That way you'll never have wet insides to your boots, and you won't have to store them indoors either. It should take less than 30 minutes, even with children helping! The finished article looks as below:-
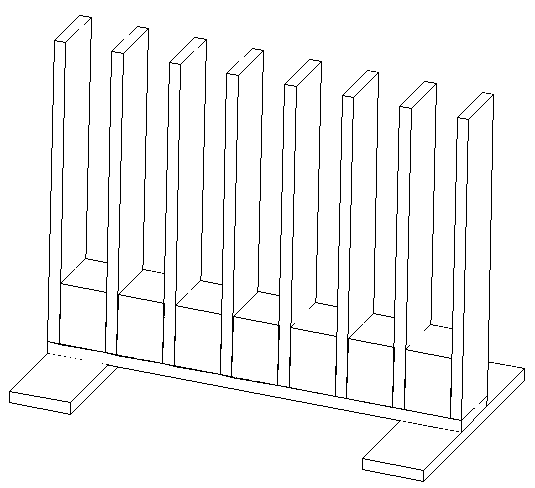
Materials:-
8 off 20" lengths of timber.
1 off 27" length of timber (don't cut to length until you've chosen all the other bits)
2 off 16" lengths of timber.
7 pallet blocks.
19 wood screws, 1.5" or 40mm long.
Tools:-
Screwdriver (preferably battery powered)
Saw (I use that 10" mitre saw)
Assembly:-
Using one screw for each 20" plank, screw the ends of seven 20" planks level with the edges of the seven blocks. With the eighth 20" plank, screw it to the other side of one block. Line these blocks up along the 27" plank, then cut it to length. Screw each block to the 27" plank from the underside. Finally use two screws in each 16" plank to fix them across the ends of the 27" plank. Job jobbed.
This boot rack should last you several years, but if it doesn't - who cares? It cost nothing but time to make and you can make another easily. Wood preservative would cost you more than making another, so why bother?
My kids helped with this project, and they were so proud of themselves. It was a joy to behold. Having got them to help make it, they always use it, which makes for a tidy garden too!
Vegetable Plot Edging
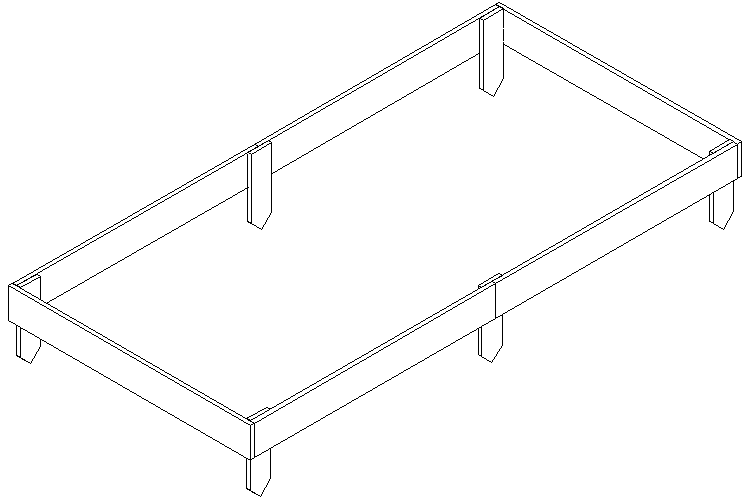
This project places timber edging all around a vegetable plot, as below:-
Materials:-
48" lengths of timber, as many as necessary to go around the plot.
10" to 15" long stakes with 45 degree mitred ends to make a point. One stake per 48" timber, plus a few spare.
2 wood screws per stake, 1.5" or 40mm long.
Tools:-
Screwdriver (preferably battery powered)
Saw (I use that 10" mitre saw to cut the stake points, and a crosscut saw to trim the stakes)
Club hammer
Assembly:-
Hammer a stake into the ground. Screw the edging timber to the stake so that the next timber can overlap the stake. Move to the other end of the edging and hammer in the next stake. Repeat the process until you go around the veg plot. When complete, trim off the tops of the stakes level with the edging board. If the stake splits lengthwise as you hammer it in.. ignore it and keep hammering each bit if you wish, or start again with a new stake. It's all up to you.
This edging will make a useful boundary to the veg plot and prevent the mower from accidentally trimming your food. It will also allow you to build up your plot height without having detrimental effects on the grass. It looks tidy too.
Garden Table
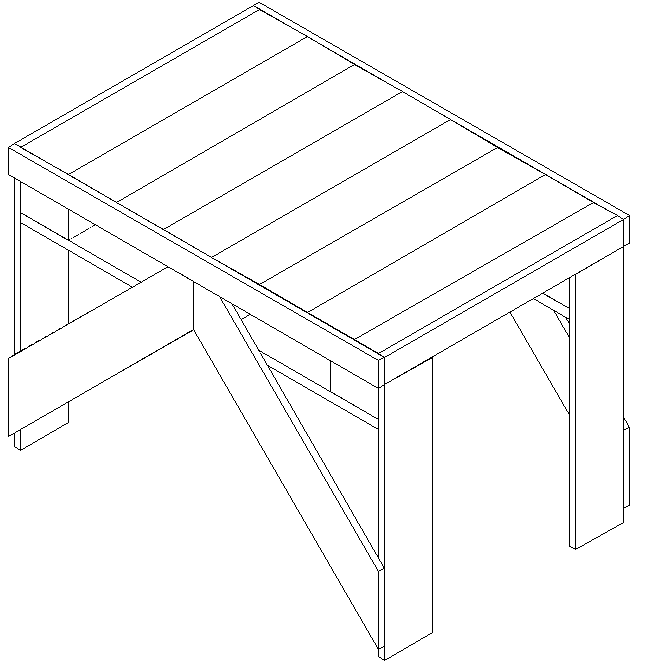
This project builds a garden table from a small pallet, as below:-
Materials:-
One small pallet, say 20" x 30"
Enough planks to fully plank the pallet top.
20" long planks, (6" wide if possible), four off.
4 planks for bracing the legs.
4 narrow planks (3" wide) for tabletop edging.
2 wood screws per top plank plus further 24, 1.25" or 30mm long.
16 wood screws, 2.5" or 65mm long.
Tools:-
Screwdriver (preferably battery powered)
Saw (I use that 10" mitre saw)
Plane (to reduce width of one top plank)
Assembly:-
Turn the pallet upside down. Screw the legs to the outside faces of the pallet blocks with four off 2.5" (6mm) screws into each leg. Leave just enough room above the tops of the legs to fit the edging planks flush with the table top. Now cut the leg braces and screw into the edges of the legs and the central pallet block with two 1.25" screws at each end.
Plank the top of the pallet perpendicular to the main pallet top planks with two screws per plank. Plane the last plank to width if necessary. Ensure that the edges are flush with the edge of the pallet. Finally use the edging four strips to cover over the cut ends of the top planking and provide a more attractive finish to the table.
This table is strong. After my daughters & I completed it, we all stood on it at the same time to prove it could take a weight of over 20 stone (280 lb, 130 kg). Fabrication time was about an hour, and could have been less if I'd done it all myself. However, once again, the kids love it and care for it all the more since they built it [with help].
Runner Bean Supports
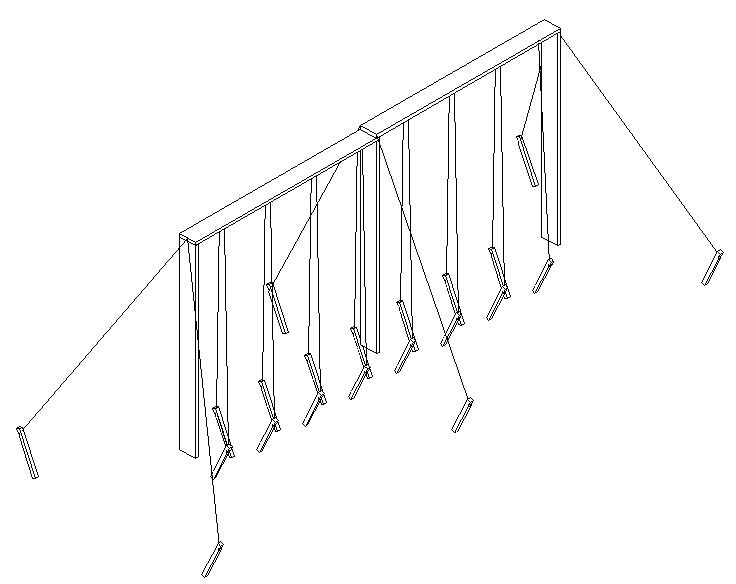
This project gives support to runner beans, as below. However it could just as easily be adapted with horizontal wires to act as supports for Raspberries, Blackberries or any other short lived fruit bush (as described at the end of this project).
Materials:-
48" lengths of timber, as many as necessary to go along the plot.
10" long pegs. Two pegs per upright timber, plus one per bean plant and a few spare.
2 wood screws per upright, 2.5" or 65mm long.
1 wood screw per upright, 1" or 25mm long.
Wire.
Twine.
Tools:-
Screwdriver (preferably battery powered)
Hand Axe
Club hammer
Wire cutter.
Scissors.
Assembly:-
Make the pegs by splitting a 3/4" square sliver off the edge of a 10" long plank with the hand axe. About 1" from the end of each peg cut a notch with the axe - this will act as a locator for the wire or twine. There is no need to sharpen the pegs - unless your soil is rock hard, and if it's that hard I doubt you'll be able to plant anything in the soil.
Hammer two upright timbers into the ground, just close enough together that another timber can bridge between the tops. Screw the bridge timber into the endgrain of the uprights with two screws at each upright. Keep going until you've gone far enough. Now at each upright screw in a single short screw on the top of the bridge timber. At each upright hammer in a peg on either side, approximately 2ft (600mm) from the uprights. Then attach a wire to one peg, take it up to (and wind around) the short screw on the bridge piece and down to the peg on the other side. The pegs on the two end uprights should be slightly splayed to support the whole frame longitudinally.
Finally, plant the runner beans. Hammer a peg close to each bean. Then string some twine from one peg, up over the bridge and down to the next peg. This way each bean will have its own support and minimise the twine necessary.
This support is a little low for normal runner beans using single timbers from a standard pallet, however it's not too difficult to screw extensions to each upright before fitting the bridge piece. Or find non-standard length pallets, there are lots about.
To convert to Raspberry supports, drill a hole every 9" up the uprights and thread a wire through the holes. Secure the wire at each end by winding around a single screw drilled into the upright.
Book Case
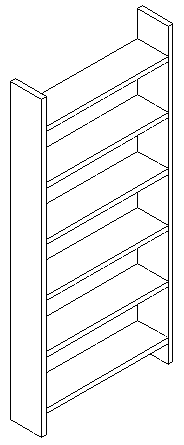
This project is a very simple 20" wide book case to hold paperback books.
Materials:-
2 off 48" (1.2m) lengths of timber, approximately 5" (125mm) wide.
6 off 20" (500mm) lengths of timber, approximately 5" (125mm) wide.
24 off wood screws, 2.5" or 65mm long.
Wood Filler (can be made from wood glue mixed up with sawdust).
Paint or varnish.
Tools:-
Screwdriver (preferably battery powered)
Plane (preferably electric)
Saw
Sandpaper
Assembly:-
Plane the planks to a nice finish. Apply filler in nail holes if required, then sand and apply paint or varnish as necessary.
Screw the bottom shelf to the upright 3" (75mm) up from the bottom of the 48" long upright with 2 screws at each end. Screw the screws through the 48" plank and into the end grain of the shelf plank. Screw the remaining shelves every 8" (200mm) up the uprights. There will be up to 4" (100mm) of upright extending past the top shelf; this is useful to hold the top row of books, but can be trimmed off if necessary.
This bookcase can then be screwed to a wall using a few little metal brackets. Alternatively, fit planks over the back of the shelves and uprights, and screw through the planks to a wall. It's amazing how tidy a heap of paperbacks will become in this book case.
|

Hits since 5 October 2005
|
| |
© Jan 2006 Richard Williams
| | |
